In this article we will explore how to build your sequences.
Step 1 - Name & Product
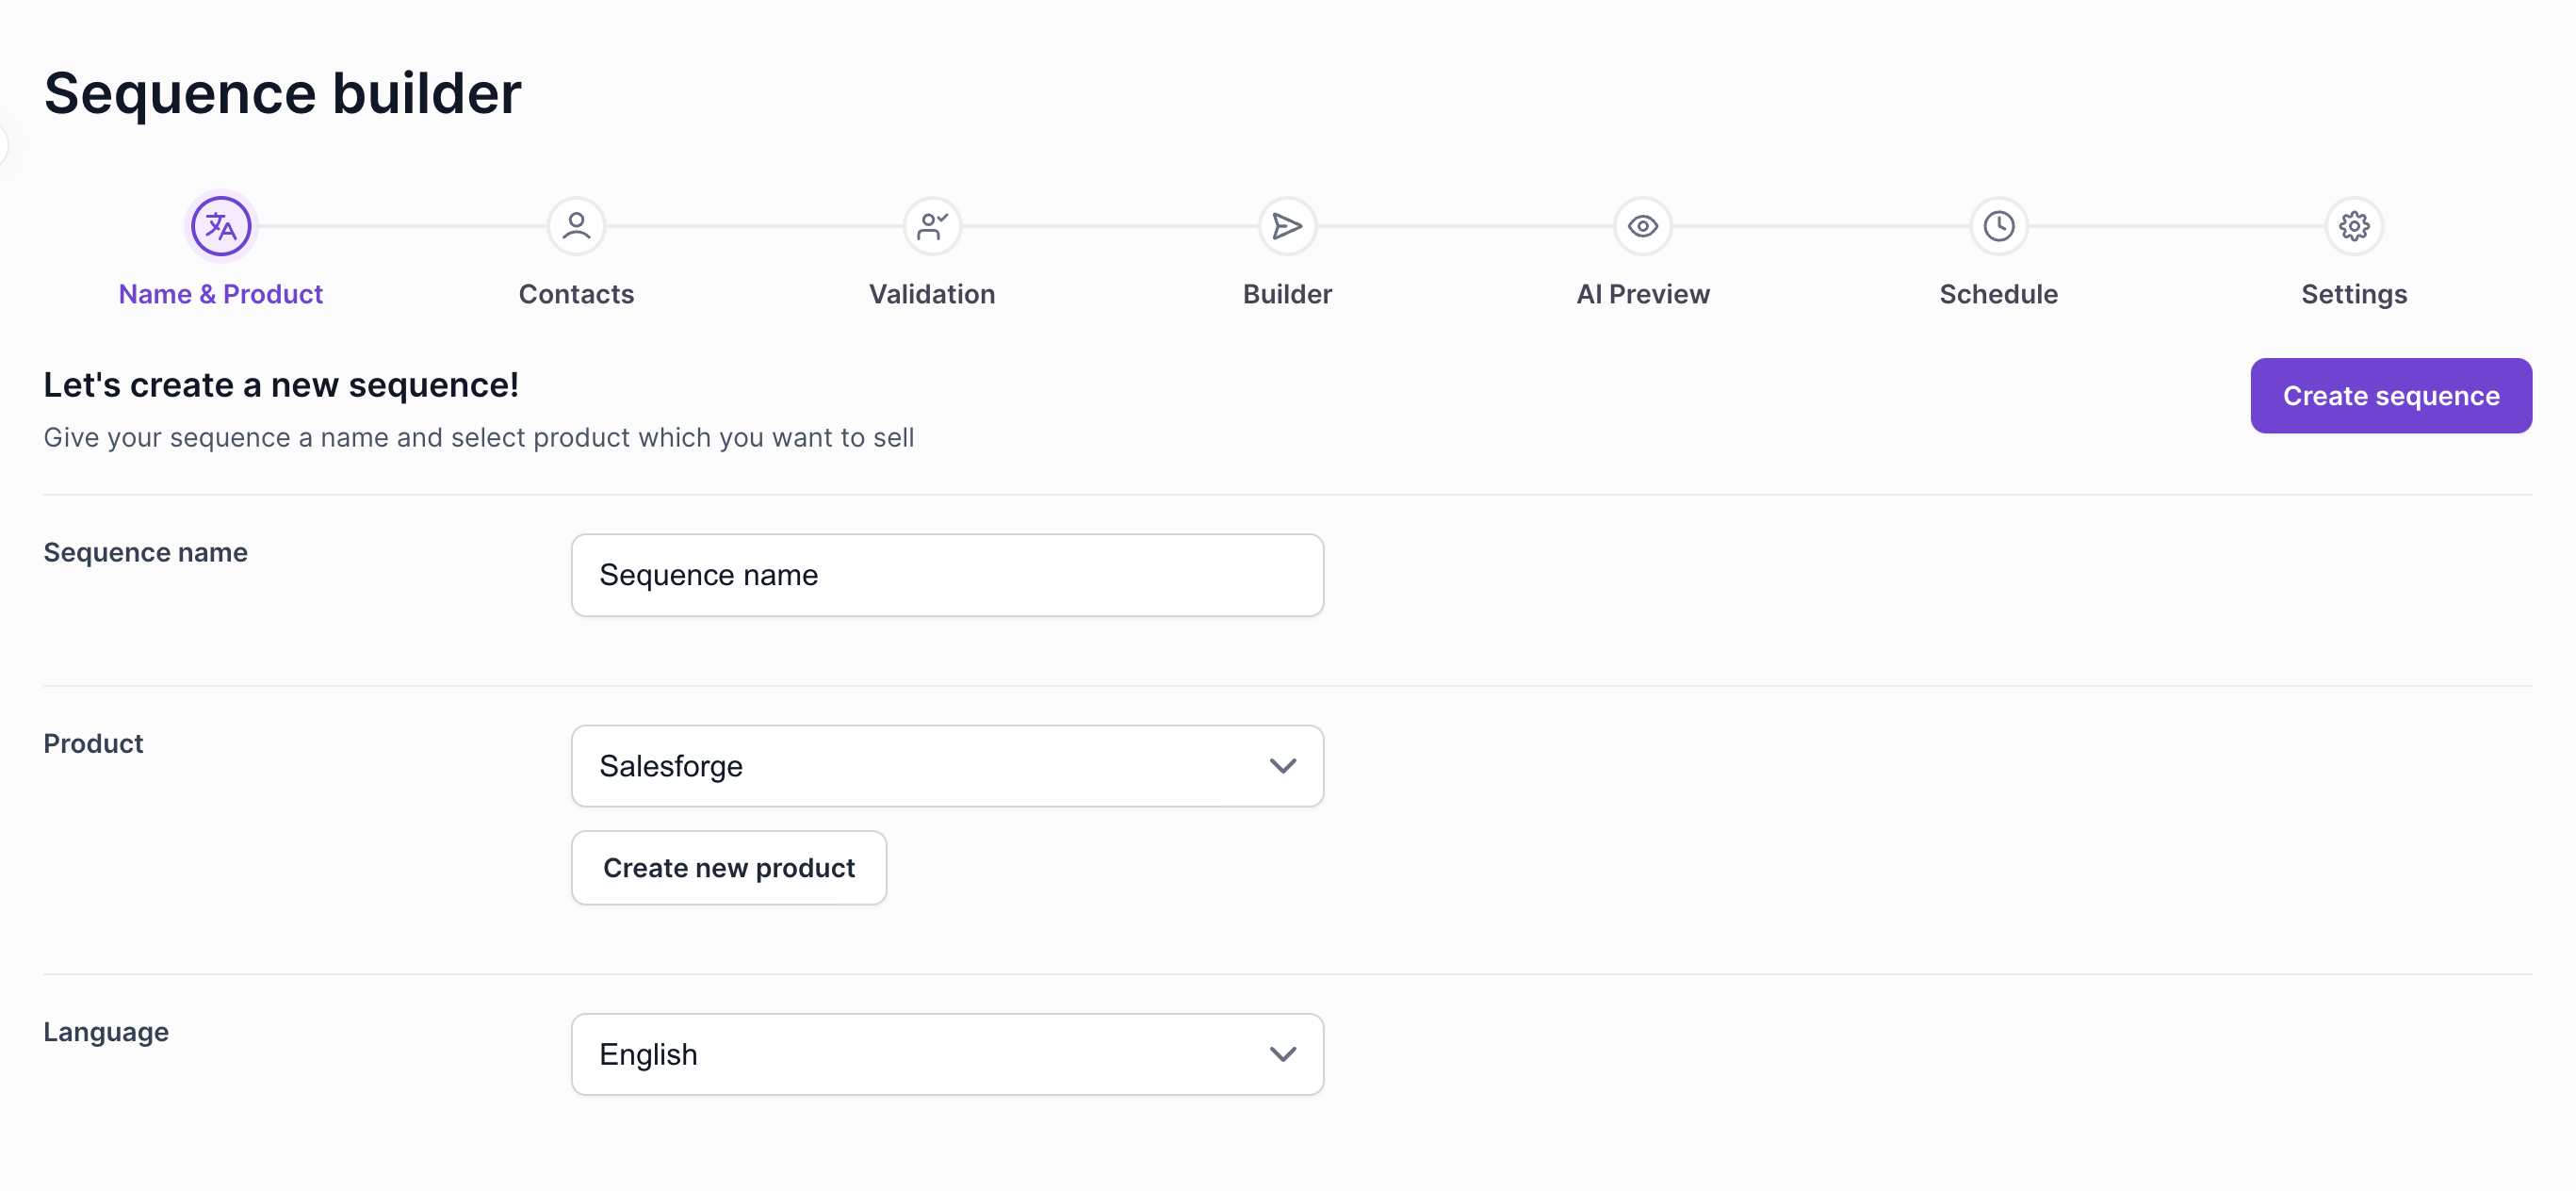
In this step you specify the sequence name which will be used for your own organization in sequences lists.
Then you specify the product, in case you will use AI, it will grab information from that product. If you have not created the product yet, you can do that by clicking Create new product button, or navigate to Products page and create it there.
After that you can select a language, which will be used for AI generation if you will use that, if not you can just leave it as default English or if you will write the template yourself in some language we recommend setting it to that language.
Step 2 - Contacts
In this page you will see all of the available contacts in your workspace.
Note: Some contacts will not be shown here if that contact is already active in some sequence. If the contact is finished in a sequence it will become available for sequencing again.
In here you can filter contacts by tags. Each tag will also show you how many contacts it has and how many are active in some sequence (not available for selection).
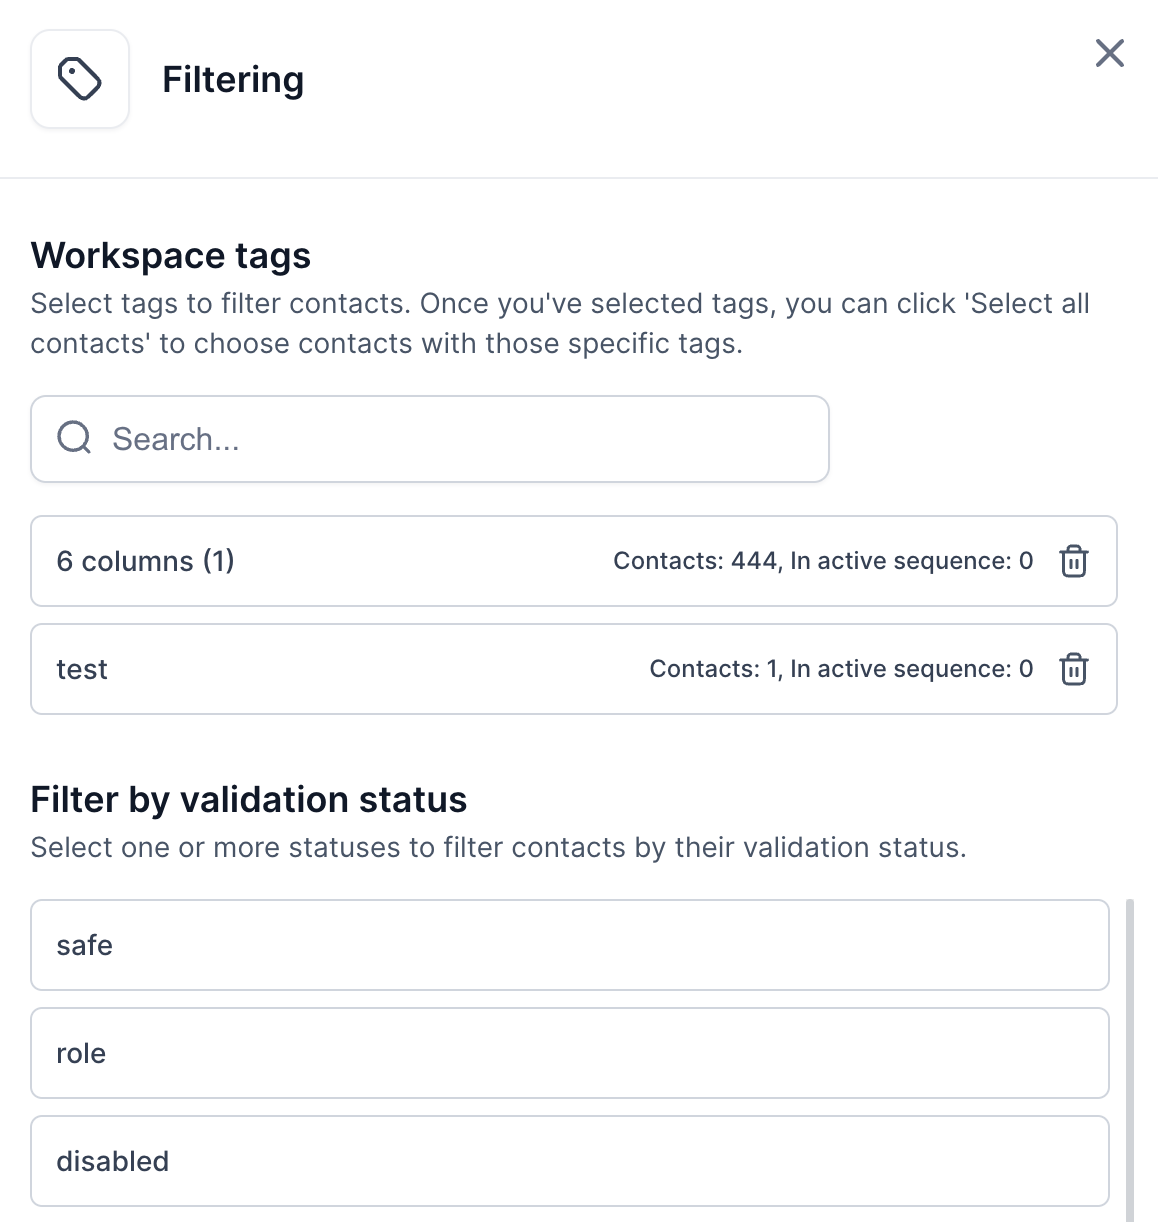
You can also filter by validation status as you see in the picture above.
Once you are done with the filtering you can click on Select All and in the right it will show how many contacts were selected.

There is also Remove contacts button, if you will click on it, it will show contacts that are already in this sequence and you can remove them.
Step 3 - Validation
When you press on next step in Contacts page you will be presented with validation screen. Here you can do realtime validation of your contacts which is very important to make sure you don't bounce and damage your domain reputation.

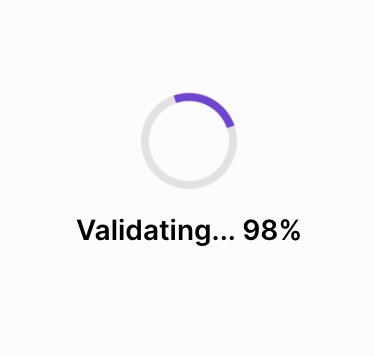
You can click on Skip validation if you have already validated the list and want to skip it. Otherwise click on Start validation process, which can take a few minutes, so just leave it until it's complete.
After validation is complete you will see the results screen. It has Safe, Role, Disabled, Disposable, Unknown, Catch all, Invalid, Spam trap, Full inbox and Unvalidated. If you are on Growth plan you are able to select multiple categories, otherwise only Safe.
We recommend to send only to Safe mailboxes, you can choose other ones that you see fit (on Growth plan).
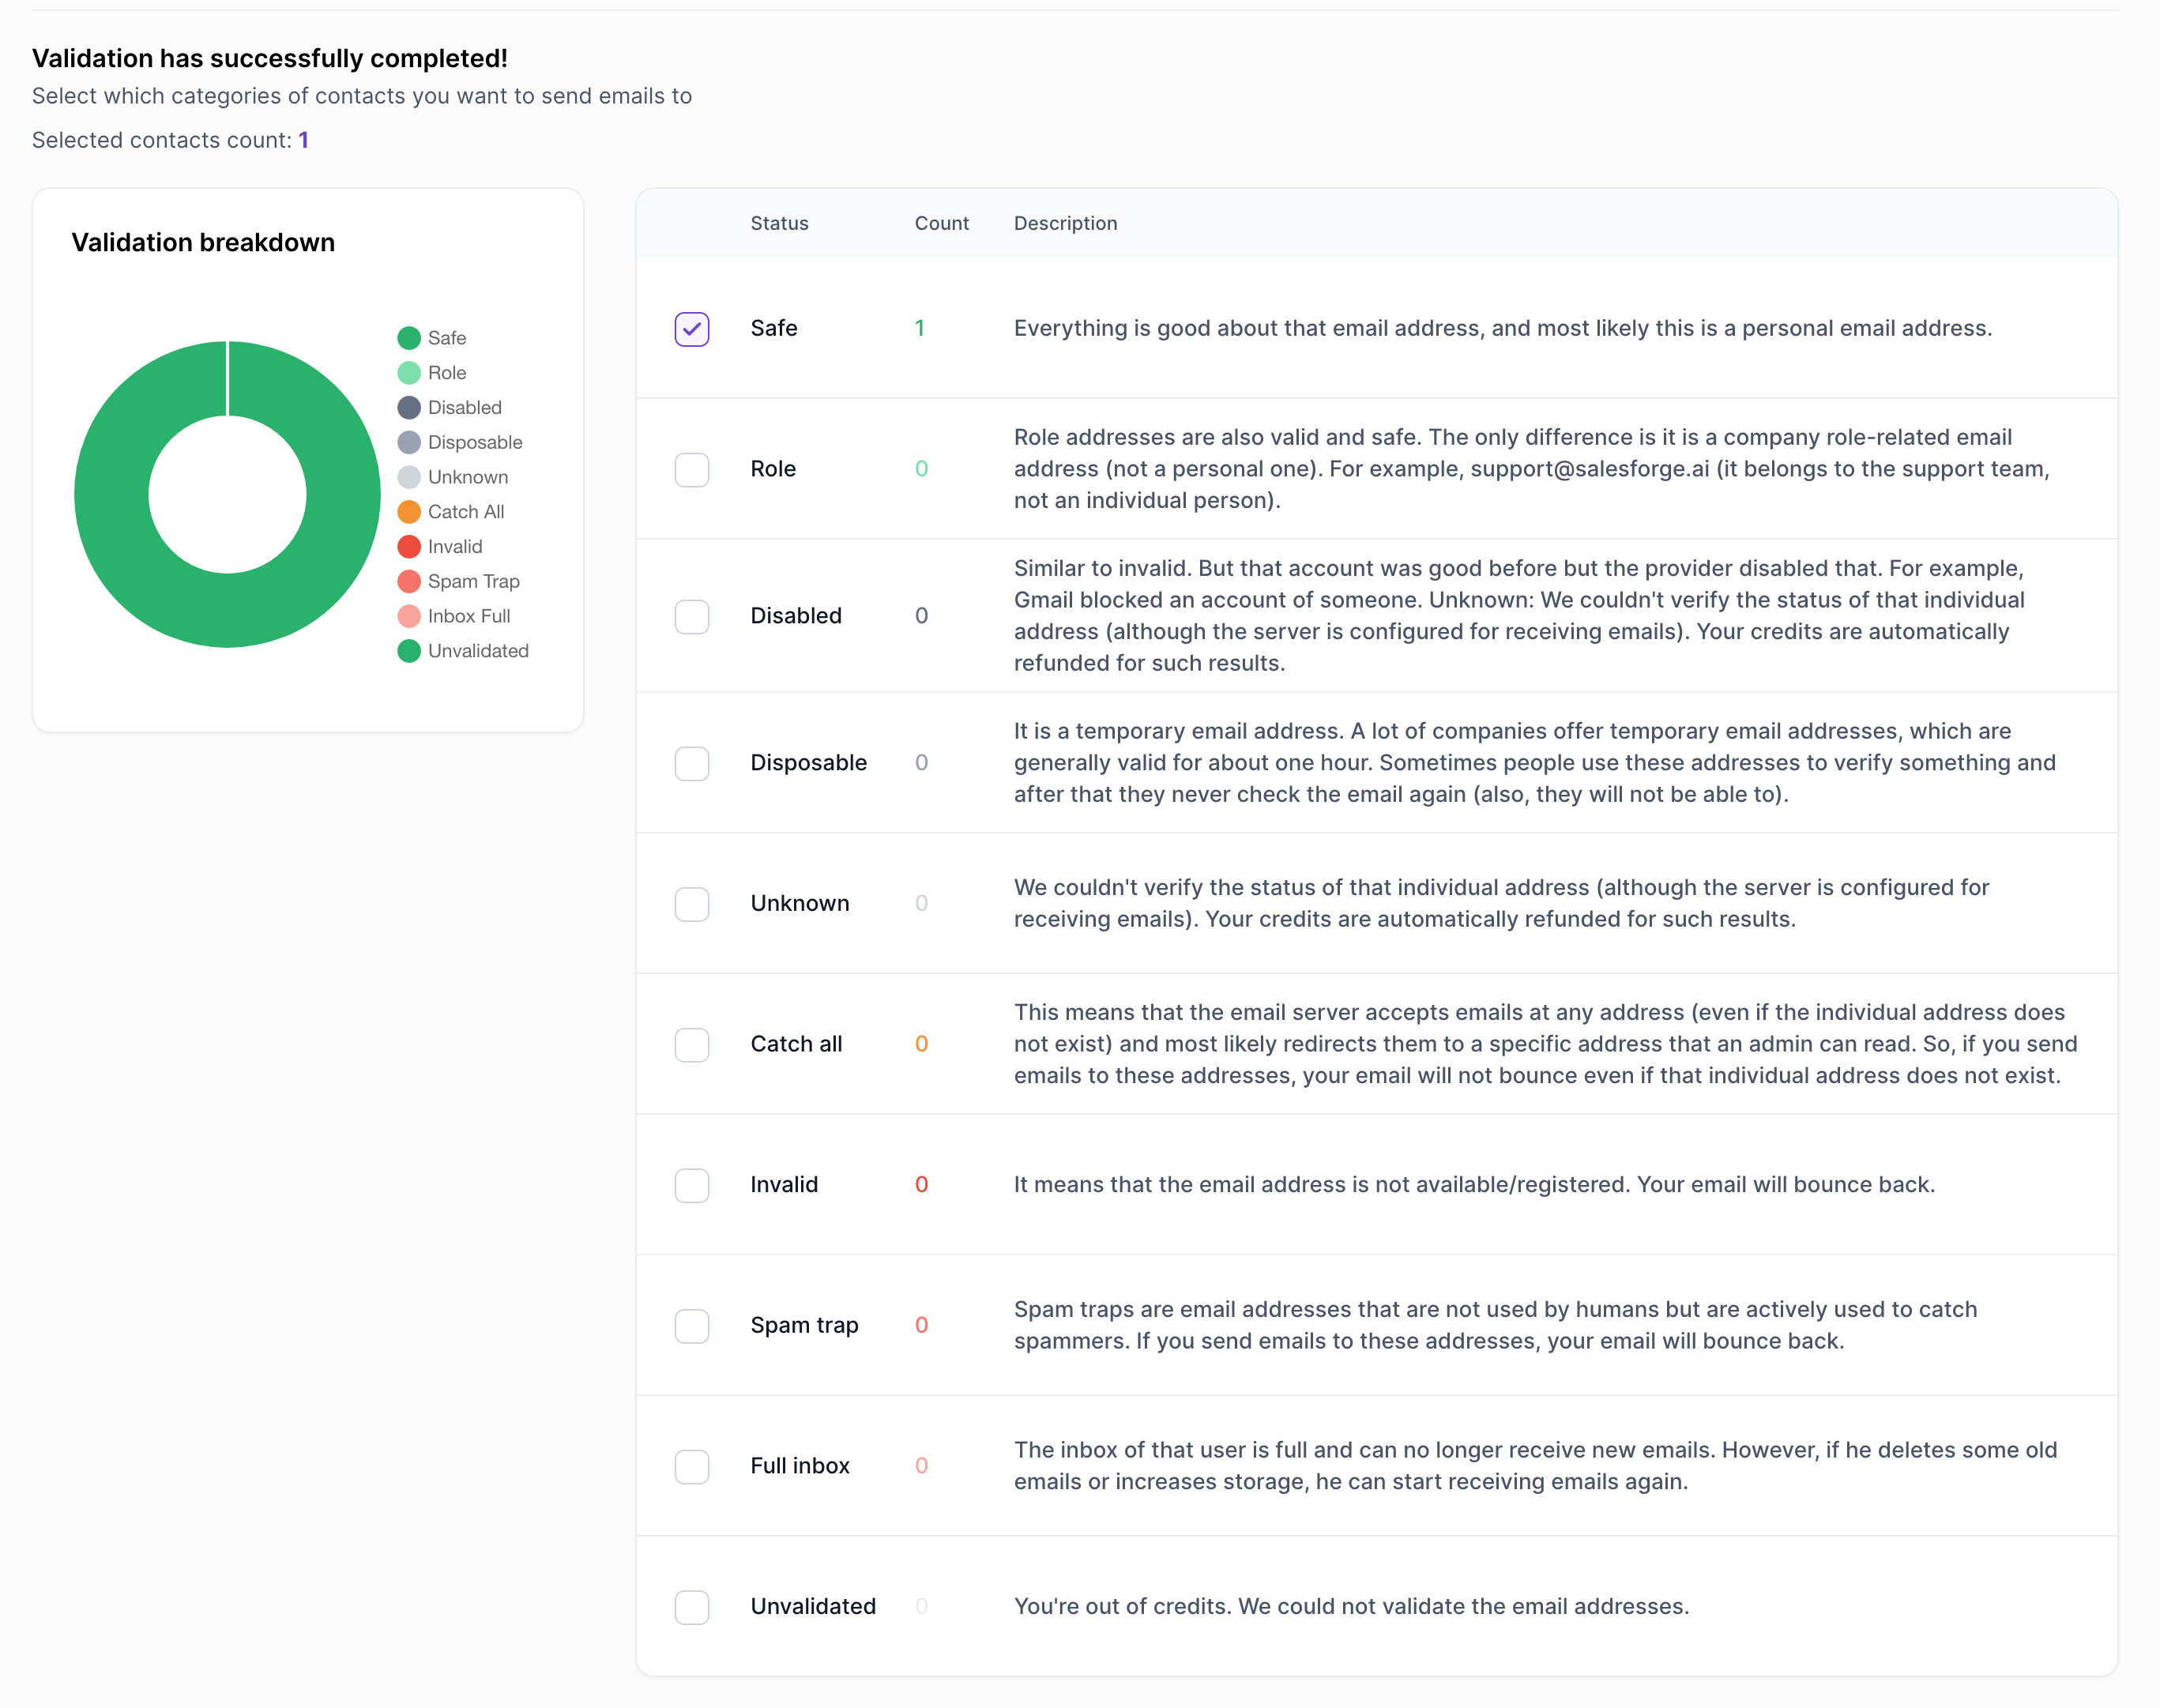
Once you have selected which contacts do you want to include in this sequence click on next - other contacts will be removed from the sequence.
Step 3 - Builder
In this step you create your sequence content. At the top you can see the Subject input which is the Subject of your email, the big text area is for content of your email.
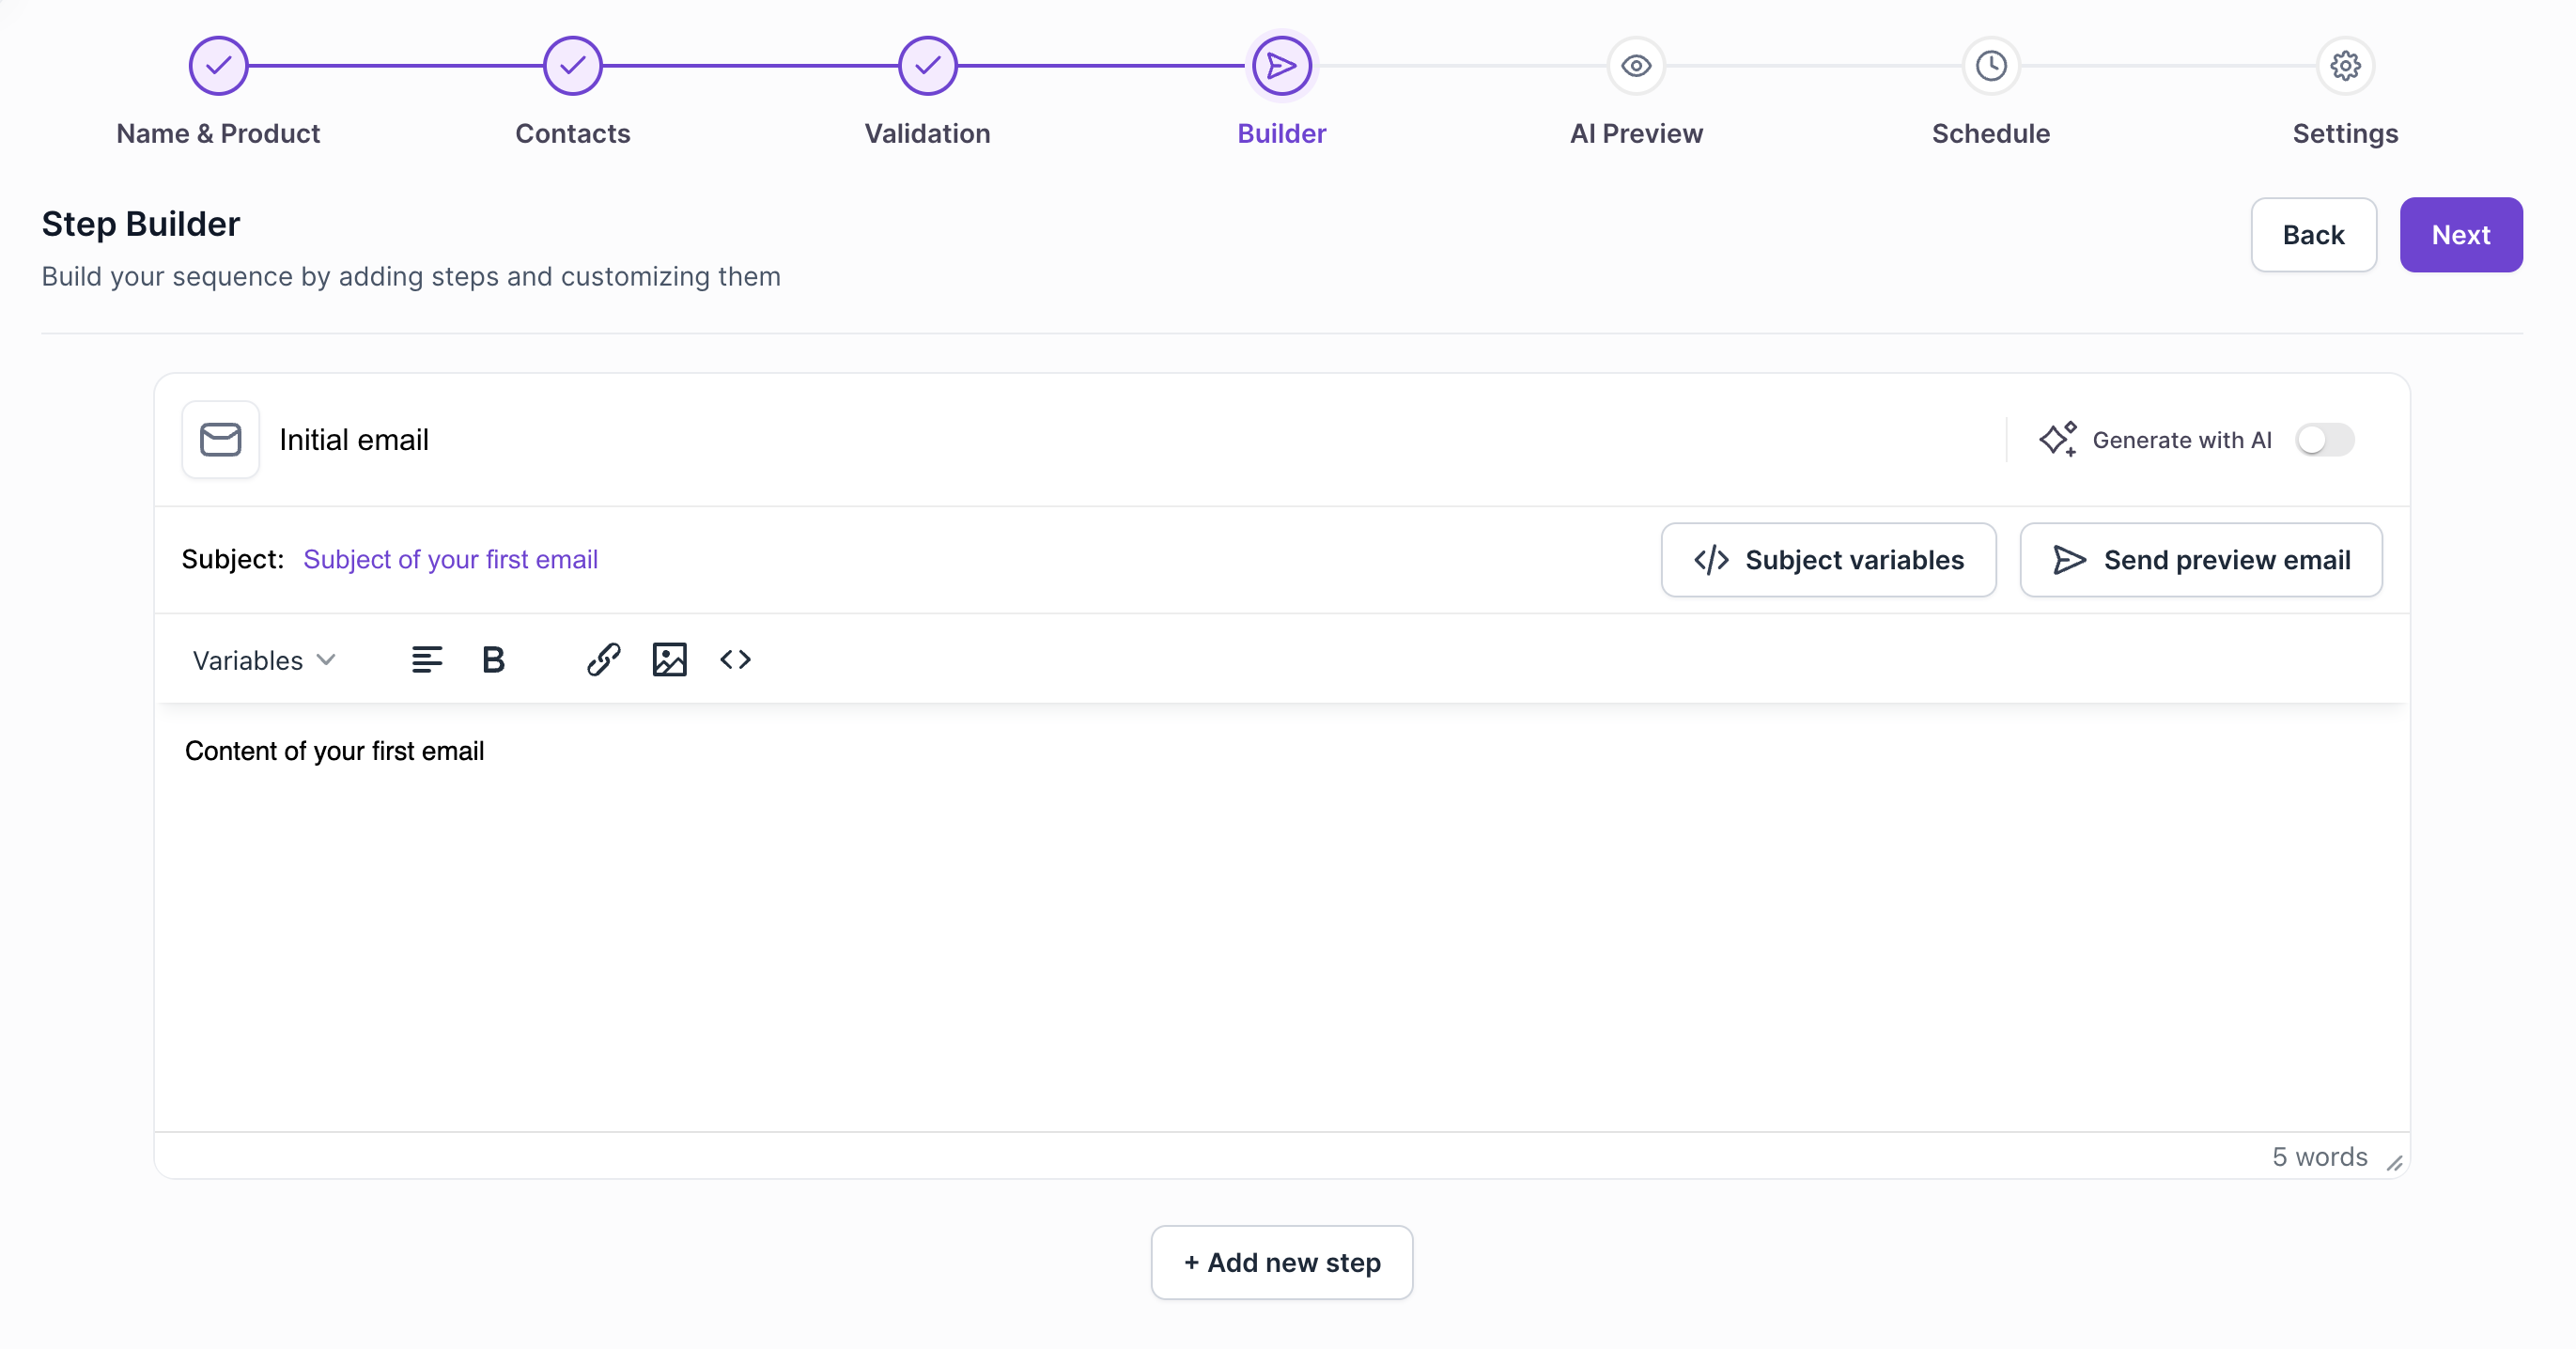
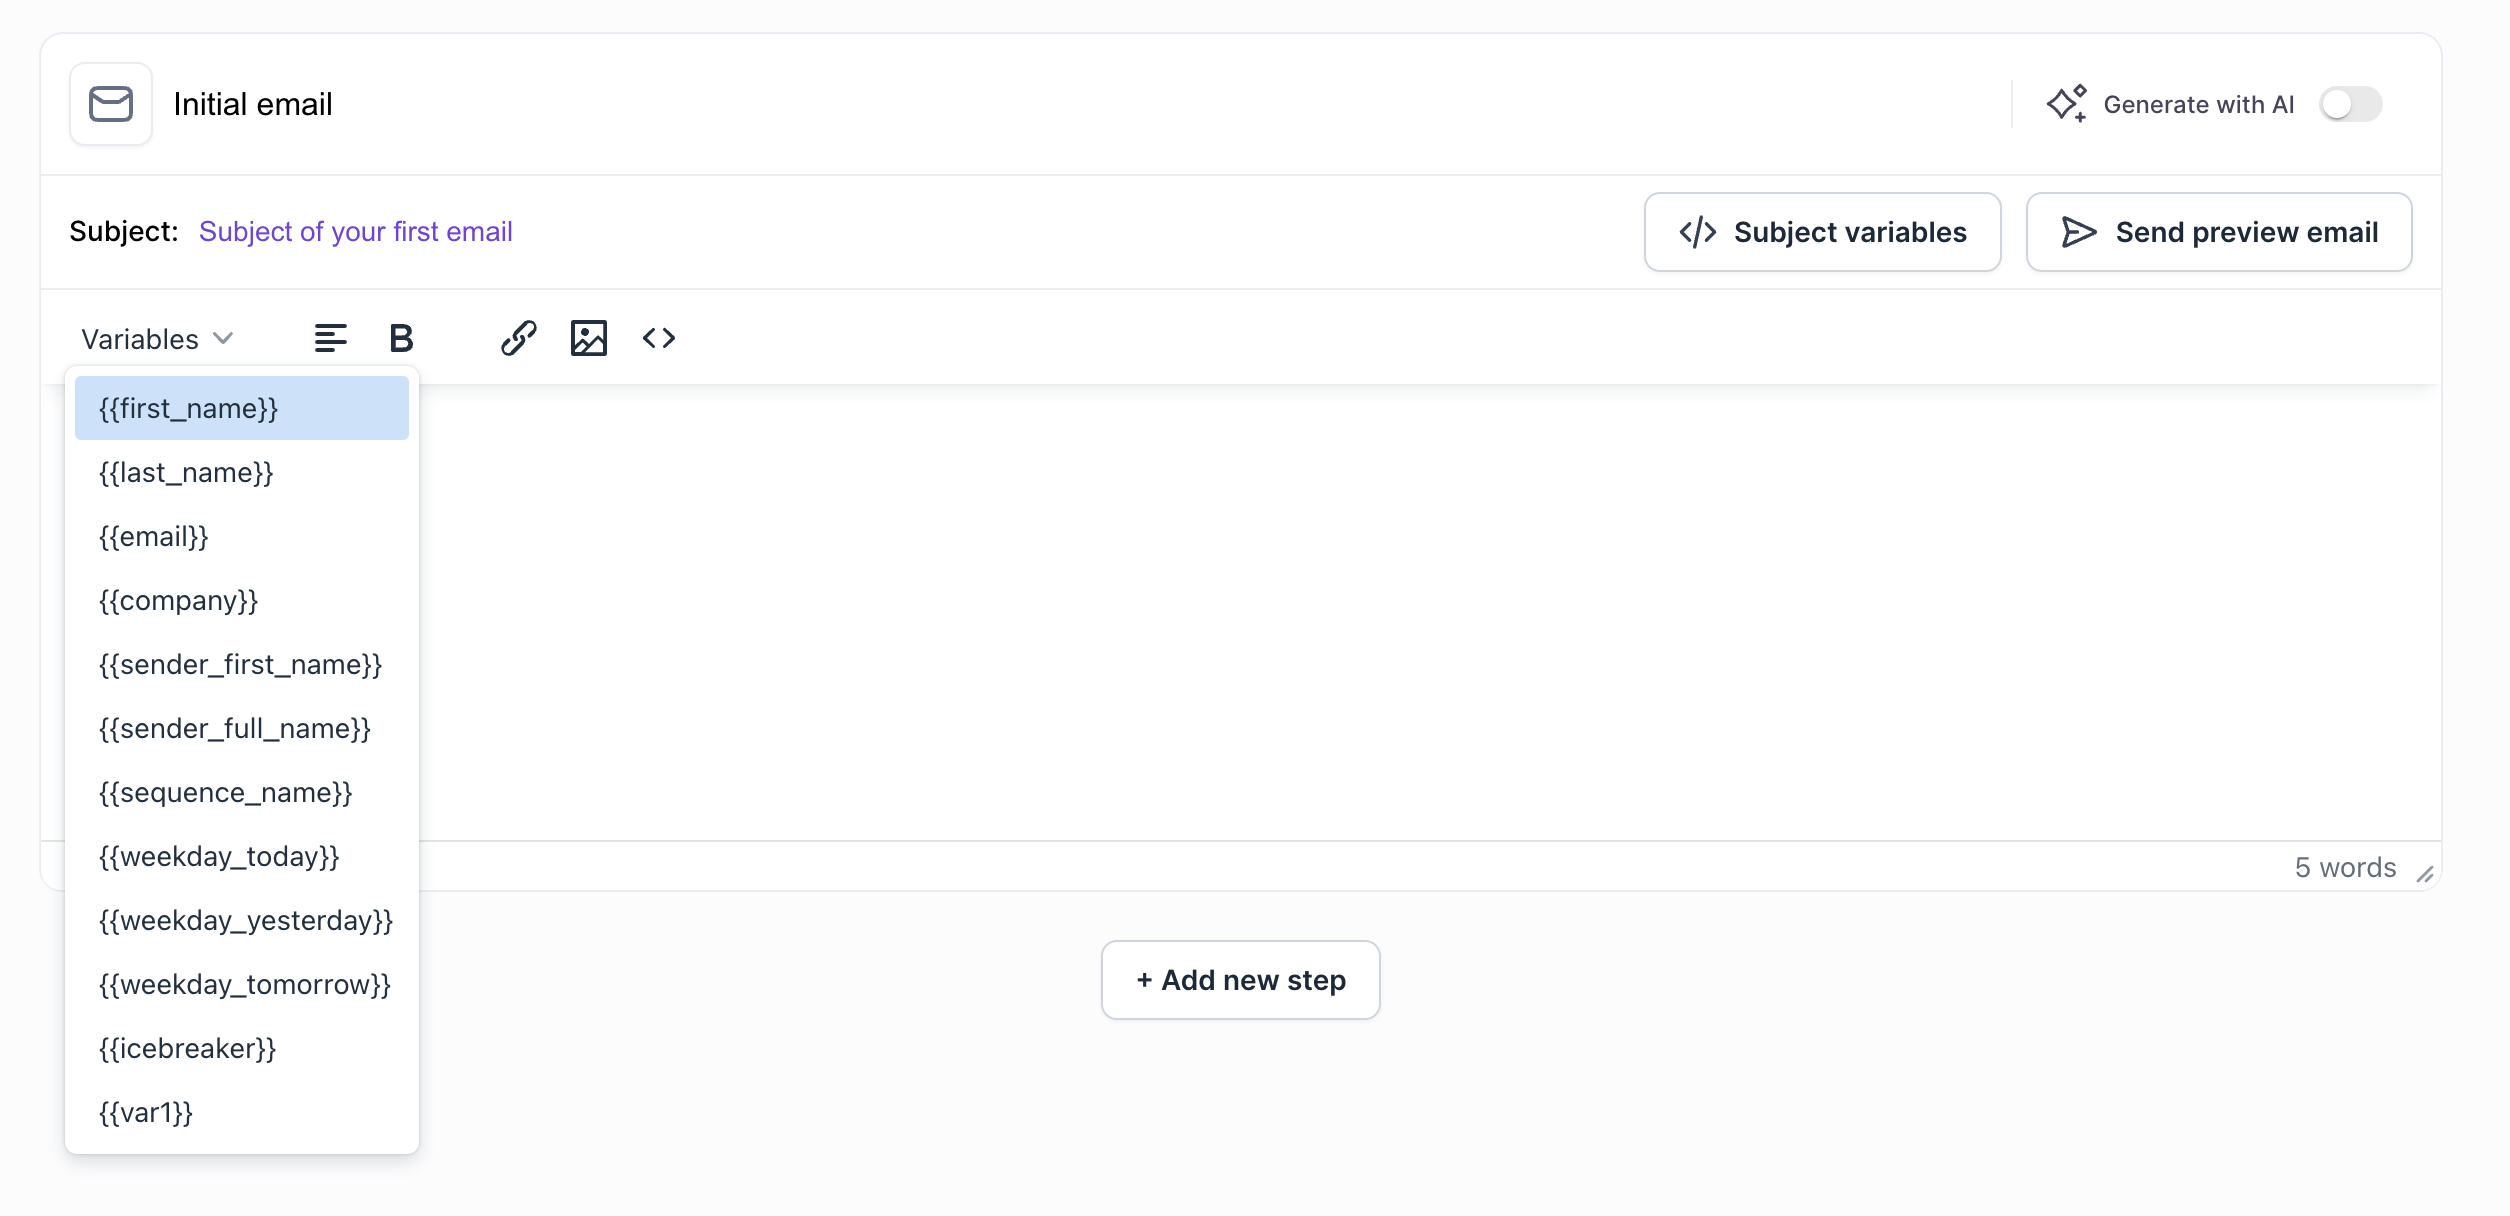
Both in content and subject you can use custom variables. Those are either predefined varabiles or variables that you have defined when you imported contacts into your workspace.
For subject you can select them by clicking on Subject variables.
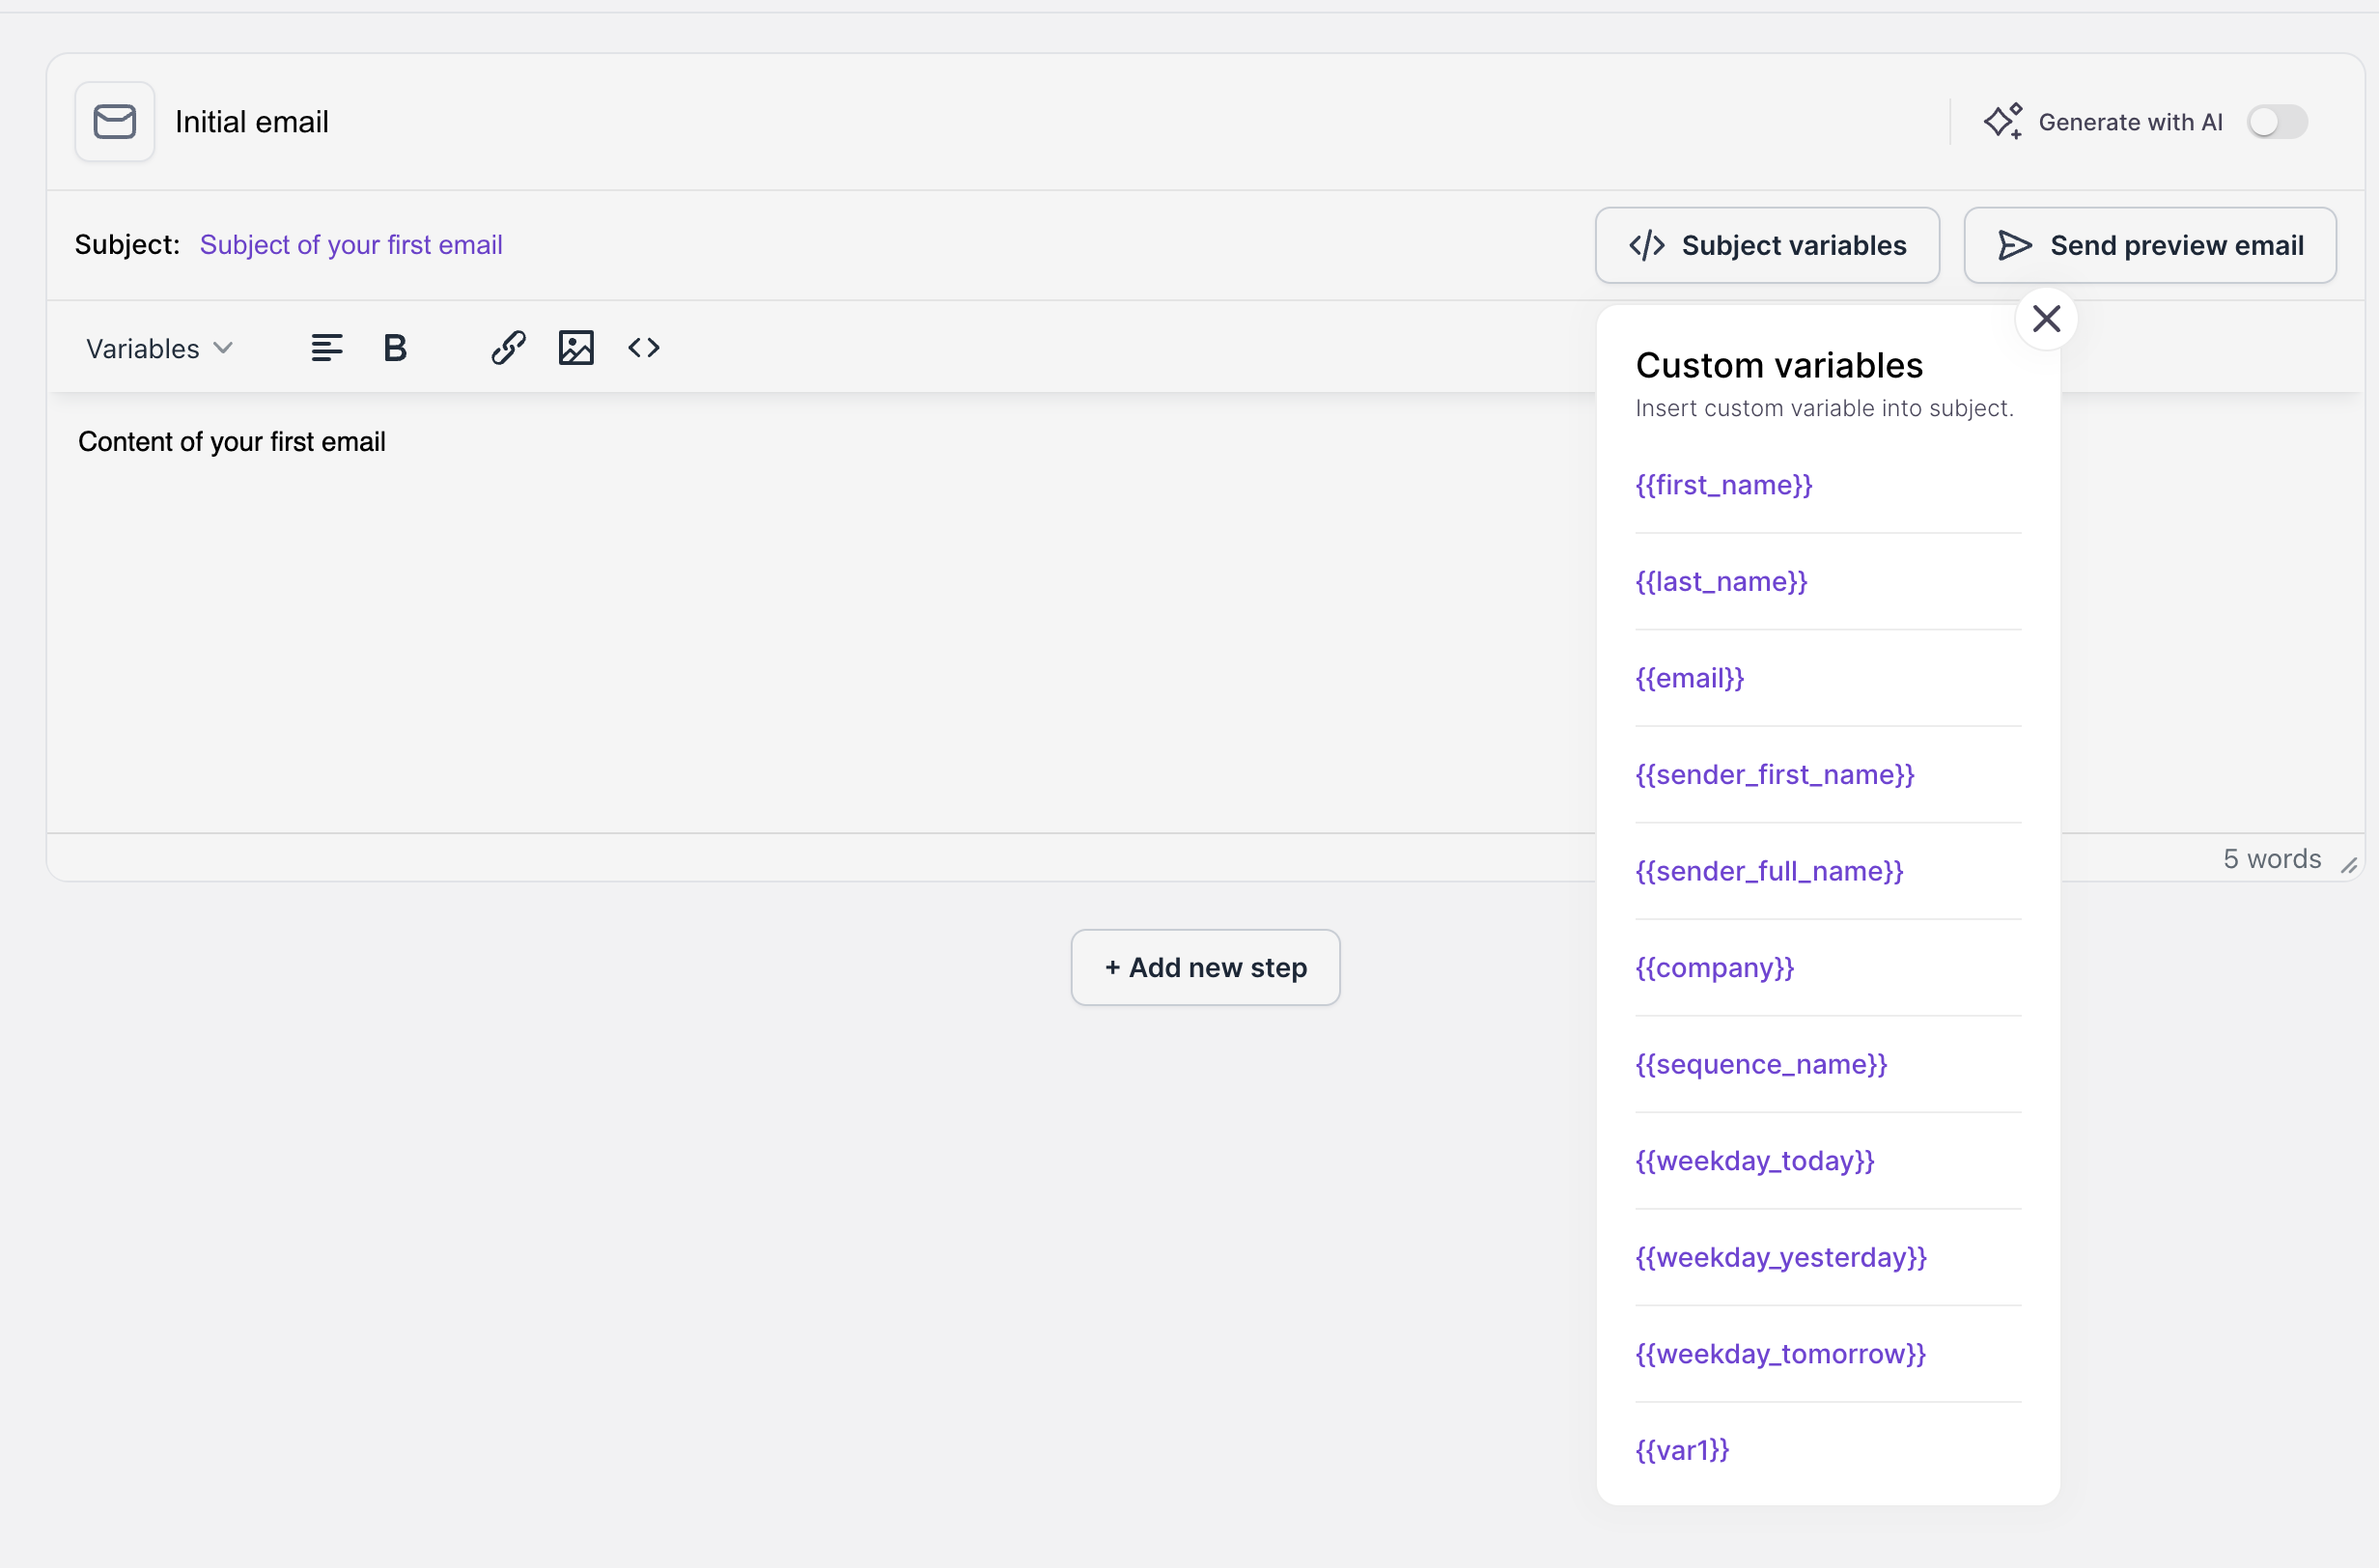
For email content those are available in variables:
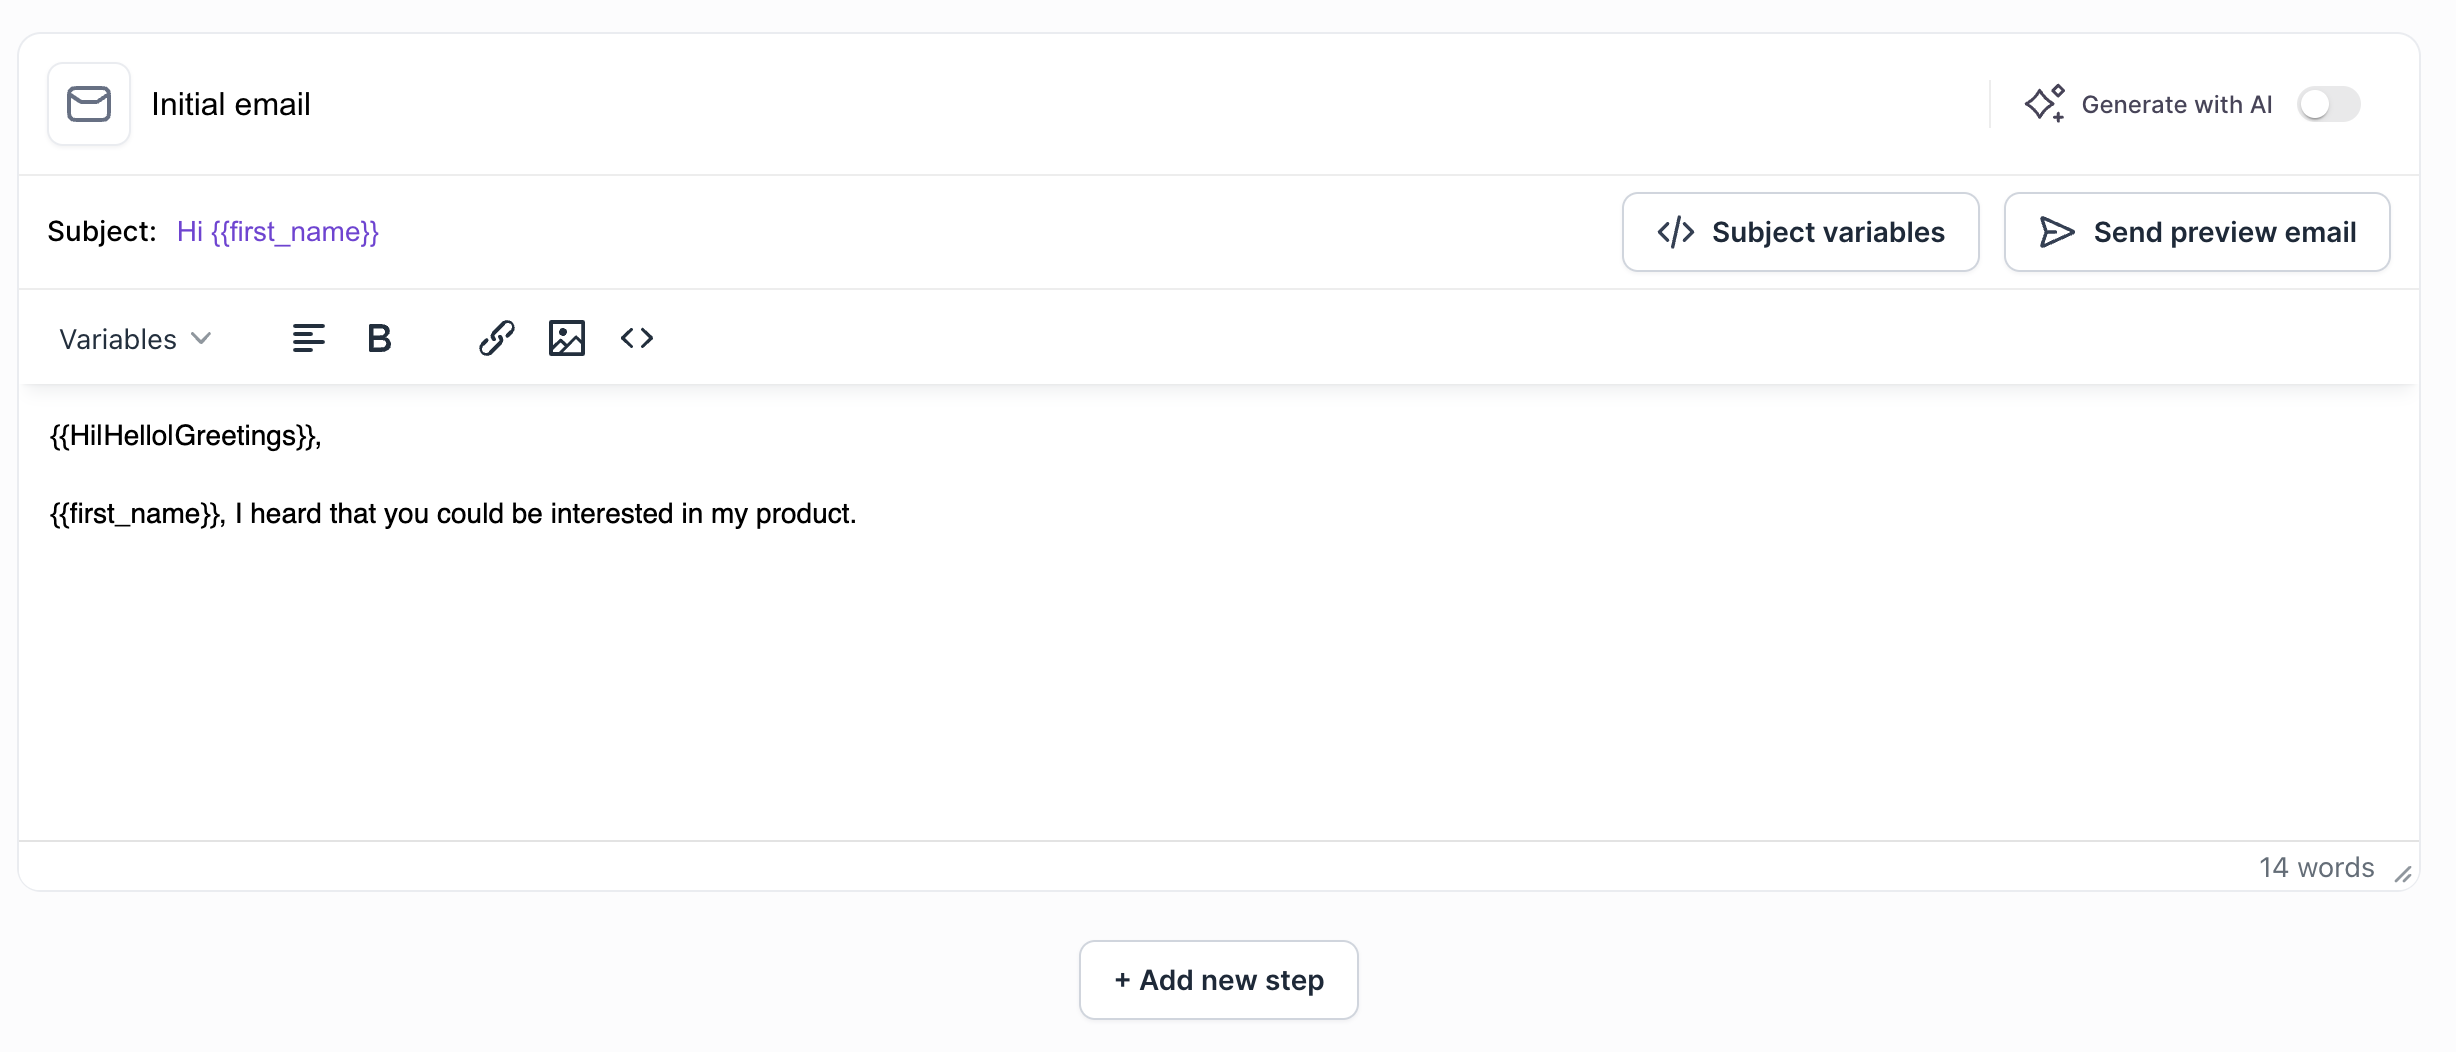
You can also use spintax, more about it here: https://help.salesforge.ai/en/articles/8136165-spintax-spin-syntax
Content with variables and Spintax can look something like this.
After you're done with the first step if contact does not reply, it's a good idea to followup. Therefore you can create a new step by clicking Add new step underneath the text area of the first step. You will see the following:
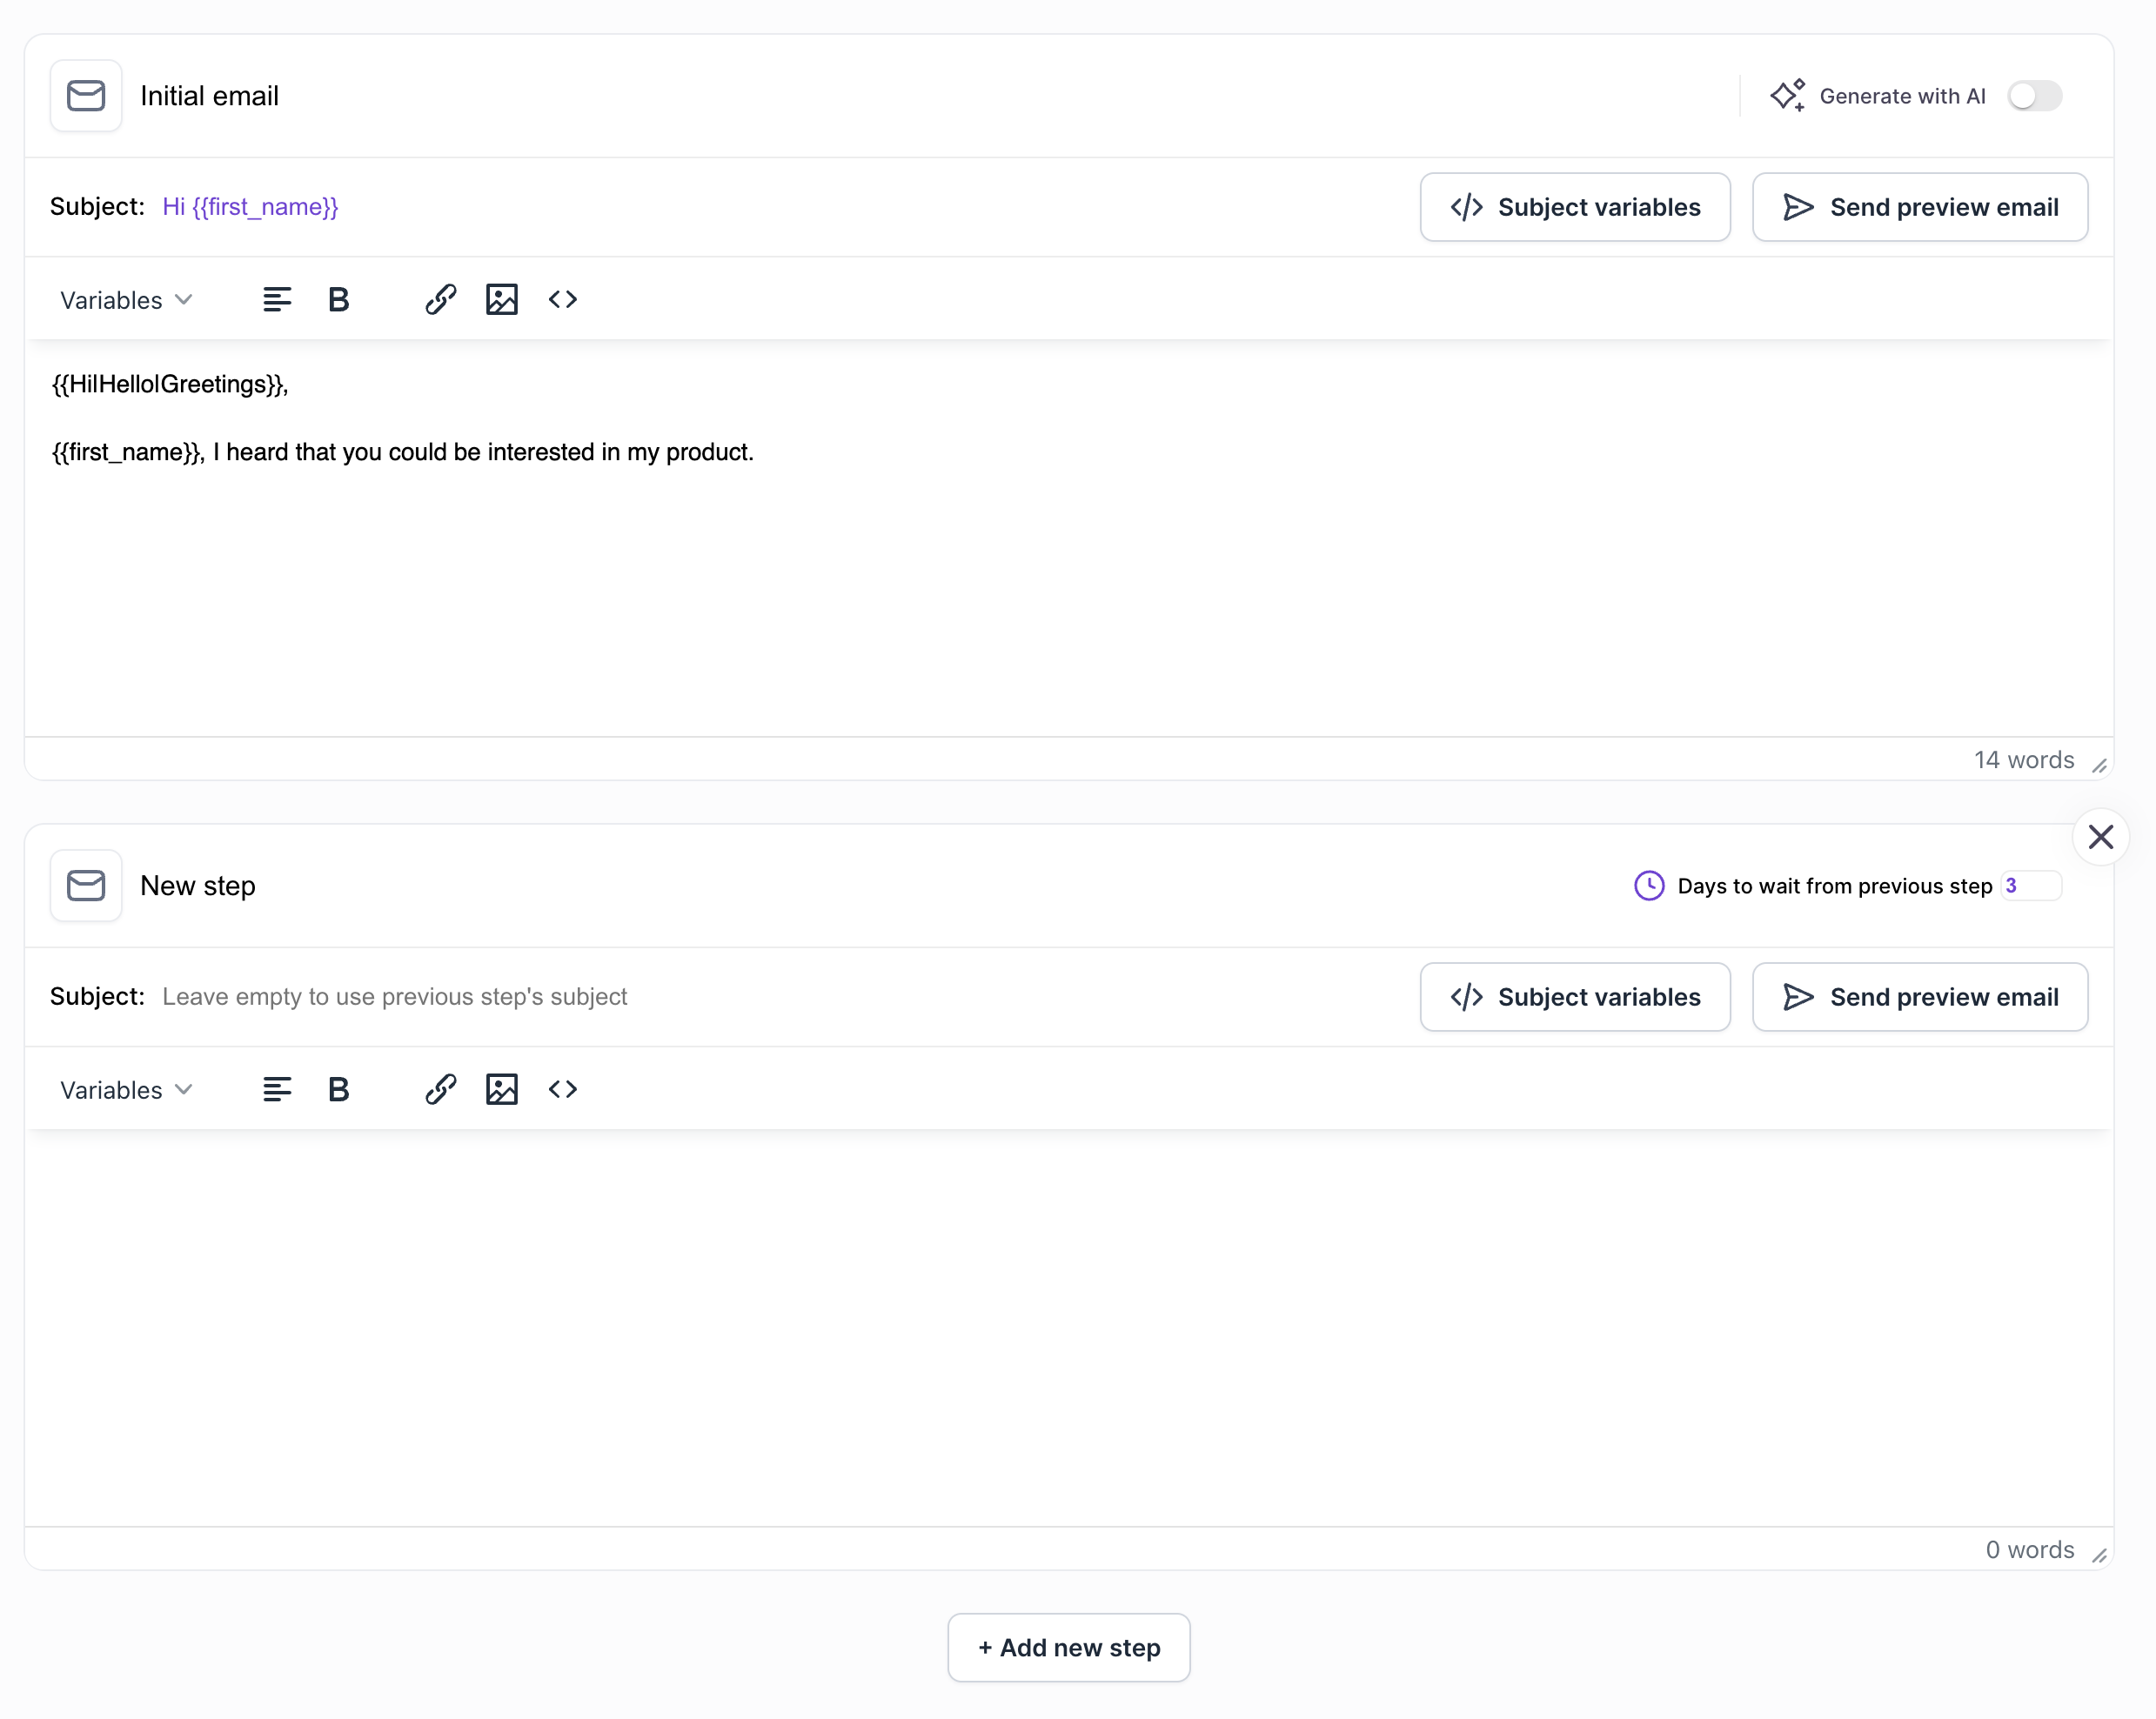
As you can see the new step have appeared but it looks slightly more different. On the right there is Days to wait from previous step with default value of 3, and now the Subject says "Leave empty to use previous step's subject.
If you will leave subject empty it will come in the same thread as the first email. Otherwise it will come as a separate email with a new subject line.
Note: Always if a new email comes in a new thread Opt out link or text will be added to it, if it's a followup in a thread it will not be added.
Days to wait from previous step is inclusive, for example if it's Monday today first step was sent, the second step will be sent on Thursday
3 day wait:
Monday 1st step sent (1d) | Tuesday (1d) | Wednesday (1d) | Thursday (send 2nd step!)
In other words it will send on the 3rd day from last sent step.
2 days would be Wednesday.
This also depends on the schedule which we will be setting soon. If wait days is 2 but Wednesday is disabled, it will send on Thursday. You will be able to set that in the Schedule step as described below.
You can also choose to use AI. Only first step can be written by AI. AI can either write the full email or just an icebreaker. Icebreaker can be inserted as a special variable #{{icebreaker}} in your template
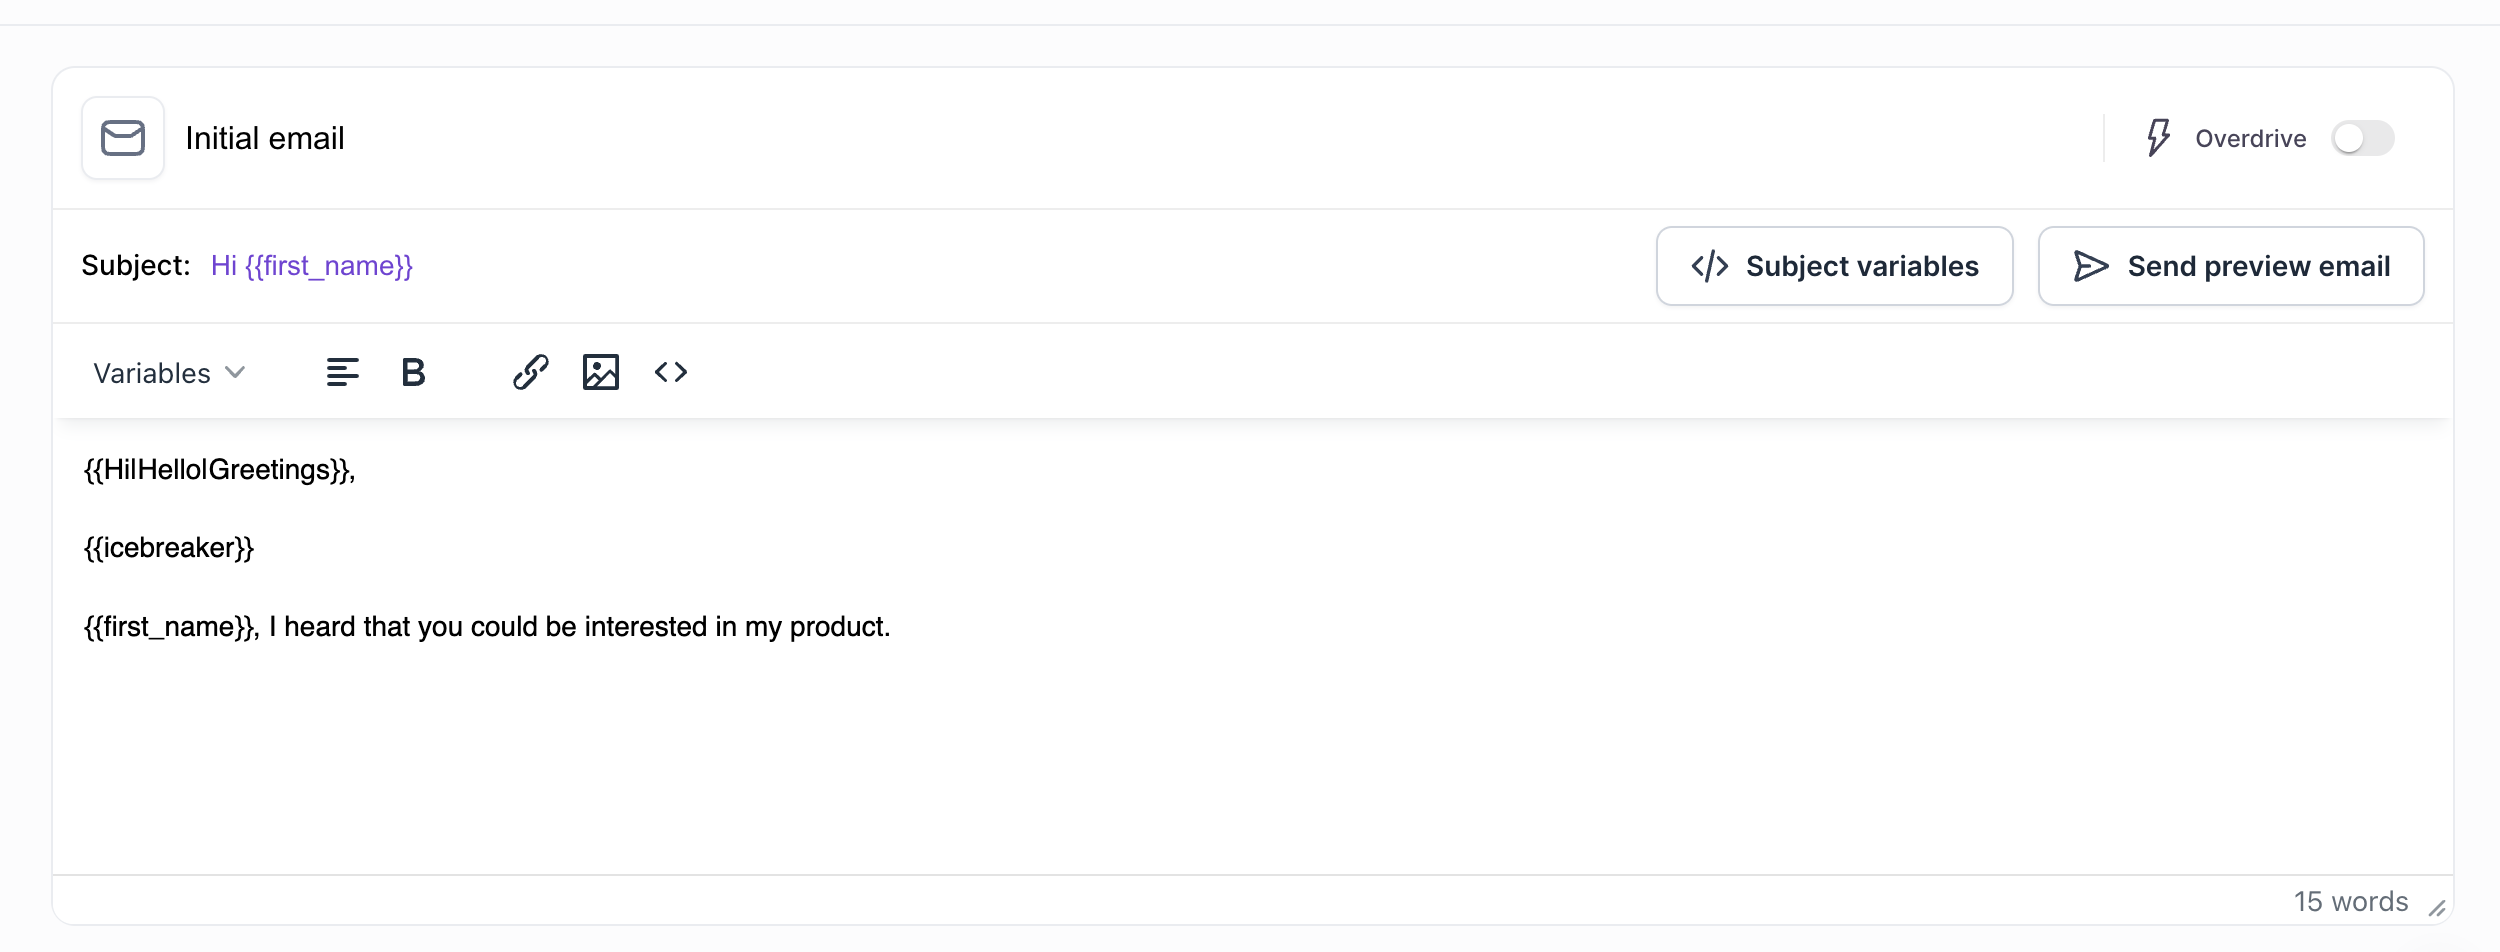
With that you will see that there is an option to use ovedrive at the top. If you will choose overdrive it will get information from contacts website (for example if somebody has email like [email protected], we will fetch information from herbusiness.com to craft a unique email) and also it will get information from her Linkedin in Linkedin url is provided in Contacts. If the email of the contact is gmail, outlook or similar we will not scrape the website, just the Linkedin.
Without overdrive it will only get information from Linkedin of the person for icebreaker.
Overdrive costs 2x personalization credits, Standard mode costs 1 credit.
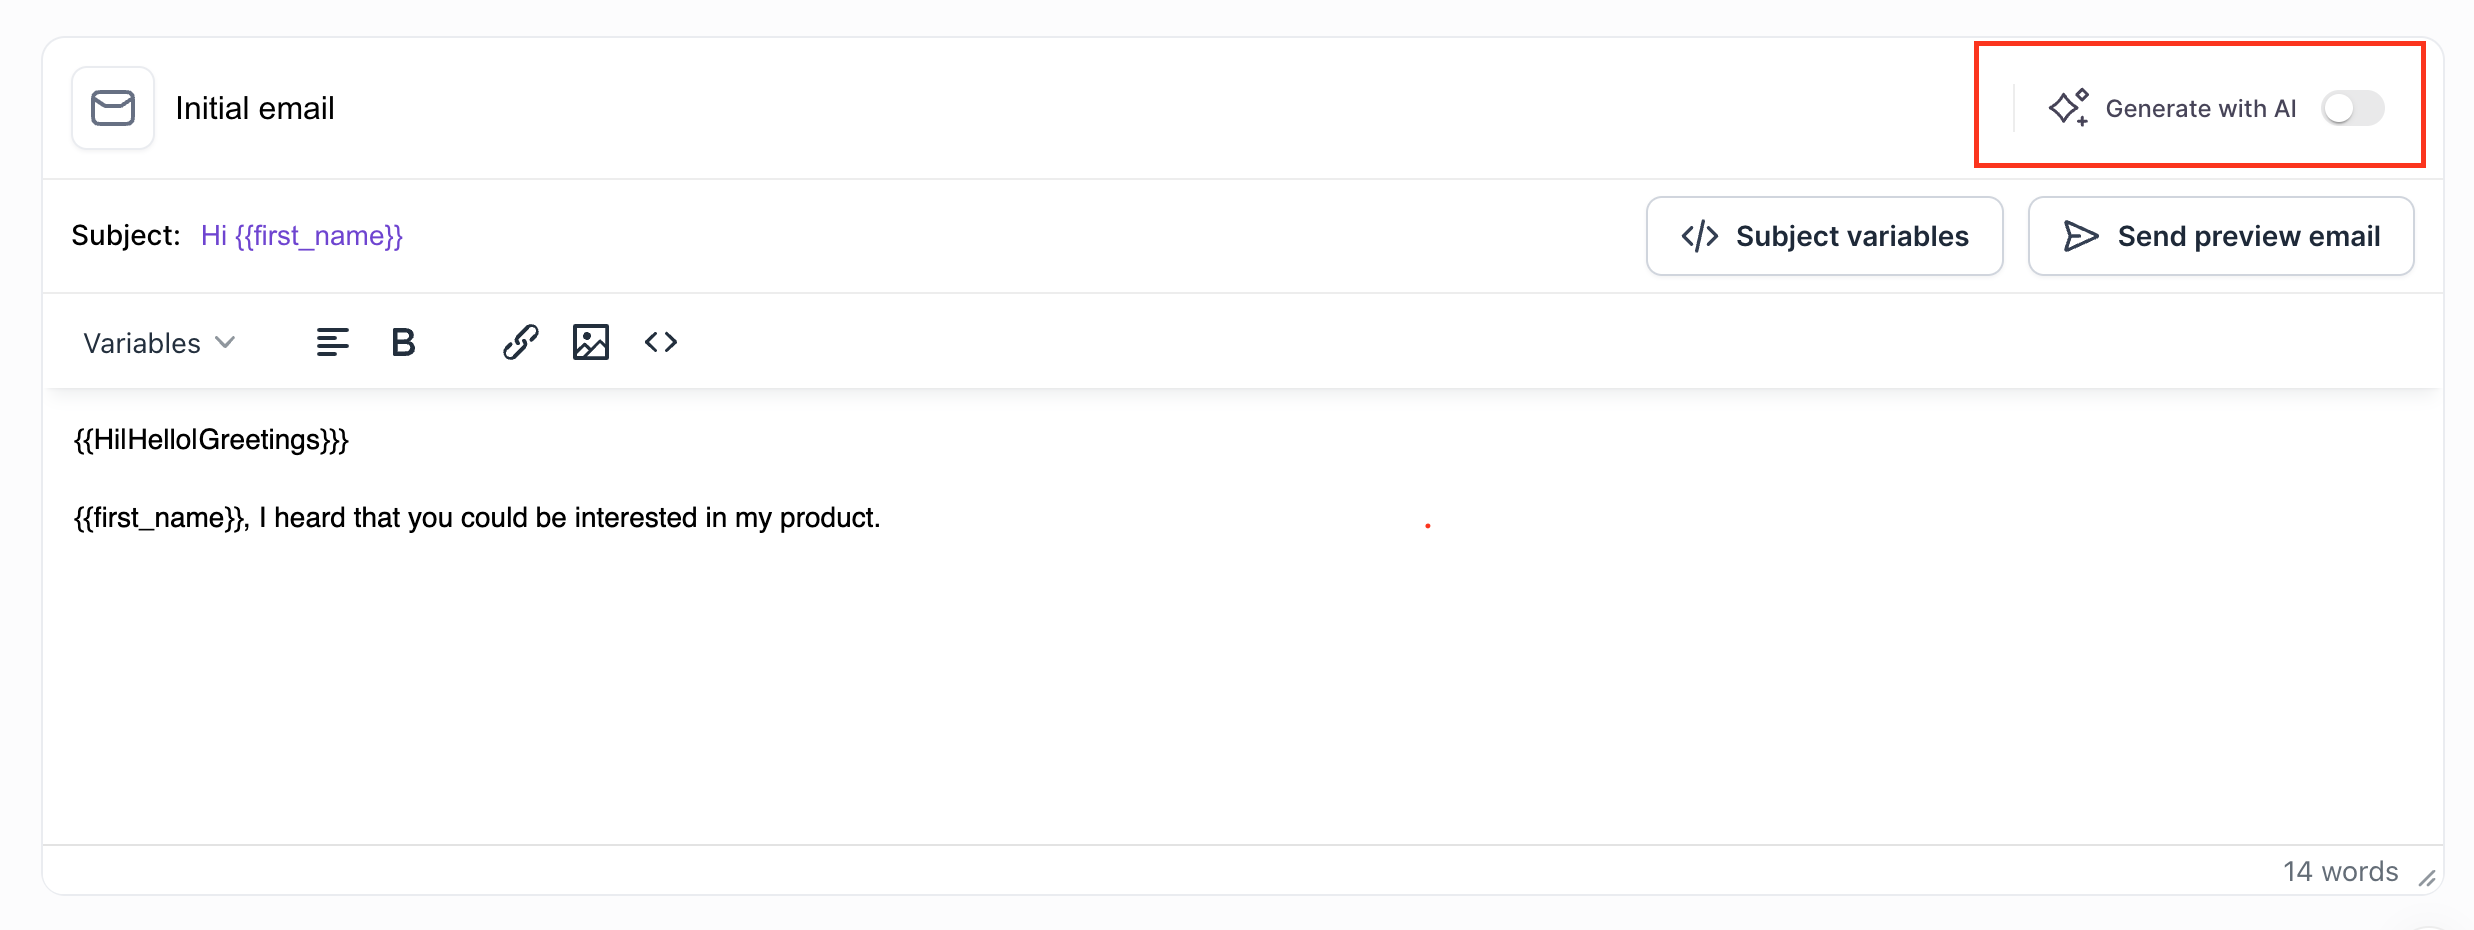
If you want the whole email to be personalized, make sure you don't have #{{icebreaker}} variable in content and click on Generate with AI toggle at the top right of the first step.
You will be presented with a Fallback template modal, which is a very important modal. This modal is needed when AI cannot generated the email for the contact because of either Linkedin url being private or website not being accessible. Therefore it will fallback to this email if it fails to generate.

Here you can use all variables just like in templates email that we talked about before. Once you're done just click on Save.
You will now see that the first step transformed into option window instead of content.
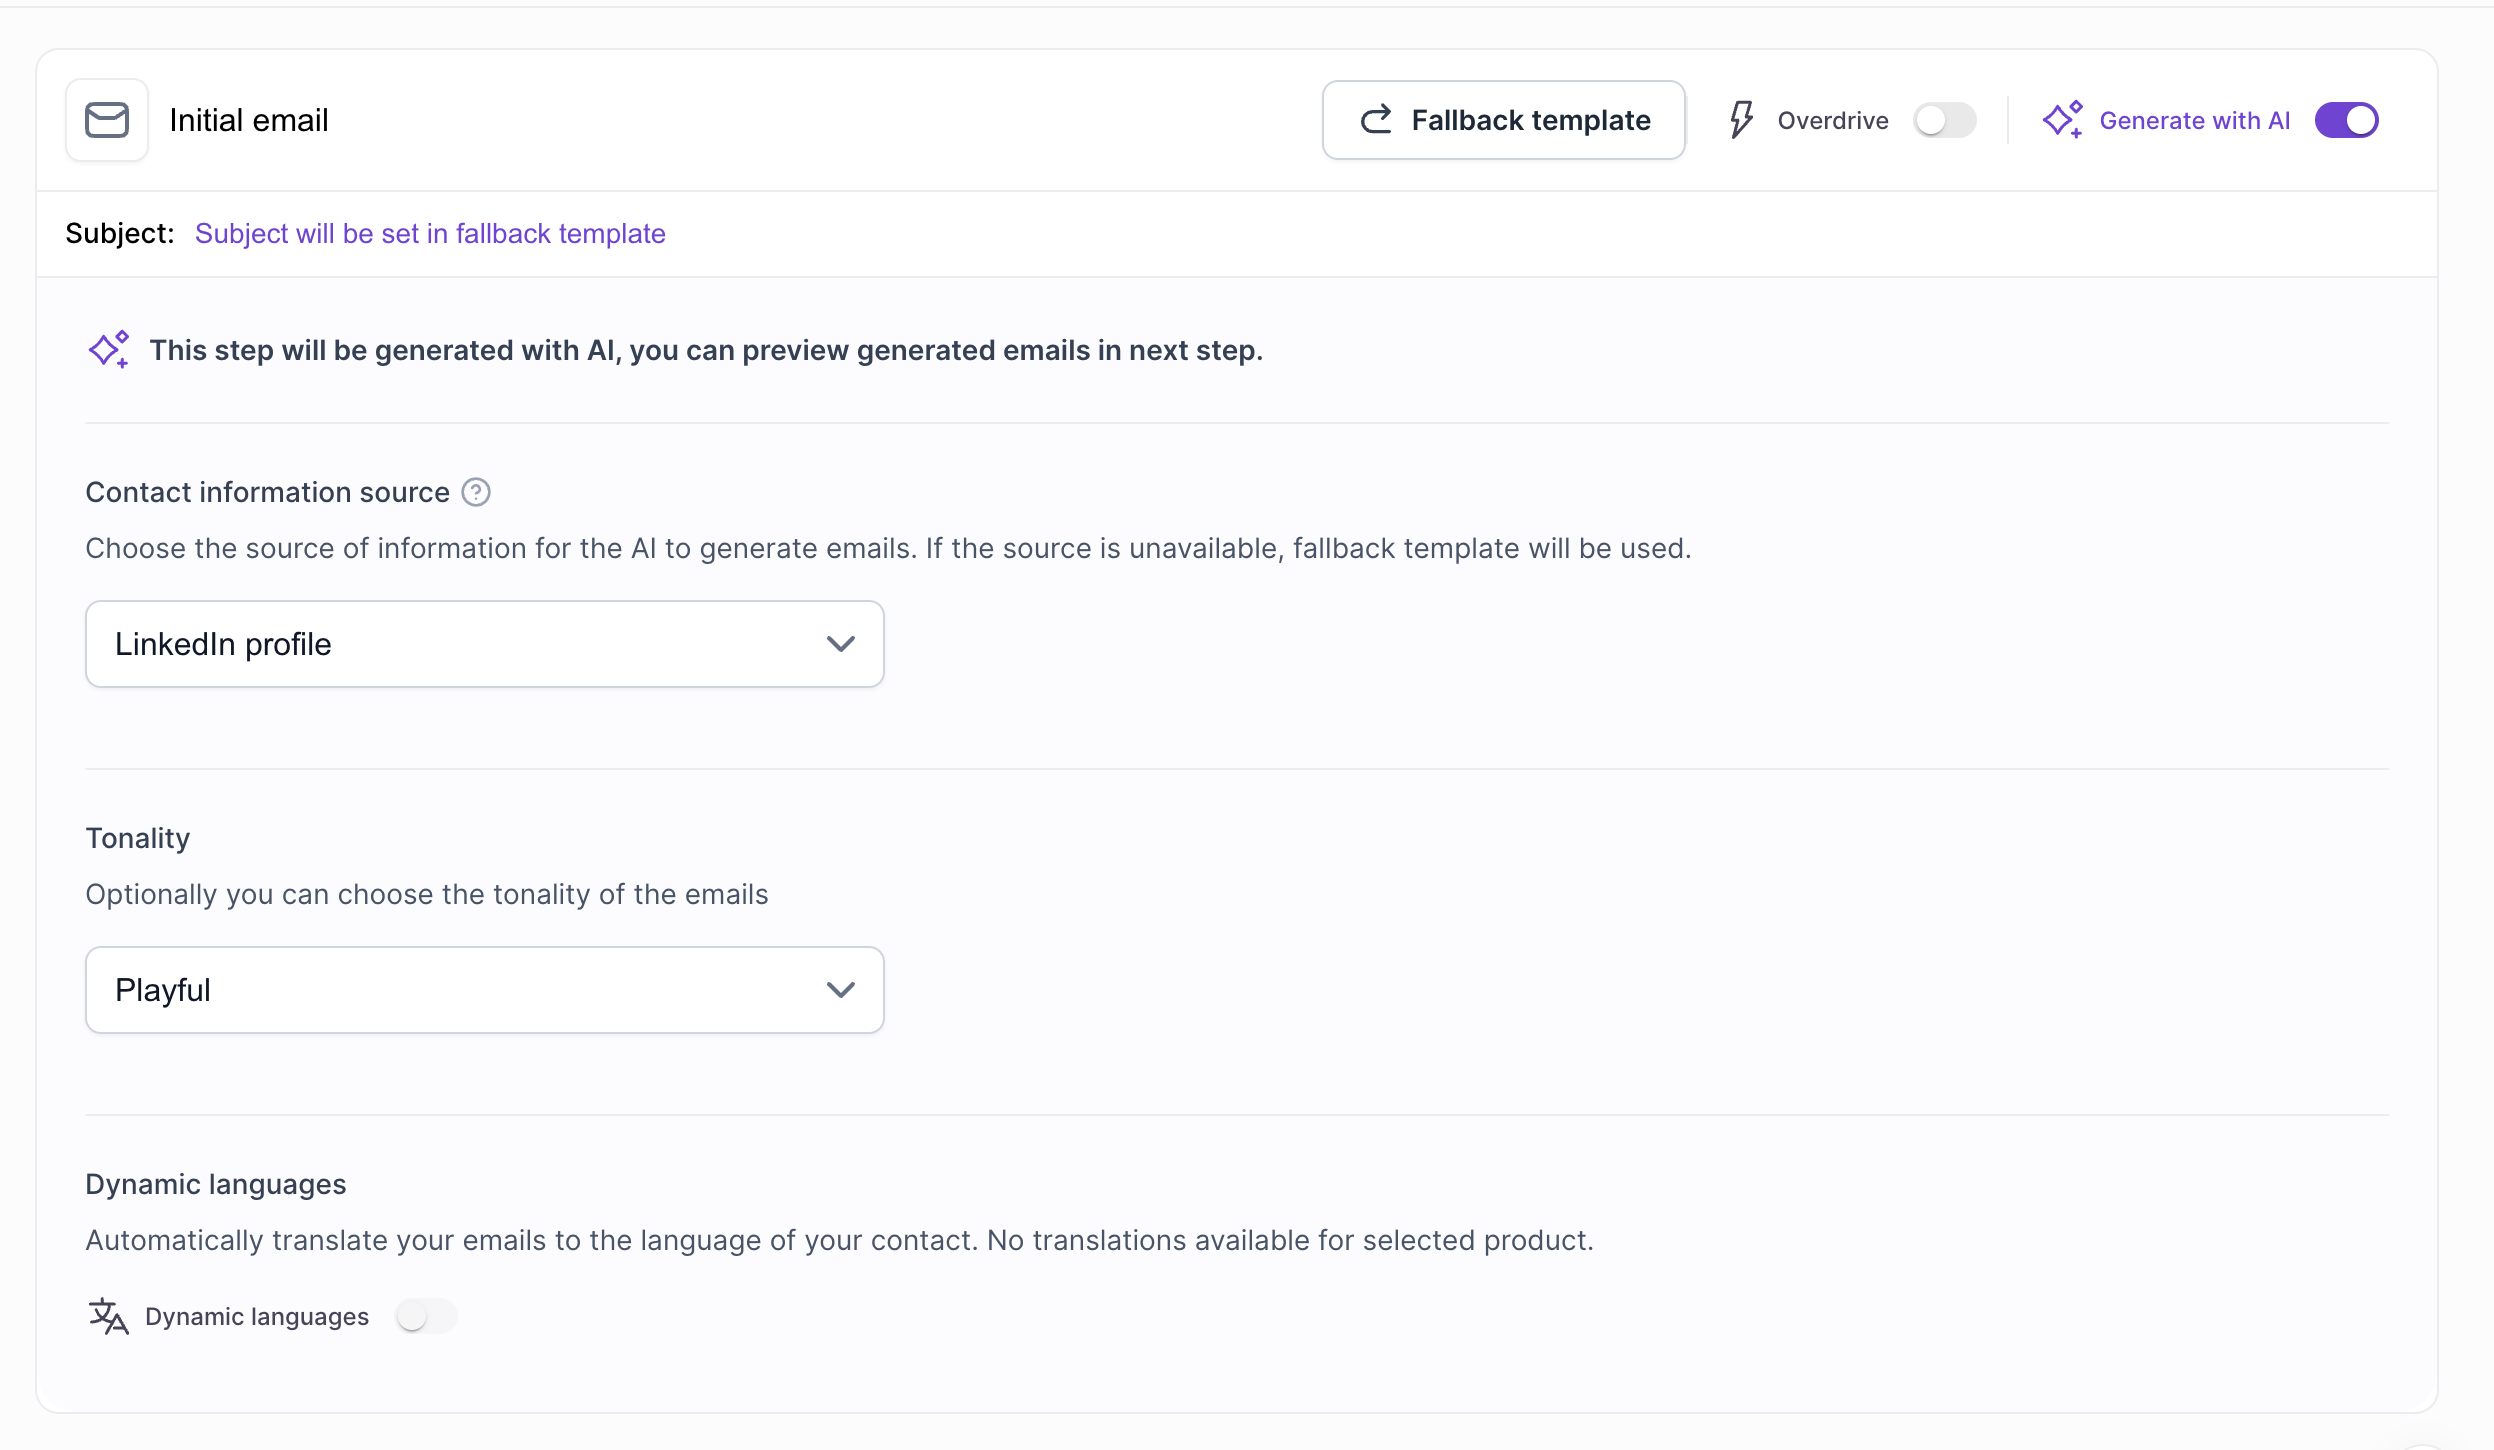
In there you will see multiple settings:
Contact information source
Linkedin profile - it will fetch only from Linkedin which was provided when importing Contacts.
Website- if contact has email like [email protected], we will fetch information from herbusiness.com to craft a unique email.
Linkedin+Website - this is Overdrive mode. Which costs 2x personalization credits, it will fetch information both from website and linkedin.
Tonality - this is the tonality of the message that AI will craft
Dynamic language - If this is enabled AI will try to get the language based on the Linkedin of the person. If the person speaks Spanish it will craft the message in Spanish, if another one speaks Dutch, it will be in Dutch. Each recipient will get the message in their native language if it's available. Only use this with Linkedin or Linkedin+Website.
If you have selected AI the next step will be AI preview.
Step 4 - AI Preview
In this step you will see the AI preview.
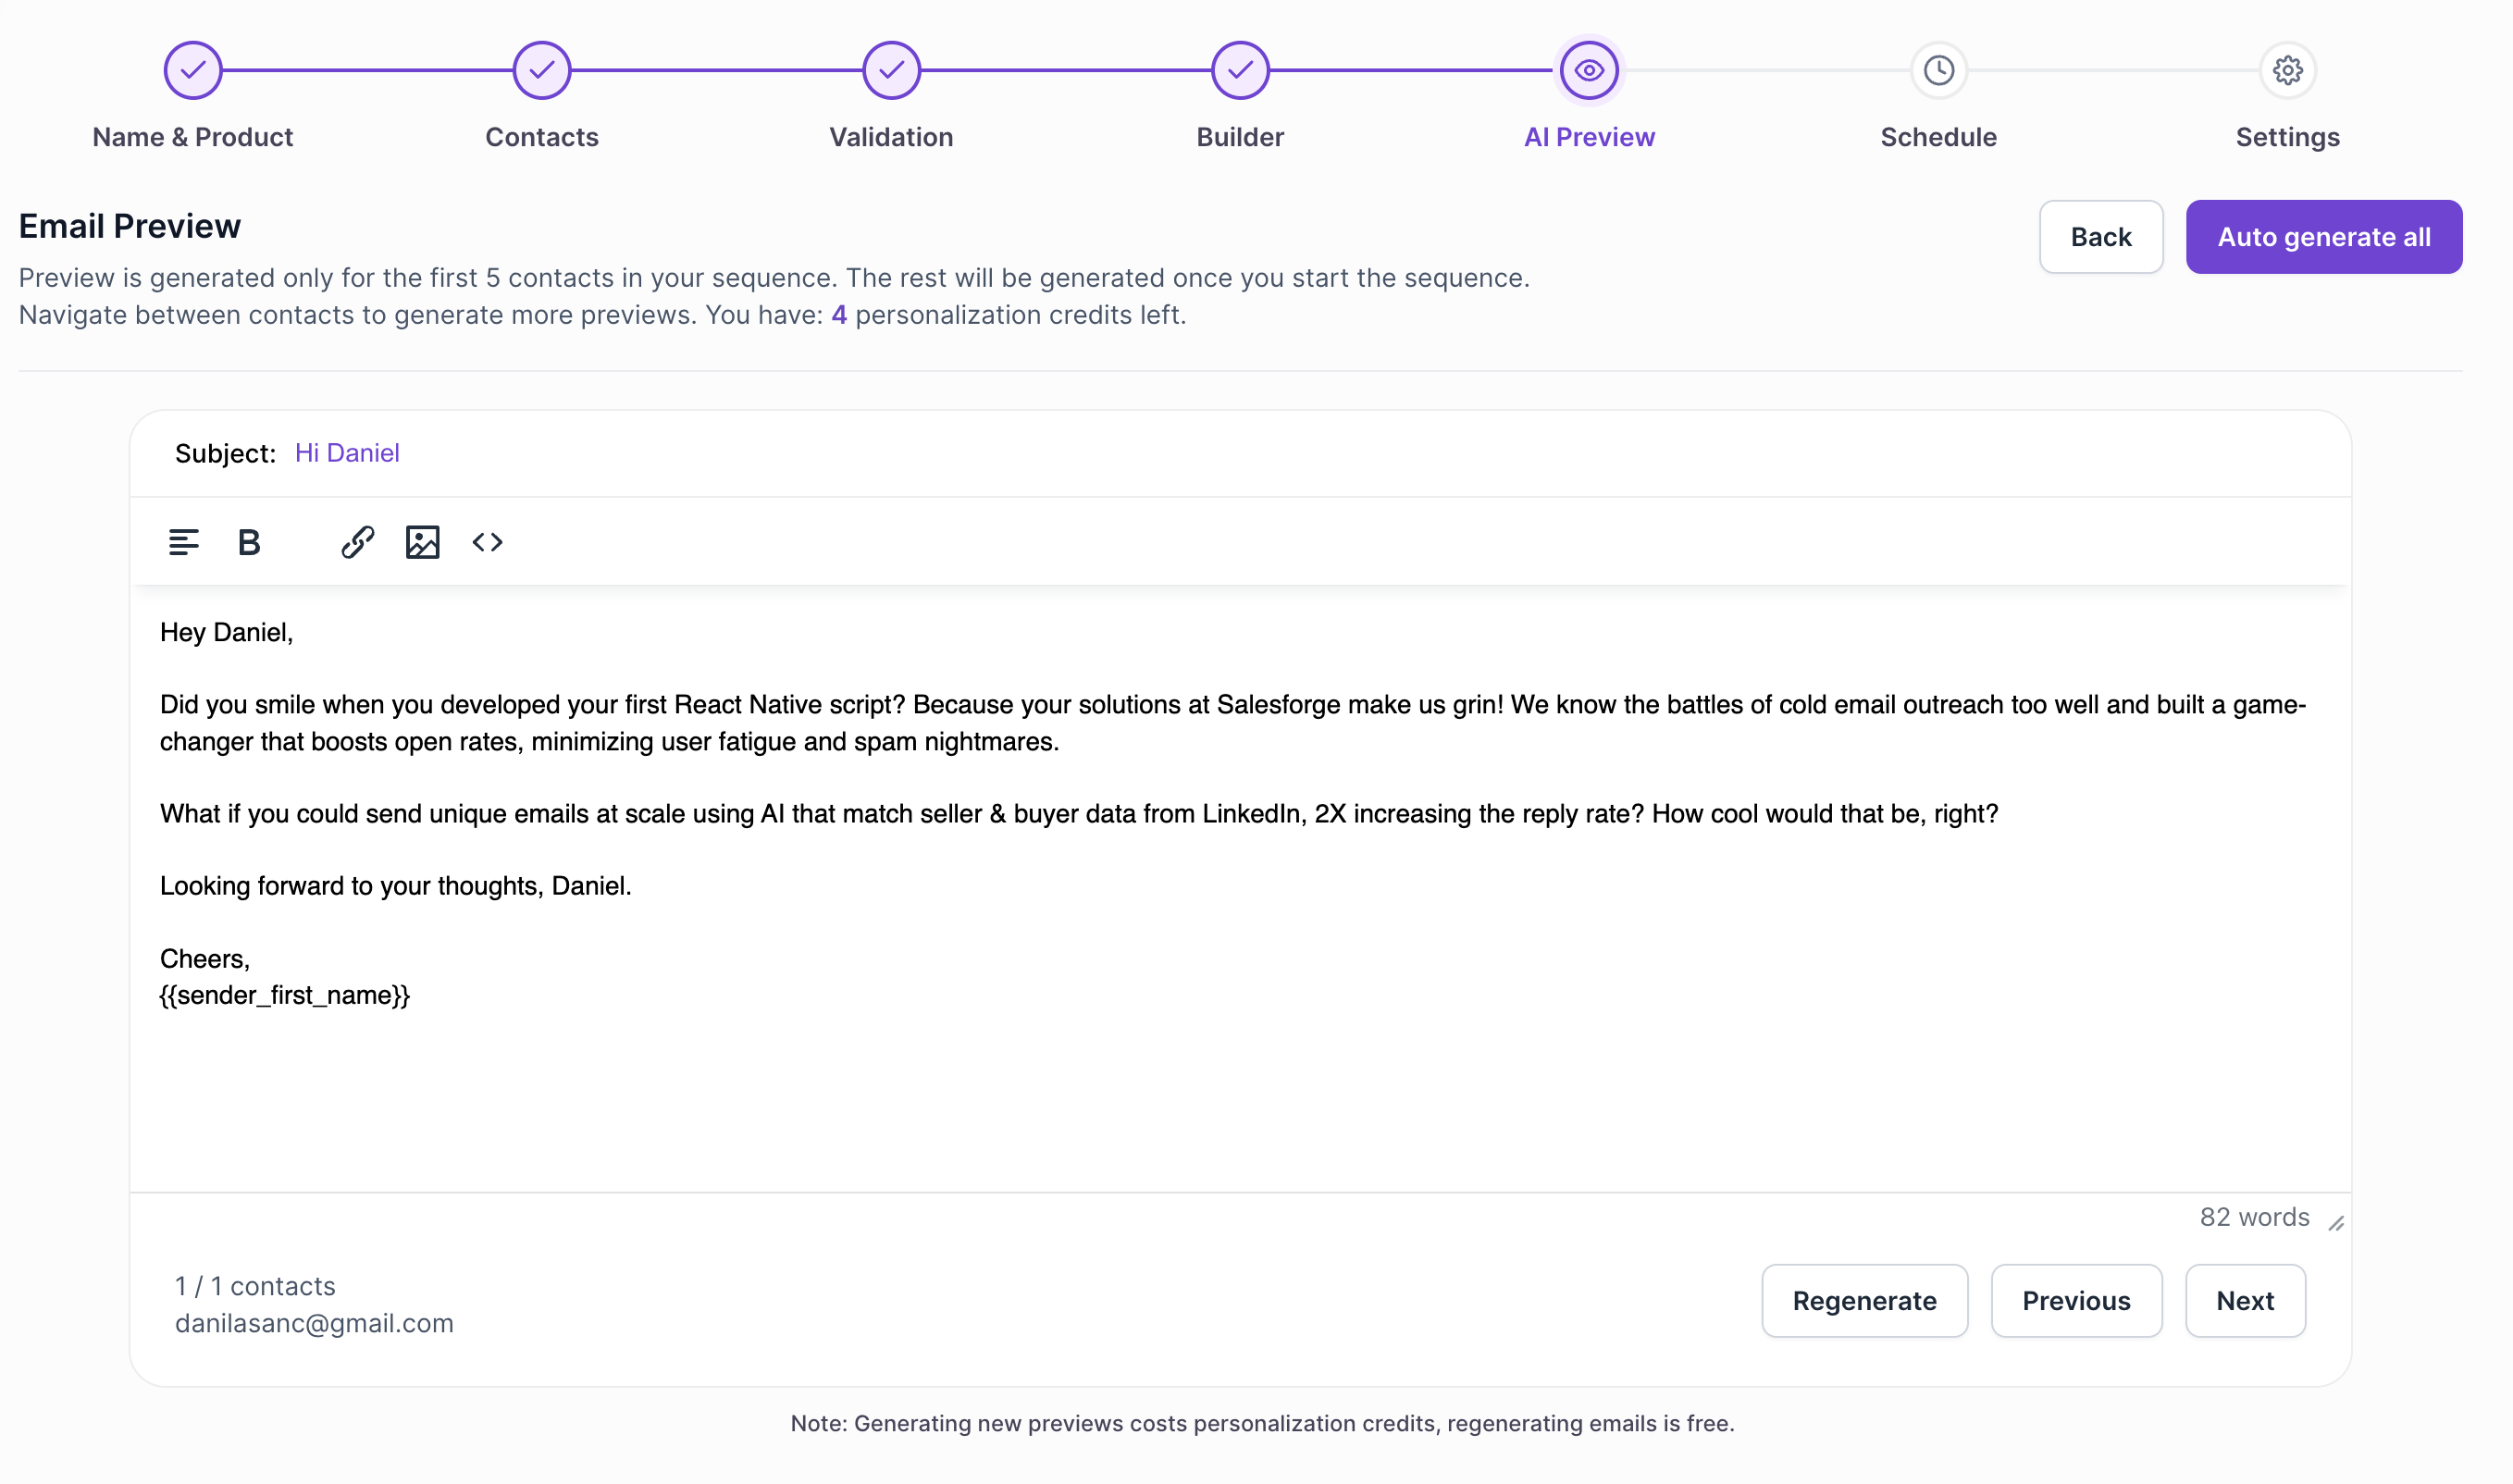
Here you can do a couple of things:
You can adjust any message (keep in mind that those will be saved only when you will click on Autogenerate All. Those where you have made adjustments will not be autogenerated.
You can see all messages by clicking Next and going through them.
You can Regenerate the message for a specific contact.
Regeneration does not cost credits, but clicking Next and generating does.
As you see at the end it also inserted #{{sender_first_name}} variable. This is the variable that is defined as First name in mailbox settings.
On you're done just click on Auto generate all. For the not generated ones it will autogenerated, for the generated ones content will stay as you modified it (if you did).
Step 5 - Schedule
Here you can define on which days and on which hours your contacts will receive emails.
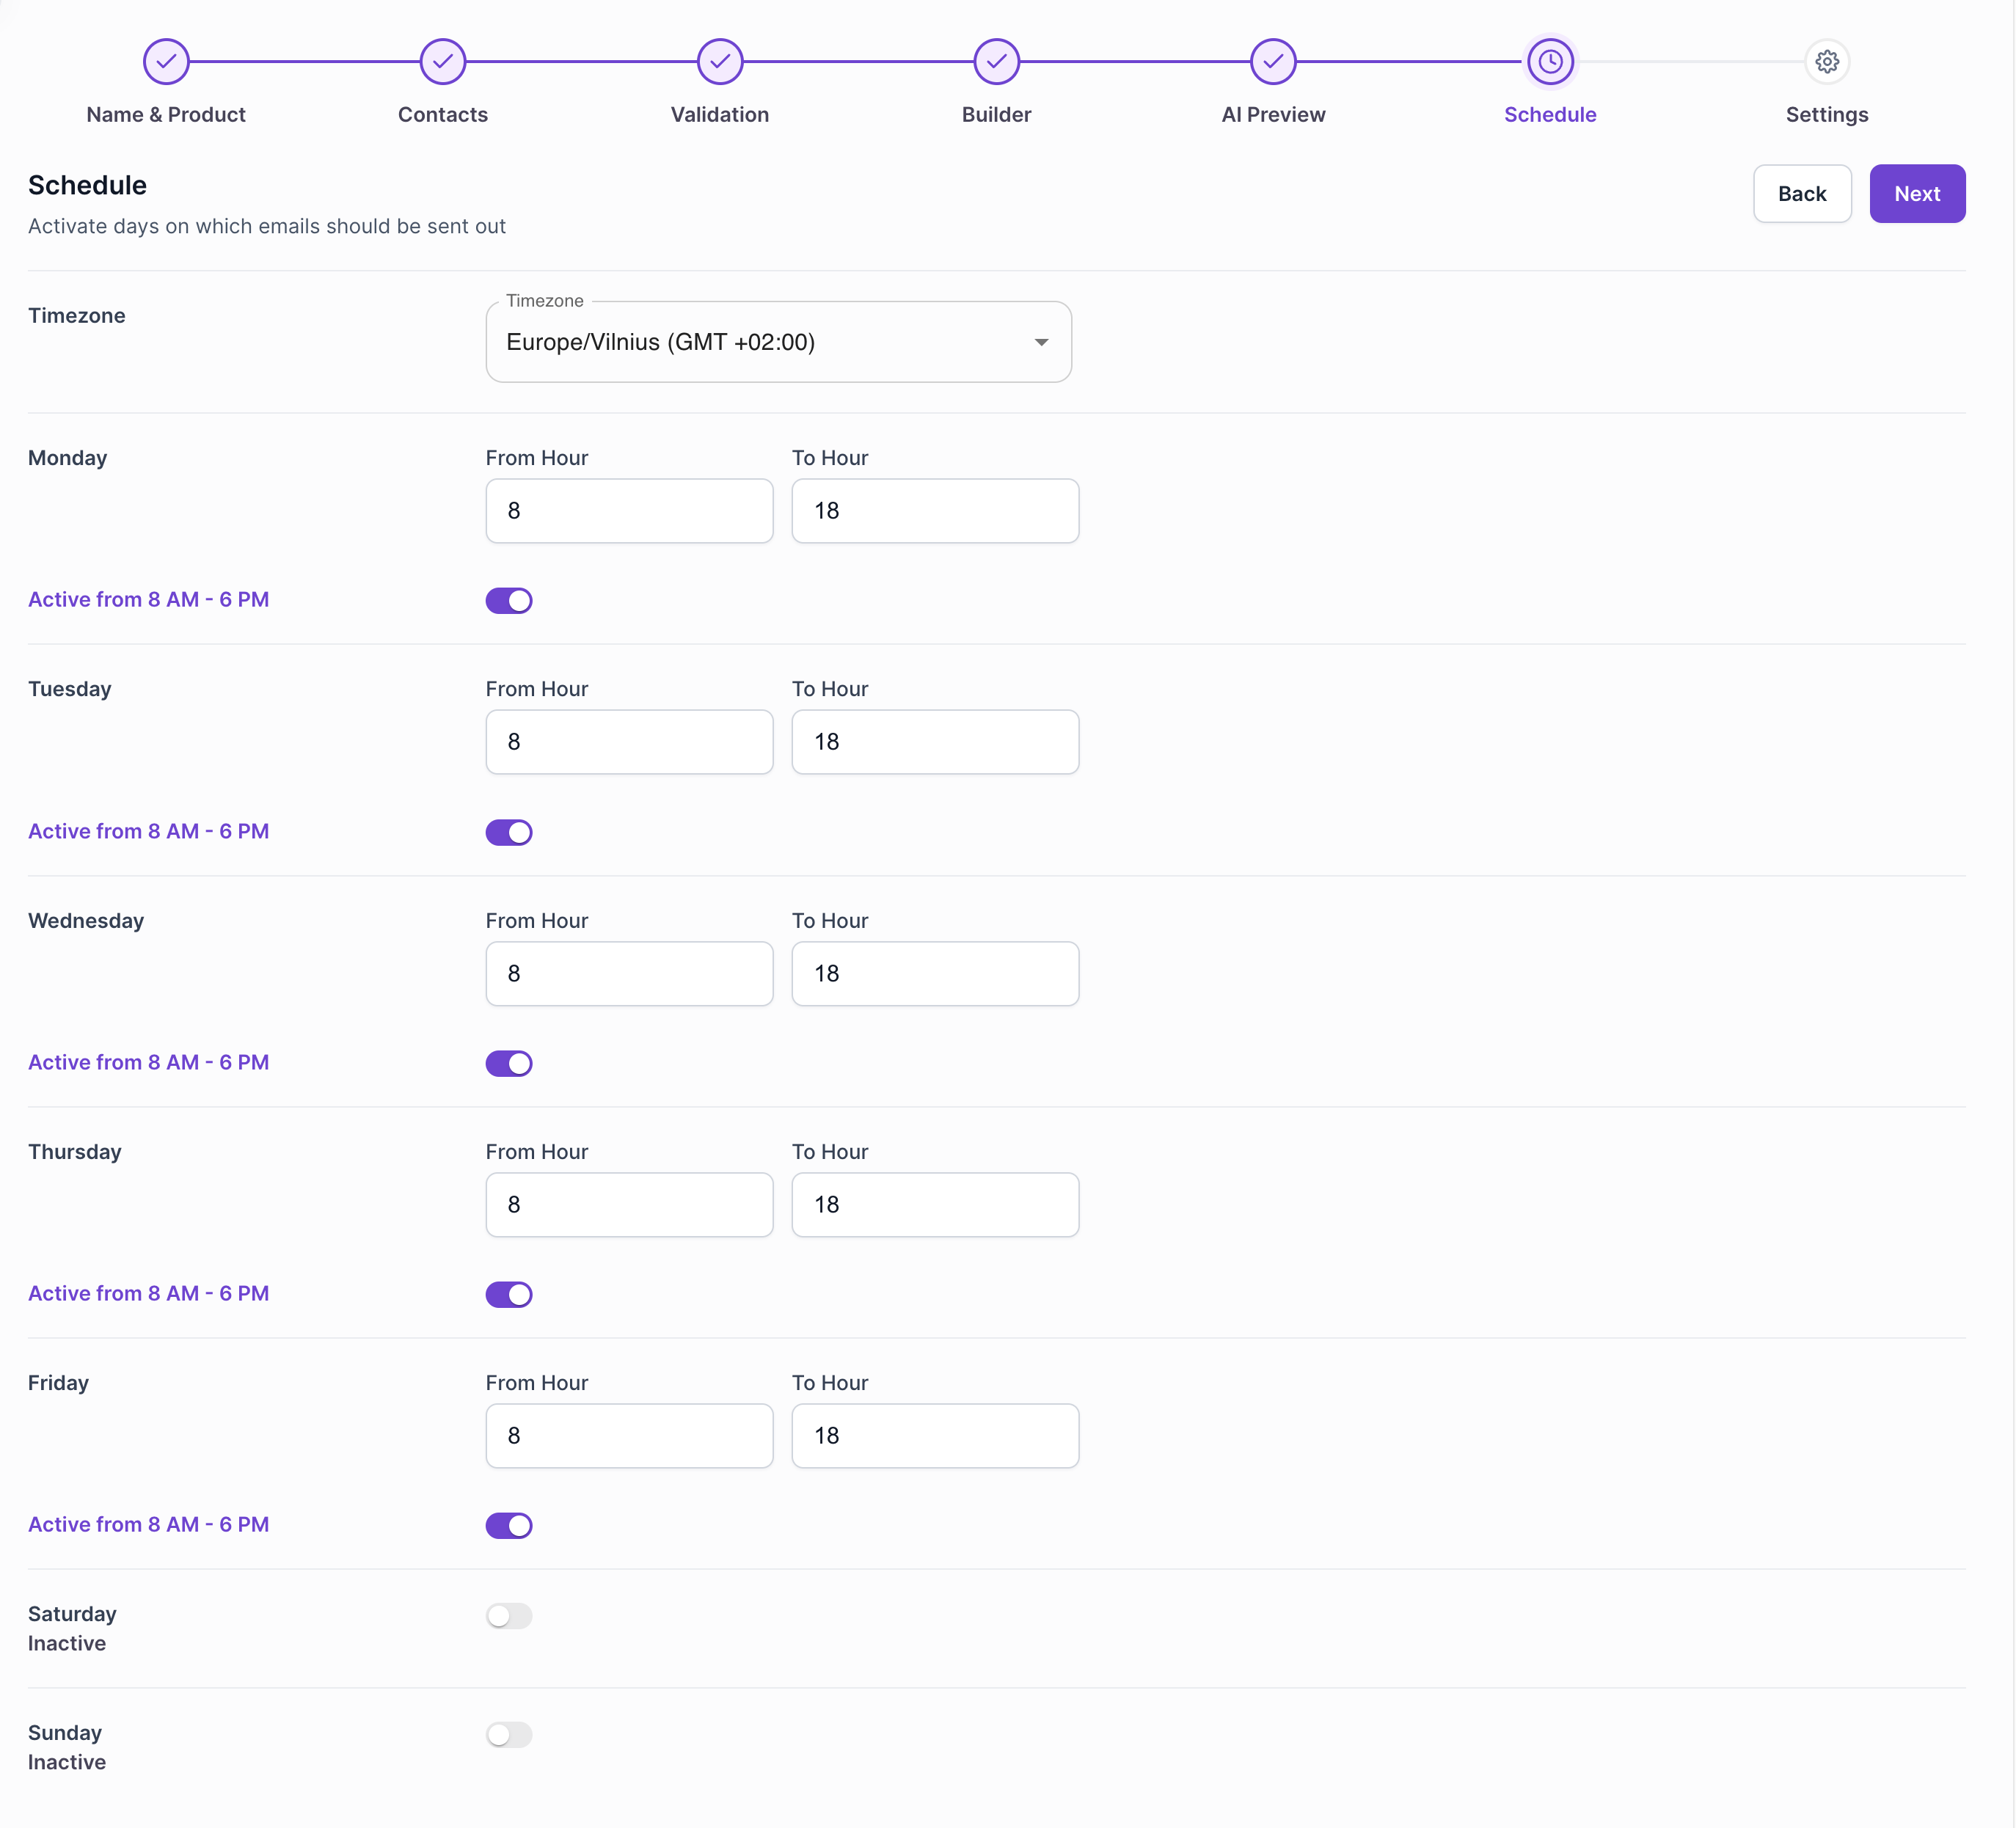
From this screen you can see that contacts will receive emails from 08:00 to 18:00 from Monday to Friday. Saturday and Sunday are disabled.
So when the email is sent depends on multiple factors:
Does the contact have a pending step that should be sent to him today.
Is the schedule for today active for that contact (in Schedule page).
Does any of the mailboxes have enough capacity to schedule an email.
Emails will be sent only inside of these schedules, all of the other scheduling logic depends on the Builder step. This steps only defines when is it allowed to send emails.
One you're done just click Next.
Step 6 - Settings
Here you can see generate sequence settings.
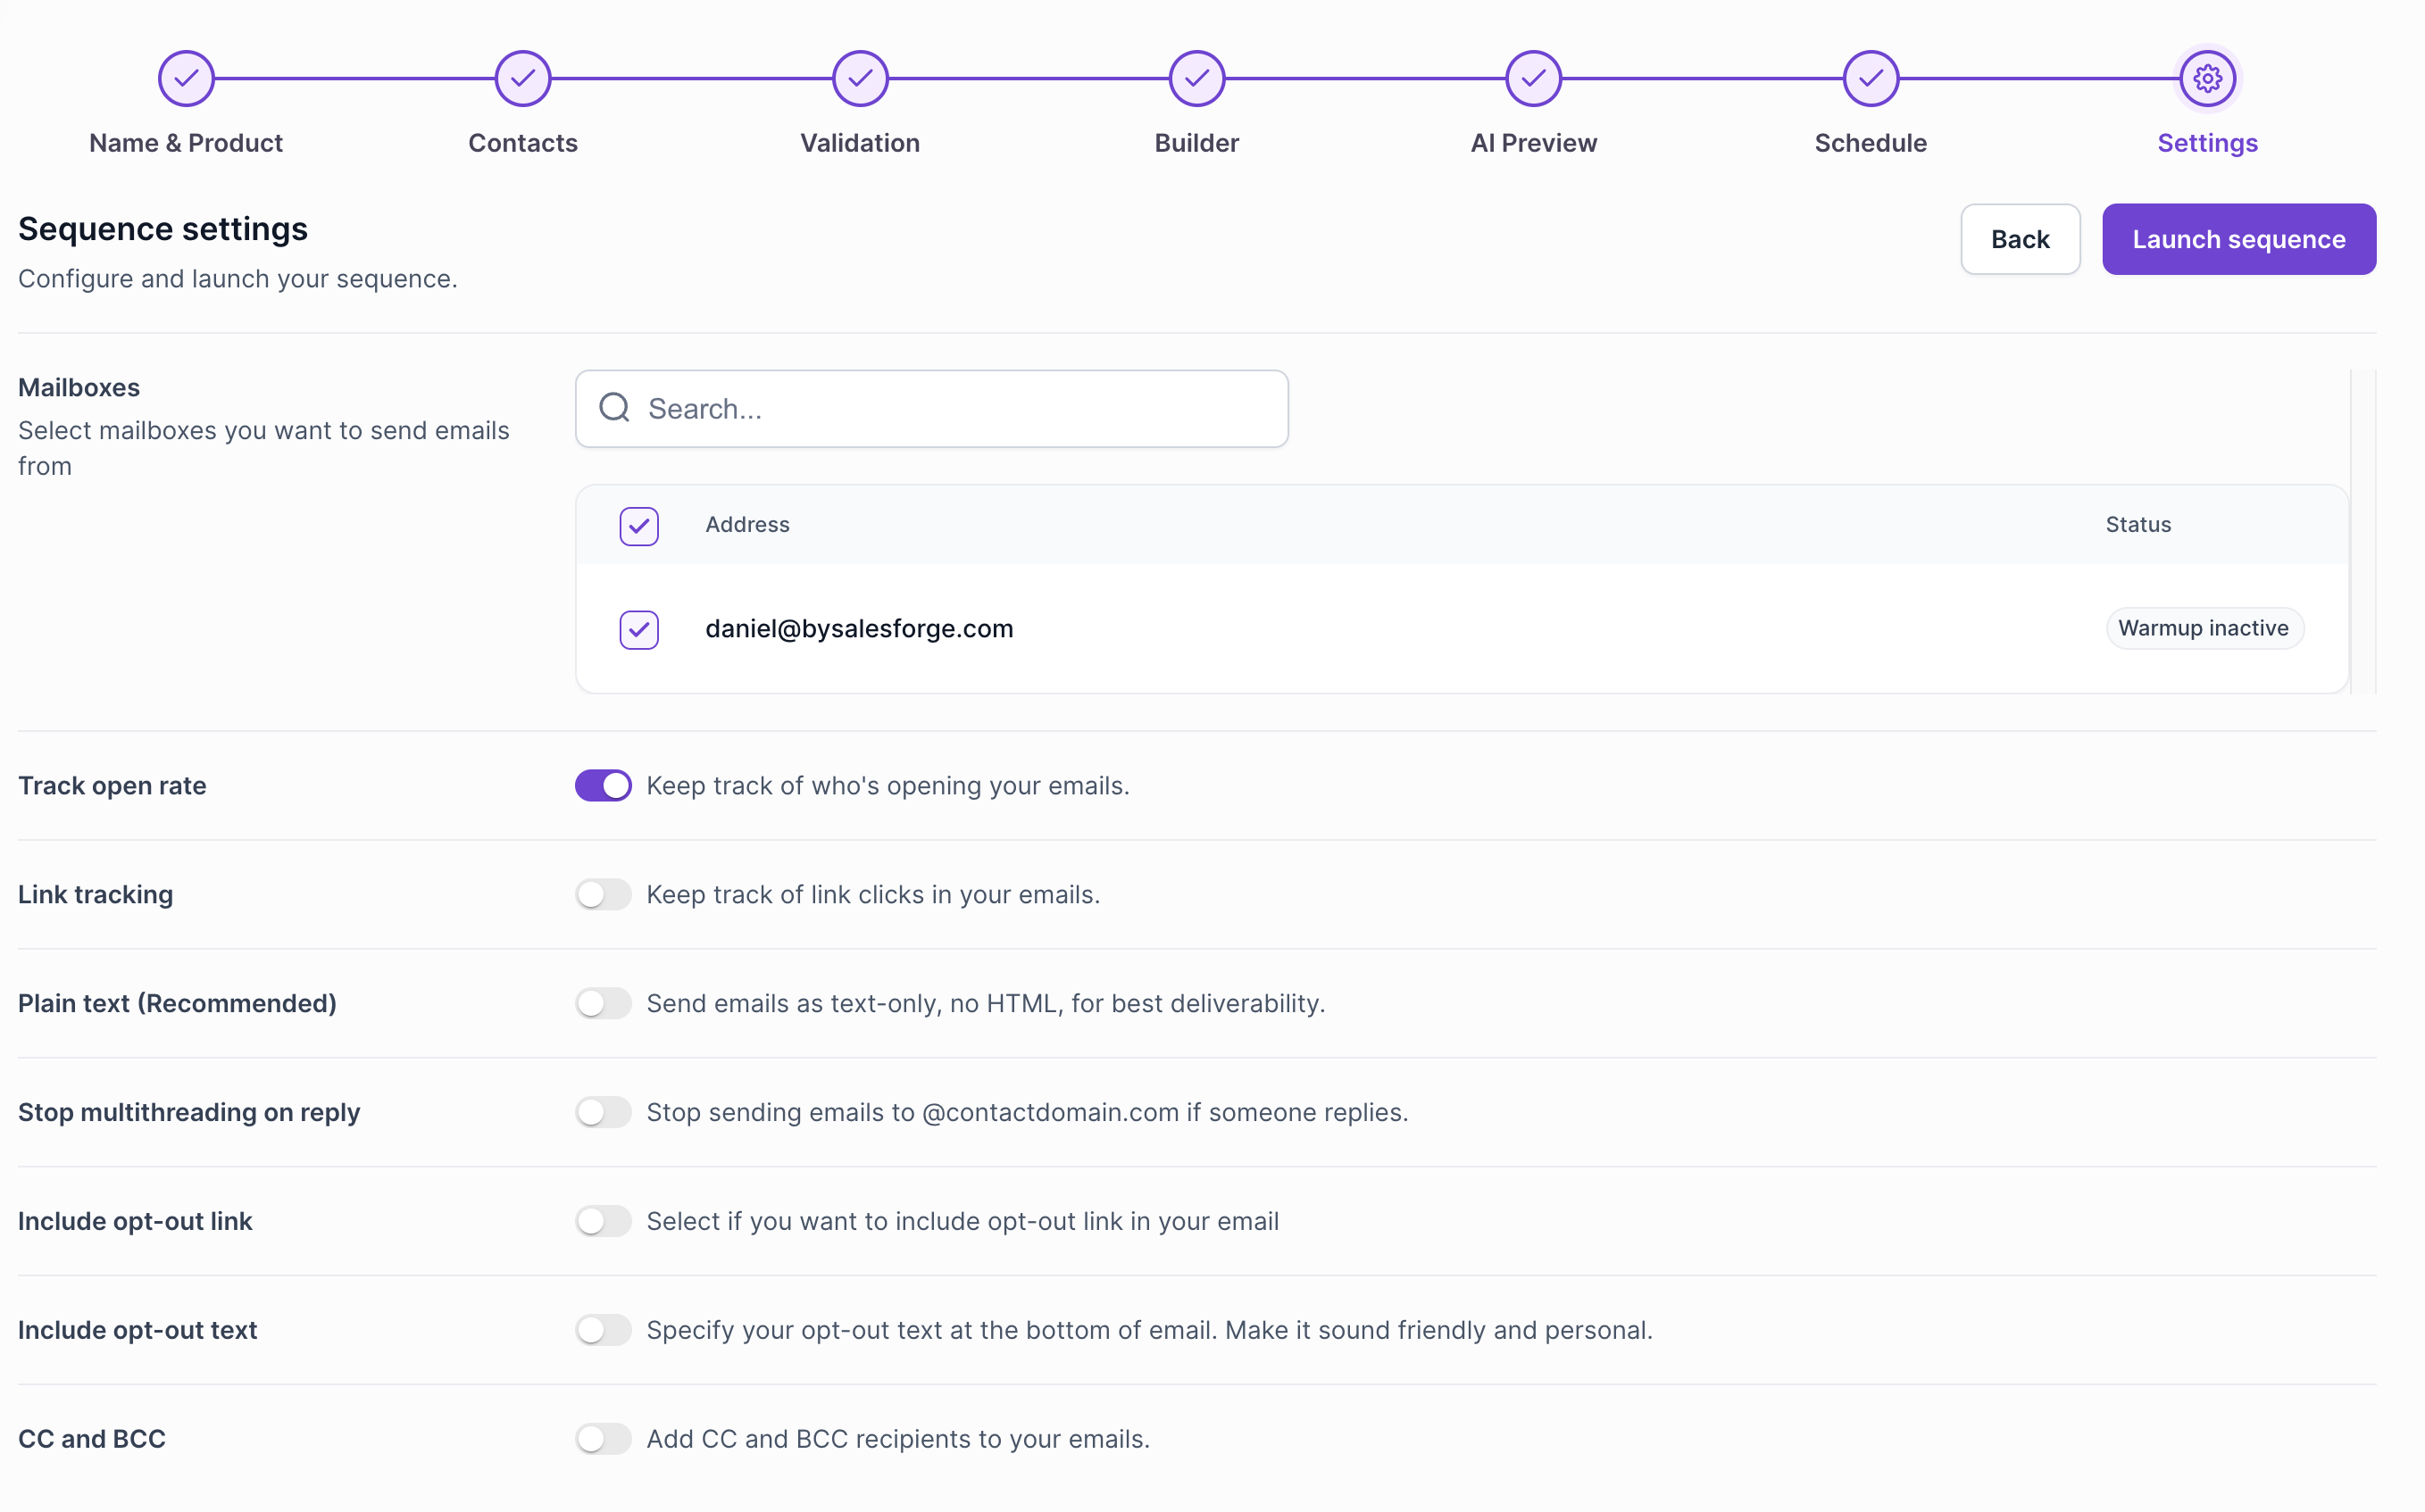
Mailboxes

This defined from which mailboxes emails will be sent. The daily capacity of mailboxes will always be respected. For example if you attach 3 mailboxes to a sequence and each of those mailboxes daily capacity is 30 (this is defined in Mailboxes), it will be able to send 90 emails during one day.
Inbox rotation will be done for each email. For example if there are 30 contacts and 30 mailboxes they will all receive emails from different mailboxes, because mailboxes will be rotated for each email.
We never recommend sending more than 30 emails a day, if you want to send a lot of emails during any day we recommend buying more domains and mailboxes. Best number is 2 mailboxes per 1 domain. You can easily buy set them up in under 5 minutes using Mailforge (https://mailforge.ai/).
Track open rate

Setting this on will track open rates by placing a small invisible image in each of the emails. You will then be able to see the open rate inside of sequences page. Here is how it would look like in sequence page:

If open tracking was disabled it would not show the number.
If contact opens the email multiple times you will be able to see it in the Sequence progress page in Contacts tab. Here the contact opened 7 times:
Keep in mind that in our industry Open rate is not always precise because some email clients are scanning images and it can track it as an open even though contact did not open the email.
For best deliverability - keep open rate disabled.
Link tracking

If link tracking is enabled - similarly to open rate the the clicks will be tracked by replacing links with our tracking links.
Plain text (Recommended)

Plain text emails means that there will be no HTML inside of the emails. Be careful if your email contains a lot of HTML because it will be stripped. For example images will be removed from the email.
Links will be converted into their plain form. Instead of Click here it will be just https://your.link.
This gives a boost in deliverability.
Stop multithreading on reply

If in your sequence you have [email protected] and [email protected] if Sarah replies, John will not receive the email because somebody from that company by domain has already responded.
Include opt-out link

This option adds an unsubscribe link which when clicked redirects to page with text "Opted out successfully!" and the person will be put into DNC (Do not contact) list which can be controller in Settings > DNC list. He will also be stopped for this sequence.
Customize opt-out link means customising the text of the link. Link will be the same.
Include opt-out text
Either opt-out link or text can be chosen, not both. If you choose the opt-out text you can just define what text to show to instruct the user how to opt out. It will not be a link, just text.
CC and BCC
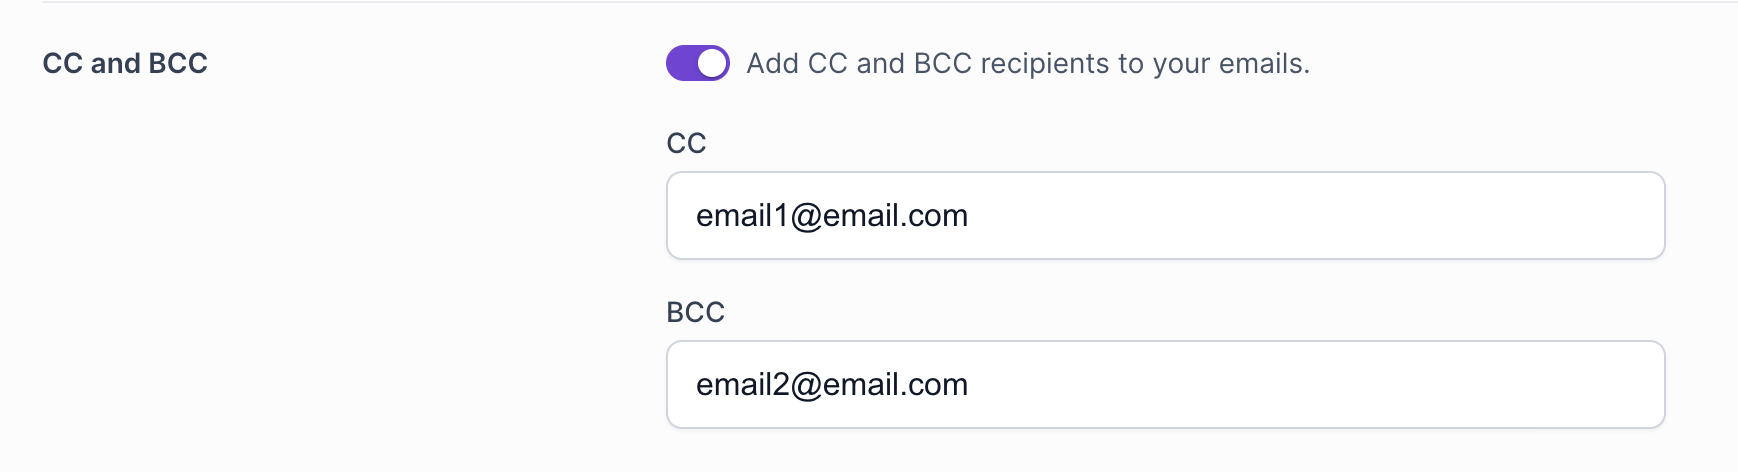
This adds CCs and BCCs to each email sent.
Once you're done with the settings you can click on Launch sequence.
Your new sequence will be scheduled as much as possible instantly, but the full scheduling will happen only on next day, more specifically at 00:00 UTC. This is done because scheduling is a complex operation where your emails are scheduled to mimic real human behaviour giving enough intervals between each emails for each mailbox.