Efficiently managing your sales sequences is crucial for maximizing outreach success.
Here is the correct process for adding leads to an ongoing sequence in Salesforge, including leads who are already enrolled in another sequence, so you can do this without disrupting your outreach.
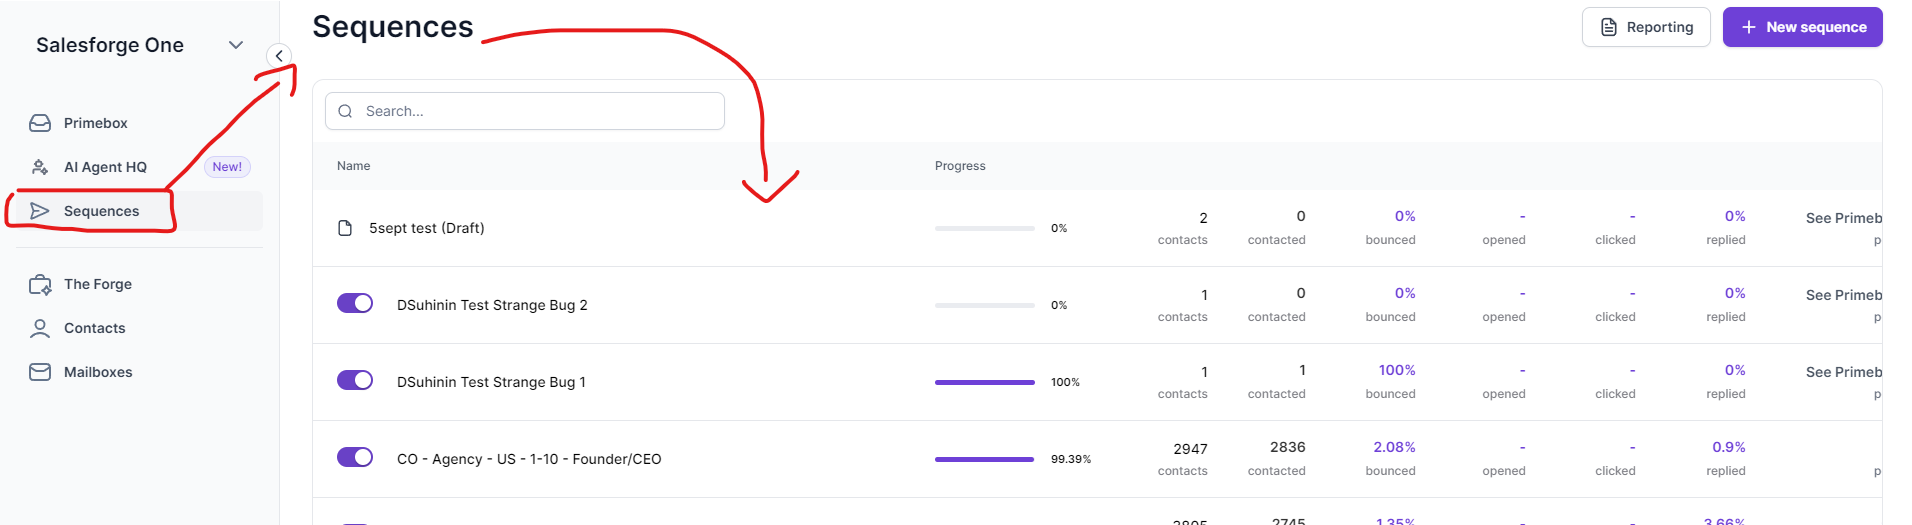
Access the Active Sequence
Log in to Salesforge and locate the sequence you want to modify. Make sure you are working on the correct sequence to avoid unintended changes.
2. Edit the Sequence
Once inside the sequence, click on the Edit Sequence button in the top right corner to make changes.
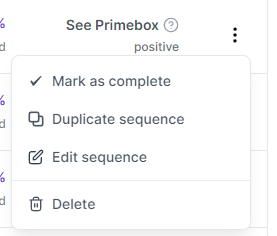
3. Add Contacts
Go to the Contacts Step: Inside the sequence builder, navigate to the contacts step.
Select Contacts: Click Add Contacts and select the contacts you want to include, even if some of them are already enrolled in another sequence. You no longer need to remove them from that sequence first.
Update Sequence: Once the contacts are selected, add them and update the sequence.

4. Contacts already enrolled in another sequence
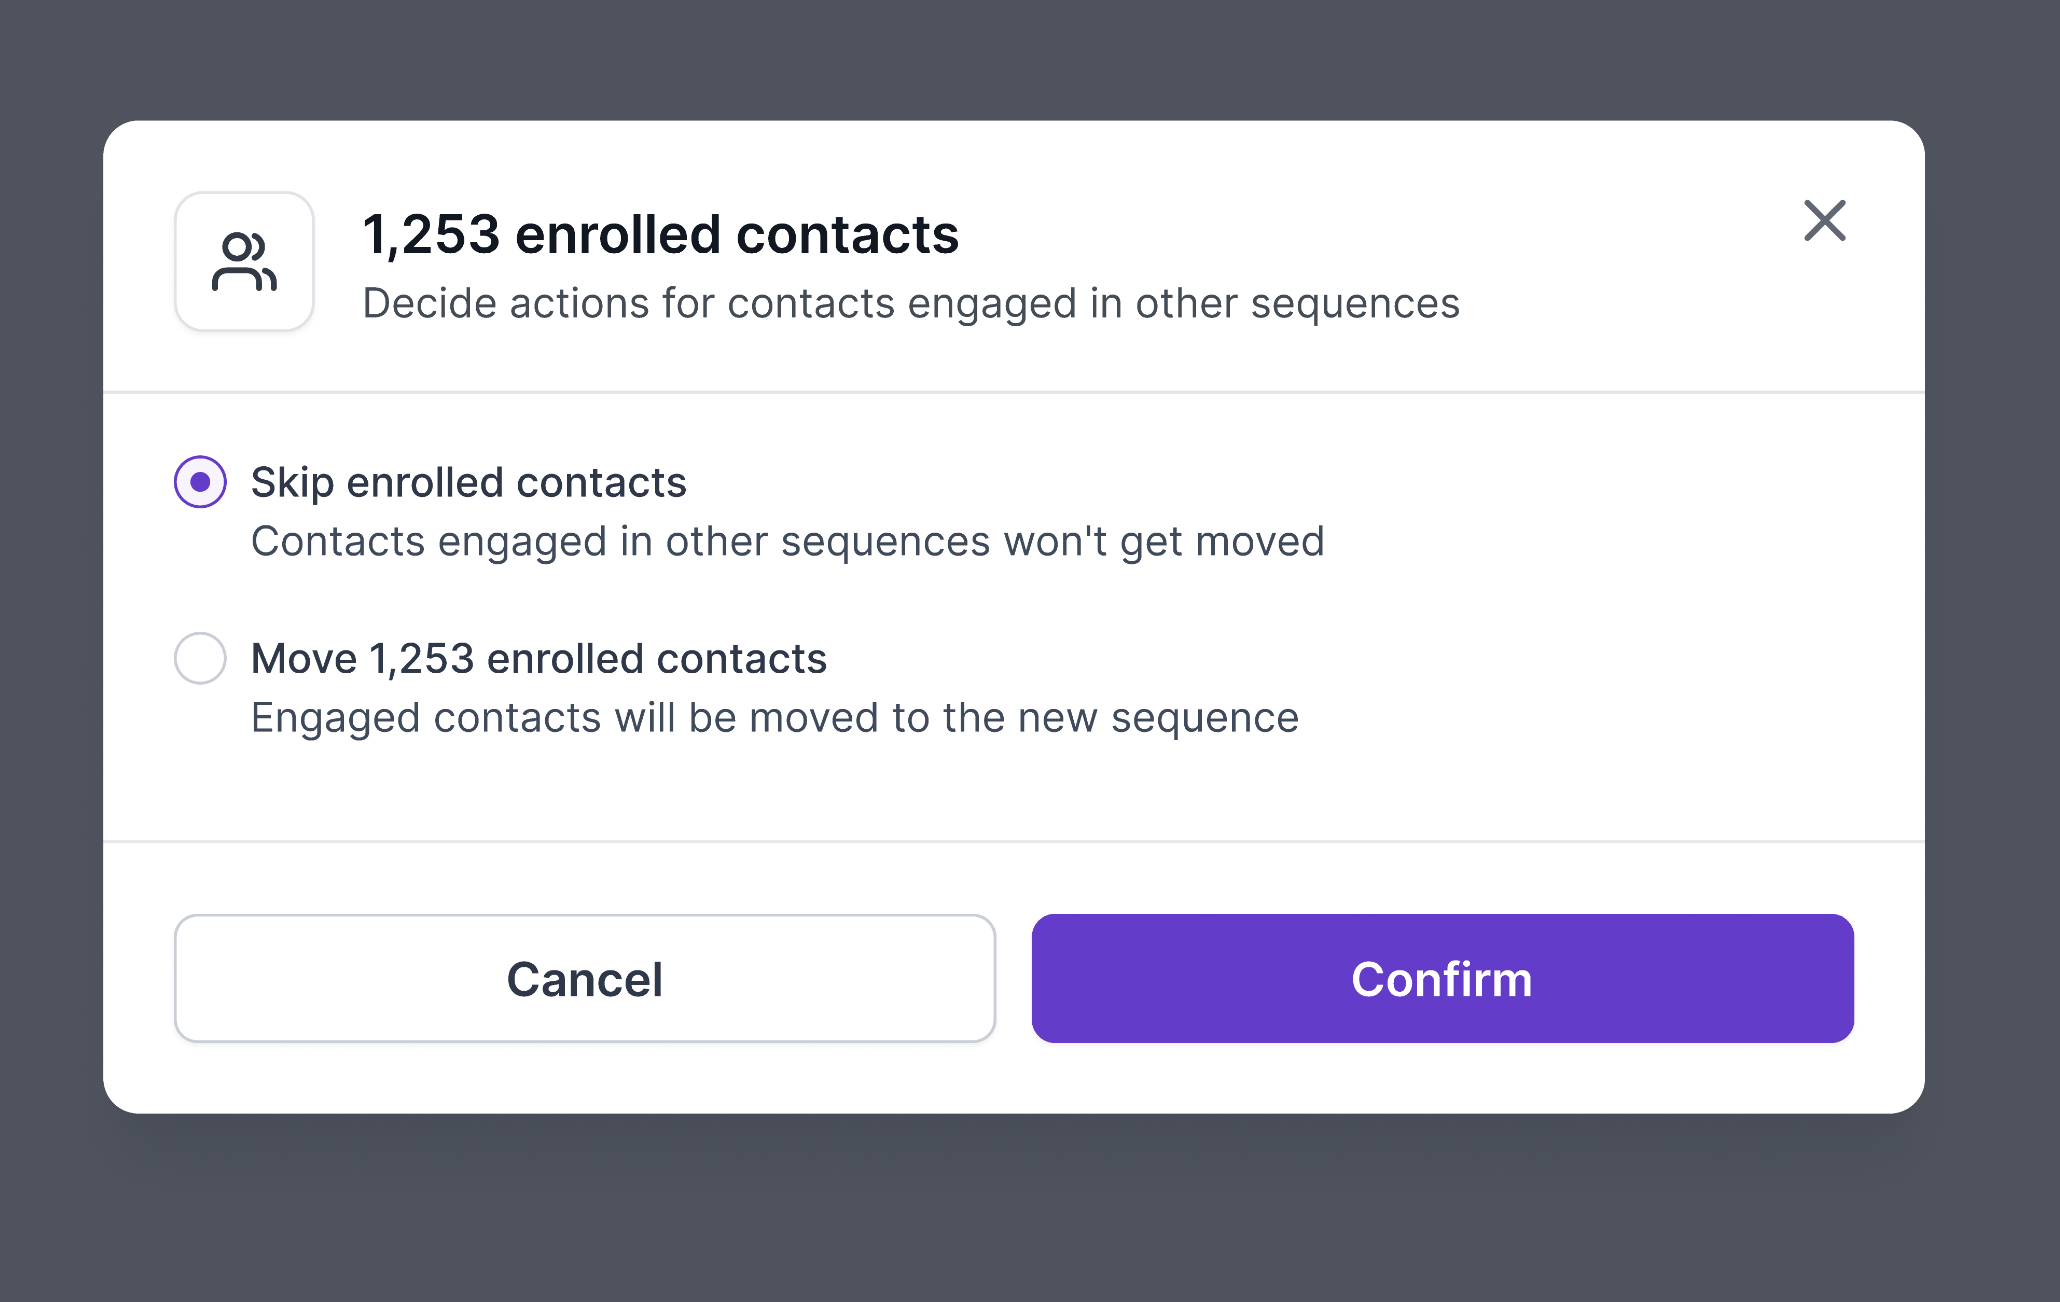
When you select contacts to add, Salesforge checks whether any of them are already enrolled in another sequence. If it finds any, a dialog opens asking you to decide what should happen to those contacts before you can continue.
Skip: only contacts that can be enrolled without changing their existing sequence progress get added. Contacts engaged elsewhere stay exactly where they are in their current sequence.
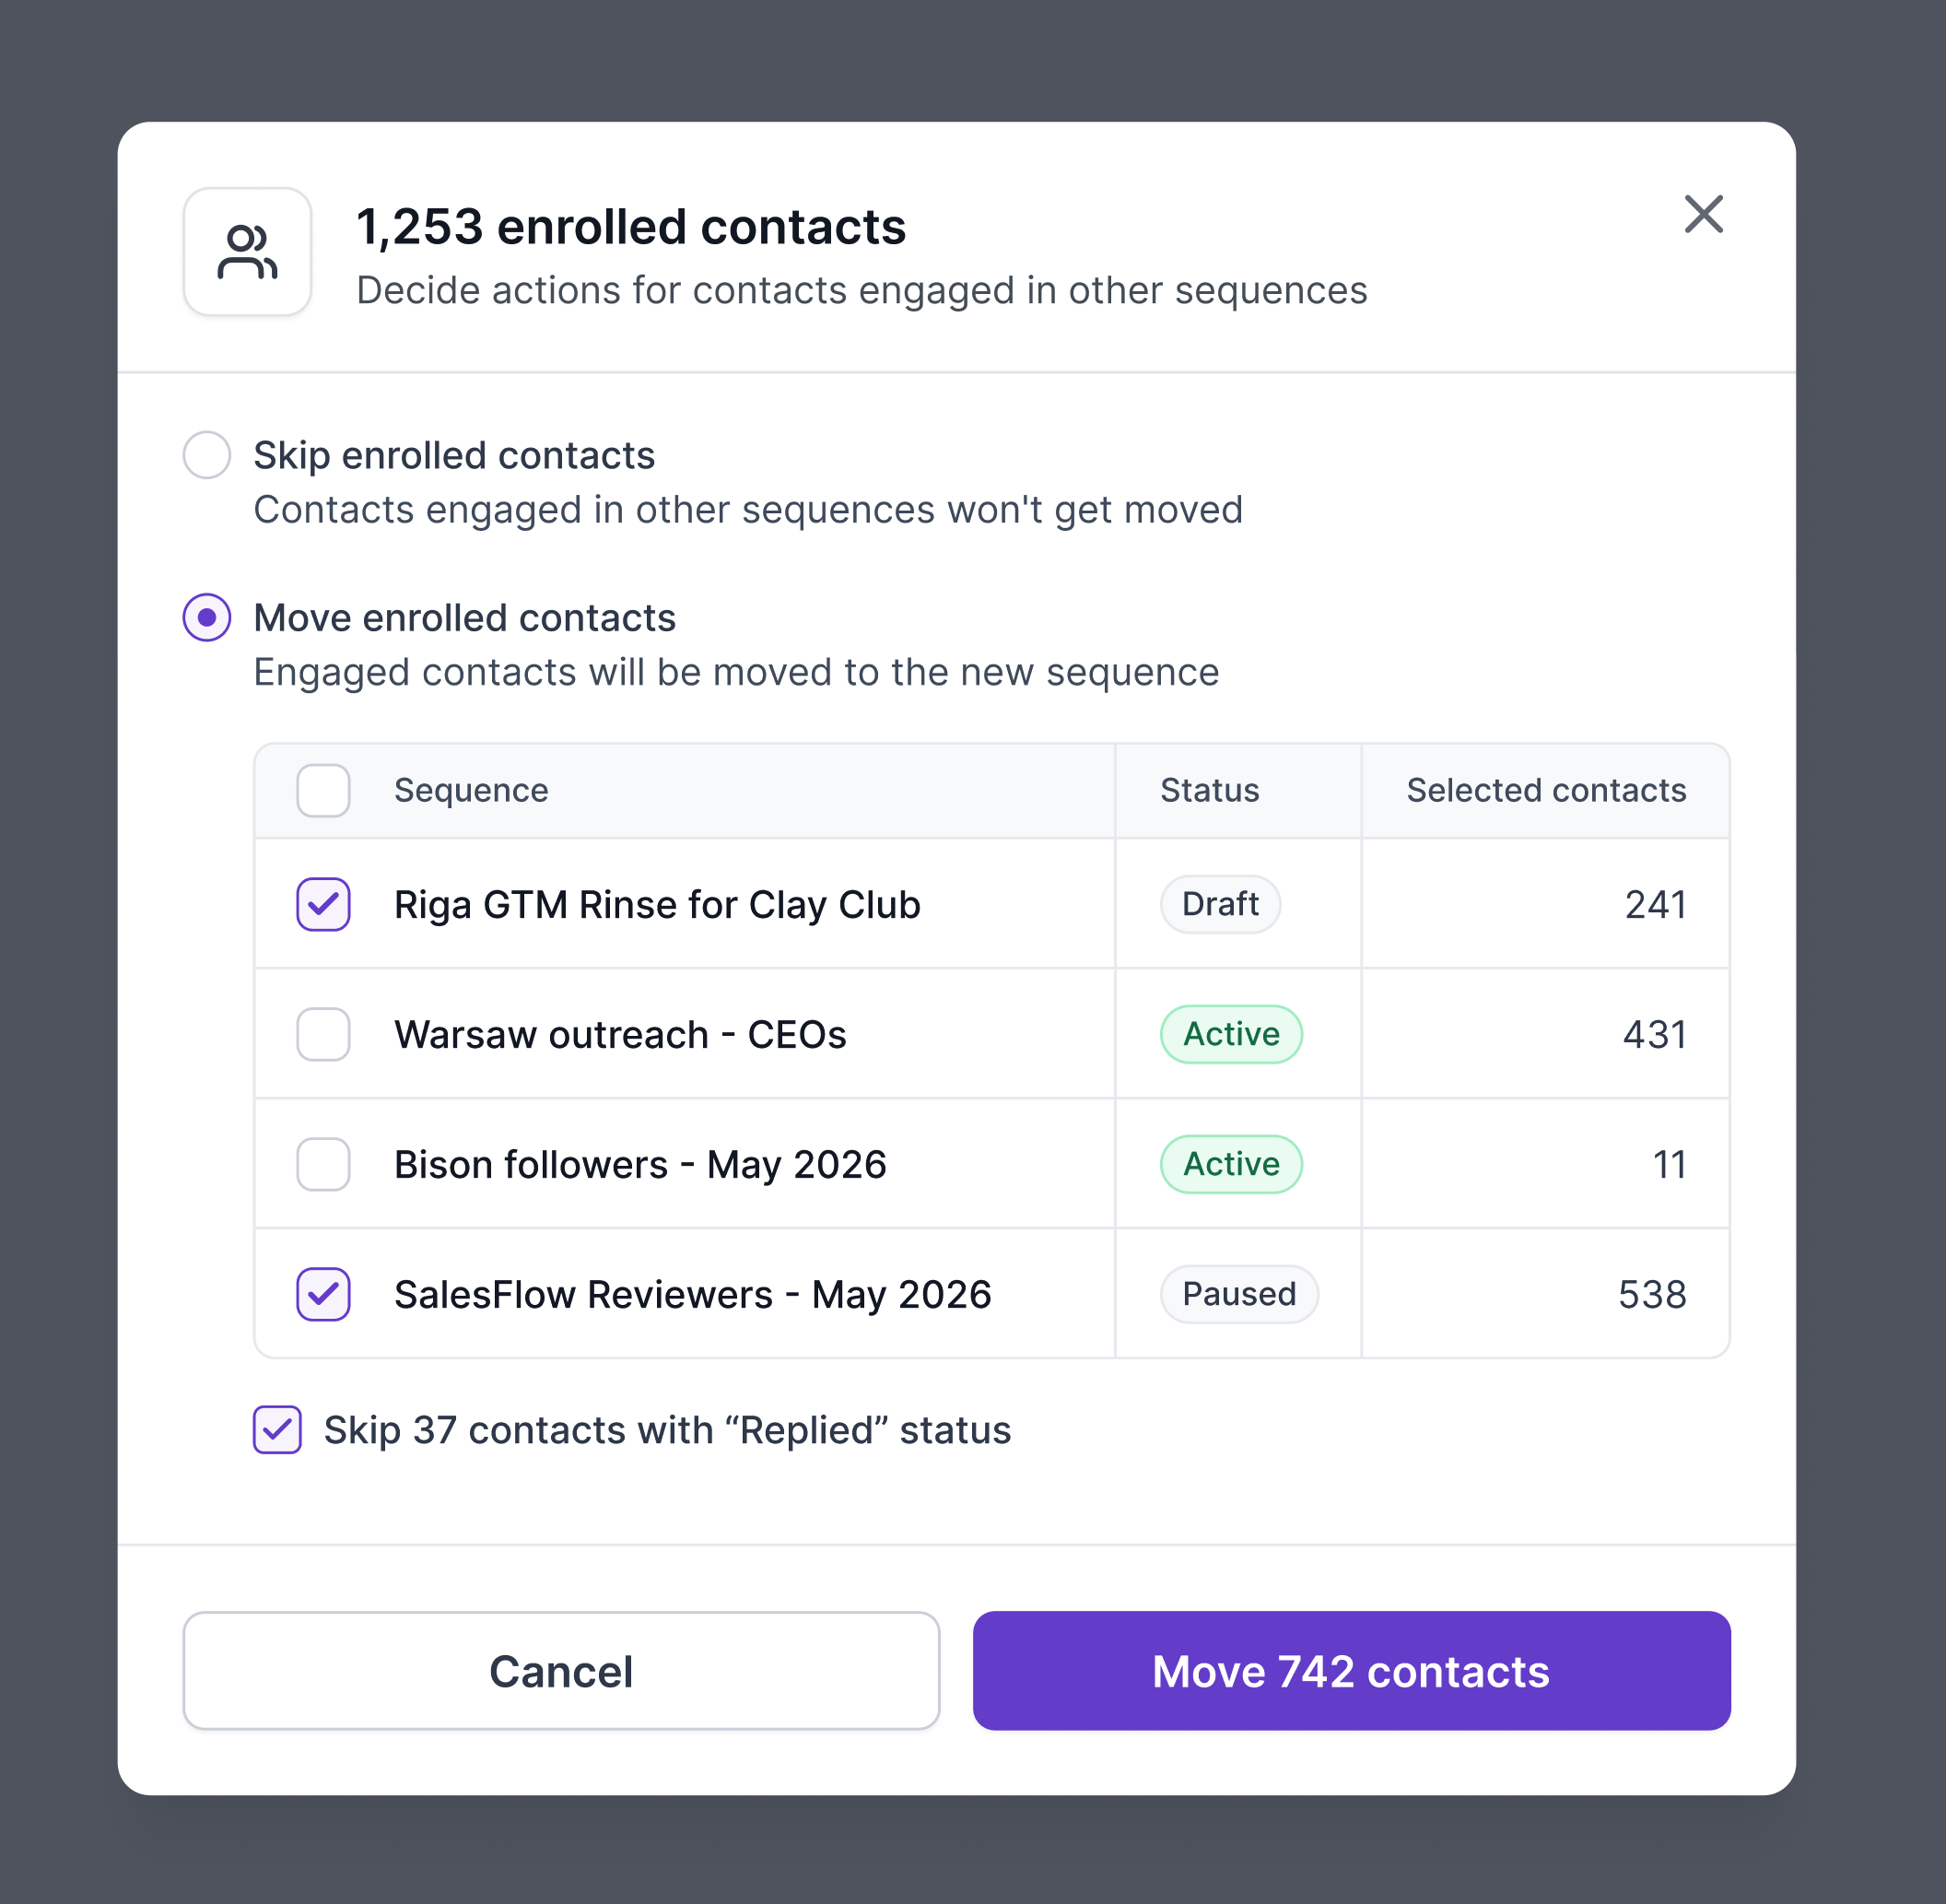
Move: eligible contacts move into the new sequence. Their future outreach in the previous sequence stops automatically where needed, and their completed steps and activity history are preserved.
If you choose Move, you can also pick which of the contact's current sequences they should be moved out of, and choose to skip contacts that already have a Replied status so that status is not disturbed.
If something about a contact's enrollment changes between opening this dialog and confirming it, Salesforge refreshes the confirmation with the latest numbers instead of making you start the selection over. Safeguards also prevent two conflicting enrollment actions on the same contacts from running at the same time.
5. Impact on the Sequence
New Leads: they begin at step one of the sequence and progress through the normal workflow.
Existing Leads: leads already in this sequence continue from their current step without restarting, and paused leads resume from where they left off.
Leads enrolled in another sequence: handled according to the Skip or Move choice you made in the enrollment dialog described above.
Suppressed contacts: contacts on your Do Not Contact list, unsubscribed contacts, and other suppressed contacts remain suppressed. Adding them to a new sequence will not restart outreach to them.
Bounced contacts: can be enrolled into the new sequence while their previous enrollment stays untouched.
Replied contacts: can be added without changing their existing replied status.
Completed contacts: can be re enrolled without affecting their previous sequence history.
Duplicates: contacts enrolled in multiple sequences are handled correctly and will not create duplicate entries.
Analytics: when a moved contact has not completed or replied yet, their record in the old sequence is marked completed so historical analytics stay accurate.
Sequence Adjustments: any changes to the sequence structure, such as modifying steps or timings, affect all leads, both new and existing, depending on when they encounter those steps.
6. Activate and Monitor
After adding or adjusting contacts, make sure to update and activate the sequence for the new entries. Use Salesforge's analytics to monitor performance and make adjustments as necessary to ensure the sequence operates smoothly.
By following these steps, you can manage and re enroll contacts across sequences in Salesforge while keeping existing sequence progress, suppression rules, and outreach history safe.
Note: this article is currently in draft while screenshots for the new enrolled contacts dialog (step 4 above) are added. The dialog screenshots referenced in this update come from the Aug 7, 2026 product announcement in Slack. The images used in steps 1 to 3 are the original screenshots from this article and may also need to be refreshed if they no longer load.