
To add Mailforge nameservers in GoDaddy, you'll need to update the domain's DNS settings. Here's a step-by-step guide:
1. Log in to Your GoDaddy Account
- Go to the GoDaddy website and log in with your credentials.
2. Access Your Domain Settings
- Once logged in, navigate to your 'My Products' section.
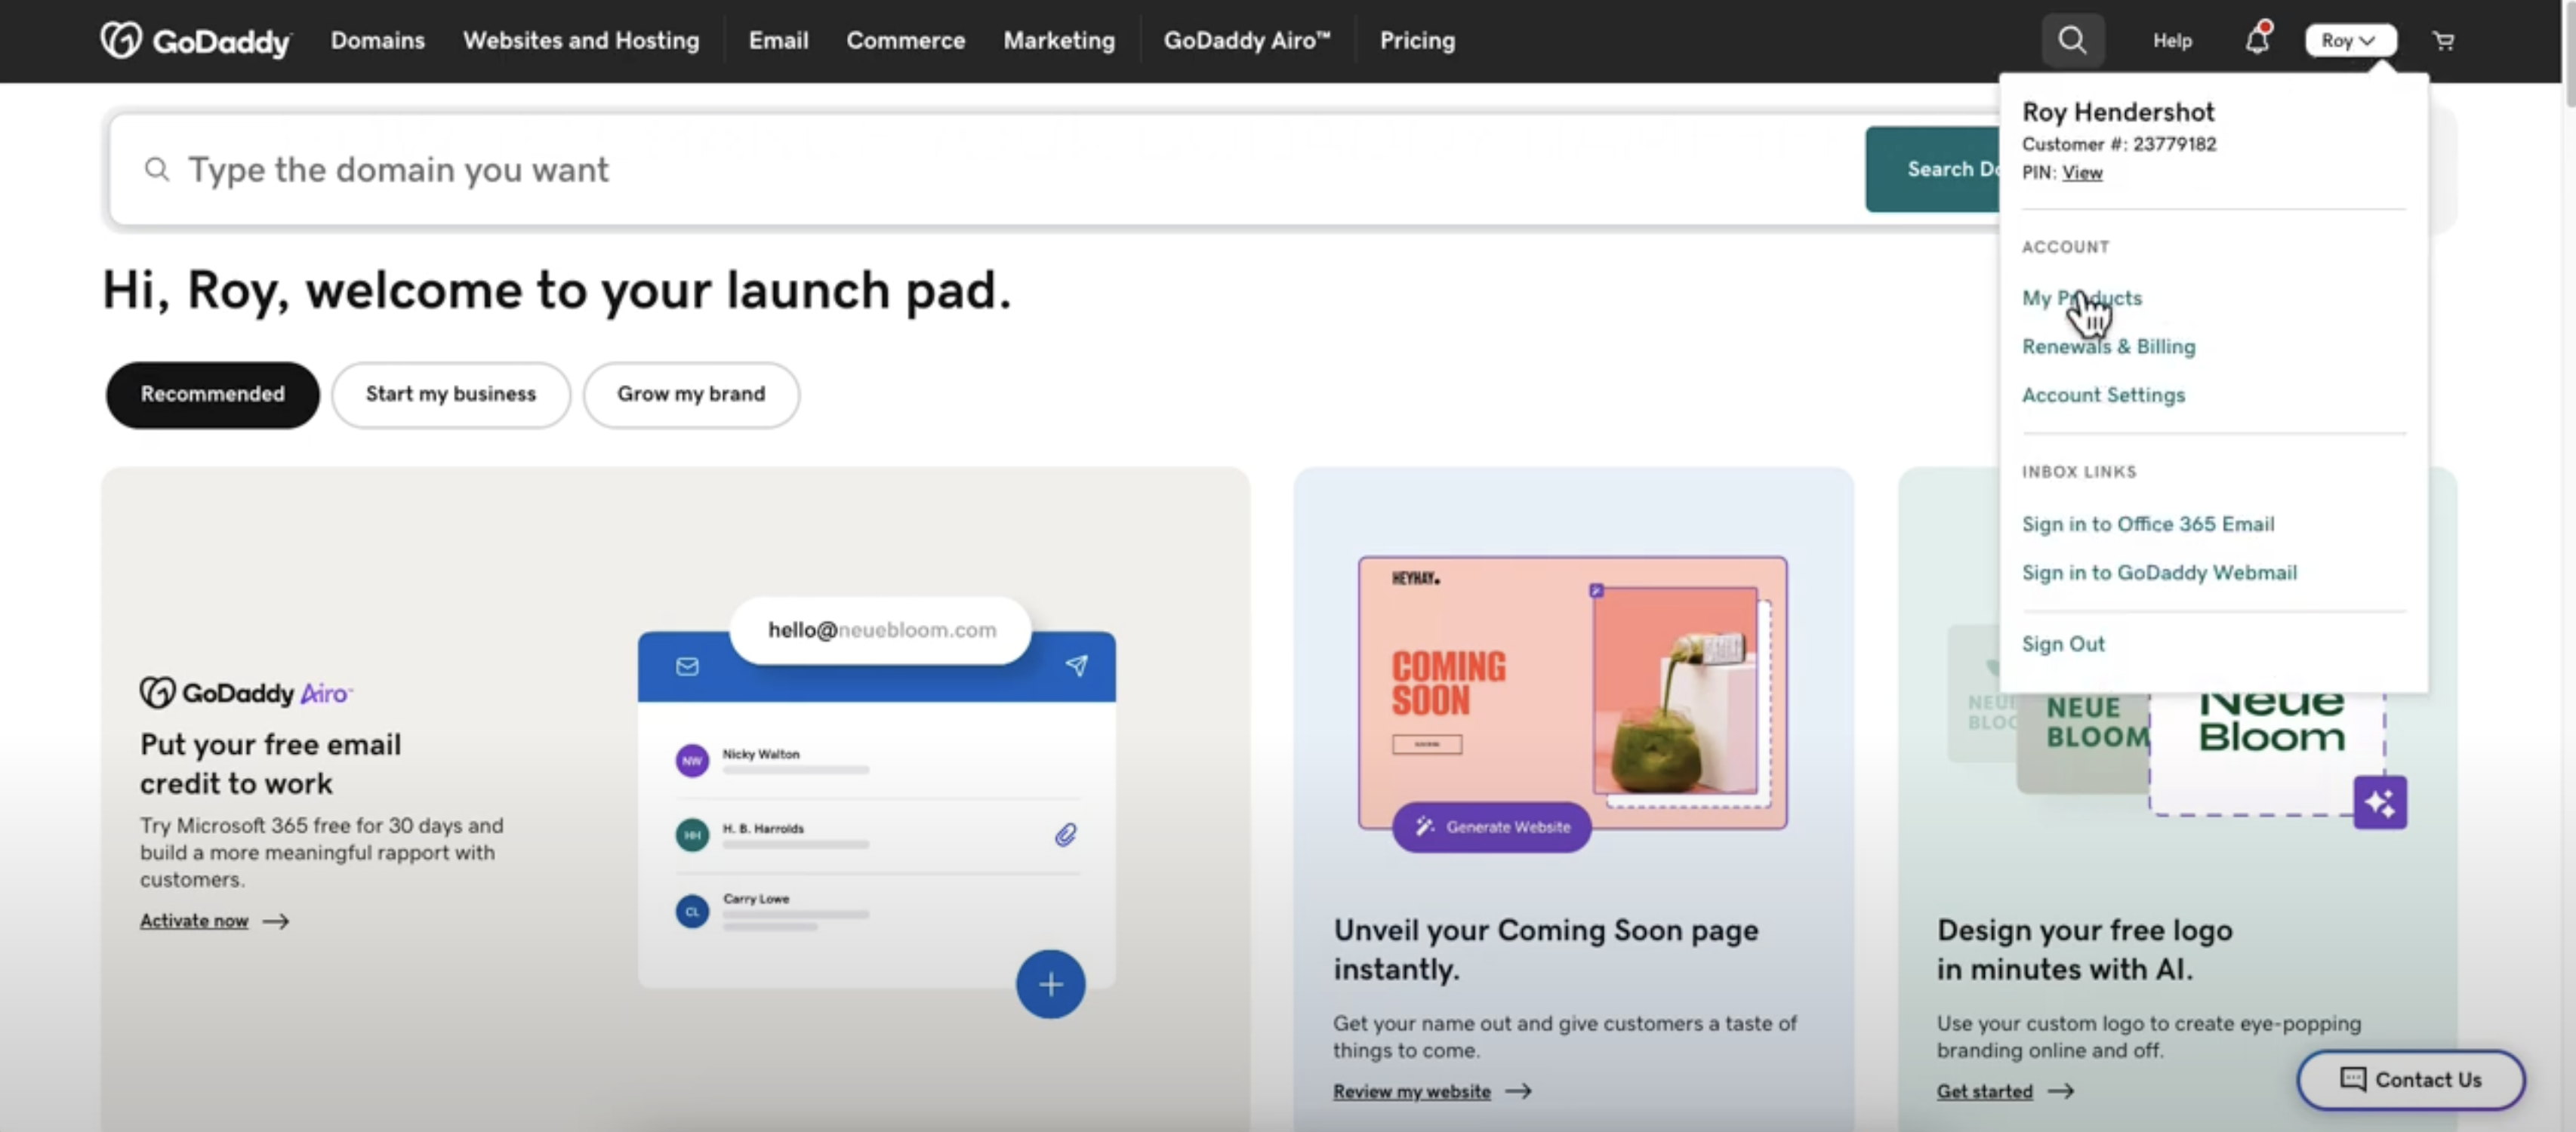
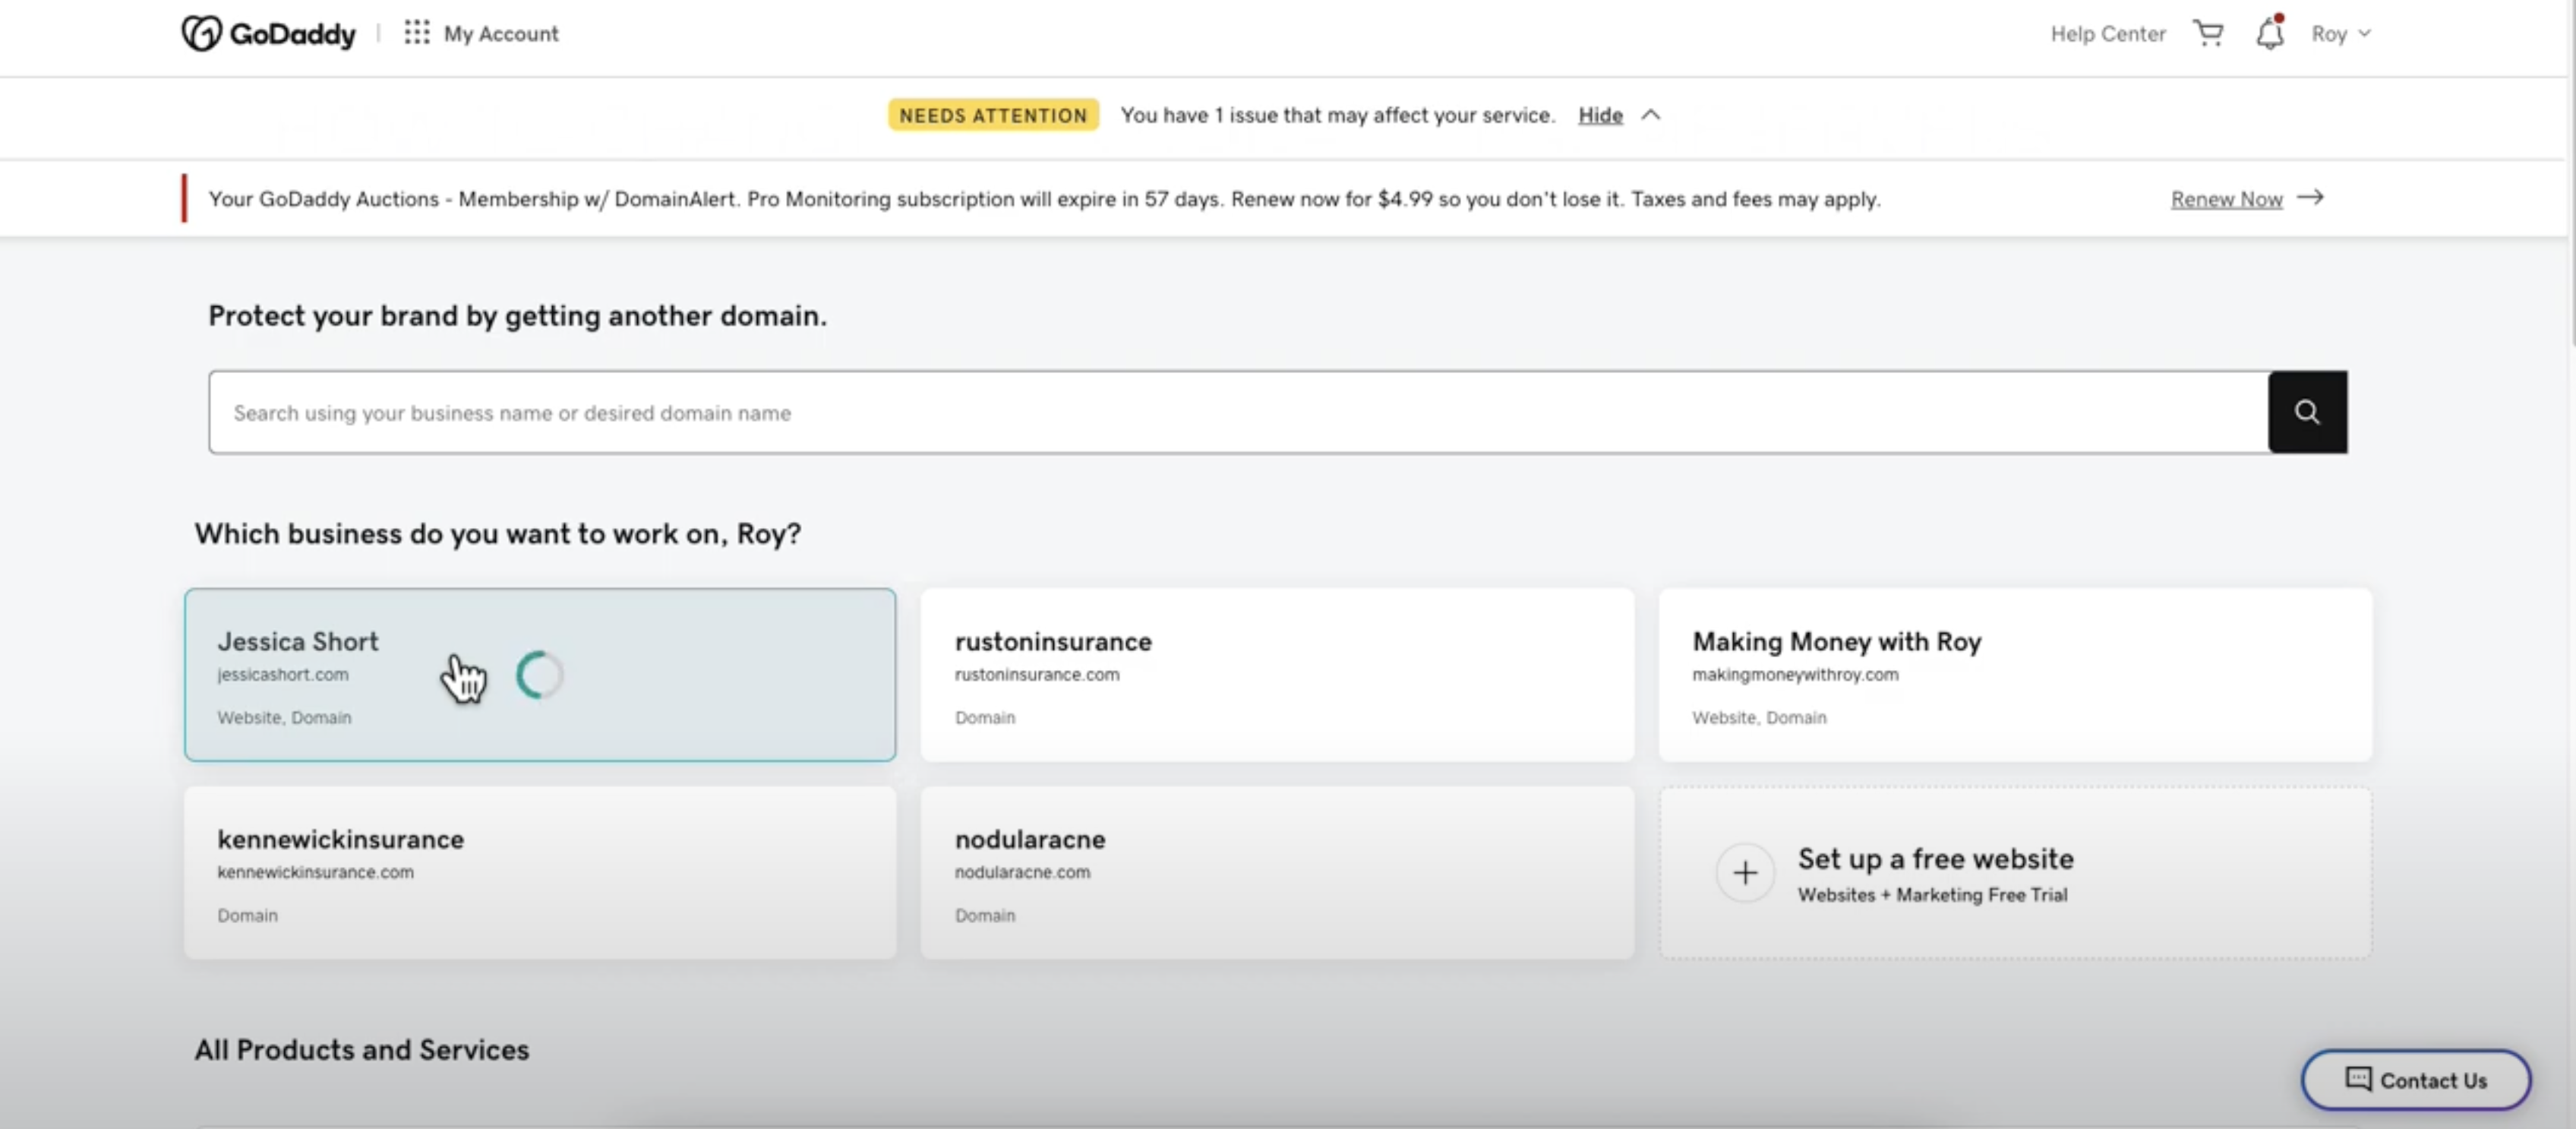
- Find the domain for which you want to change the nameservers.
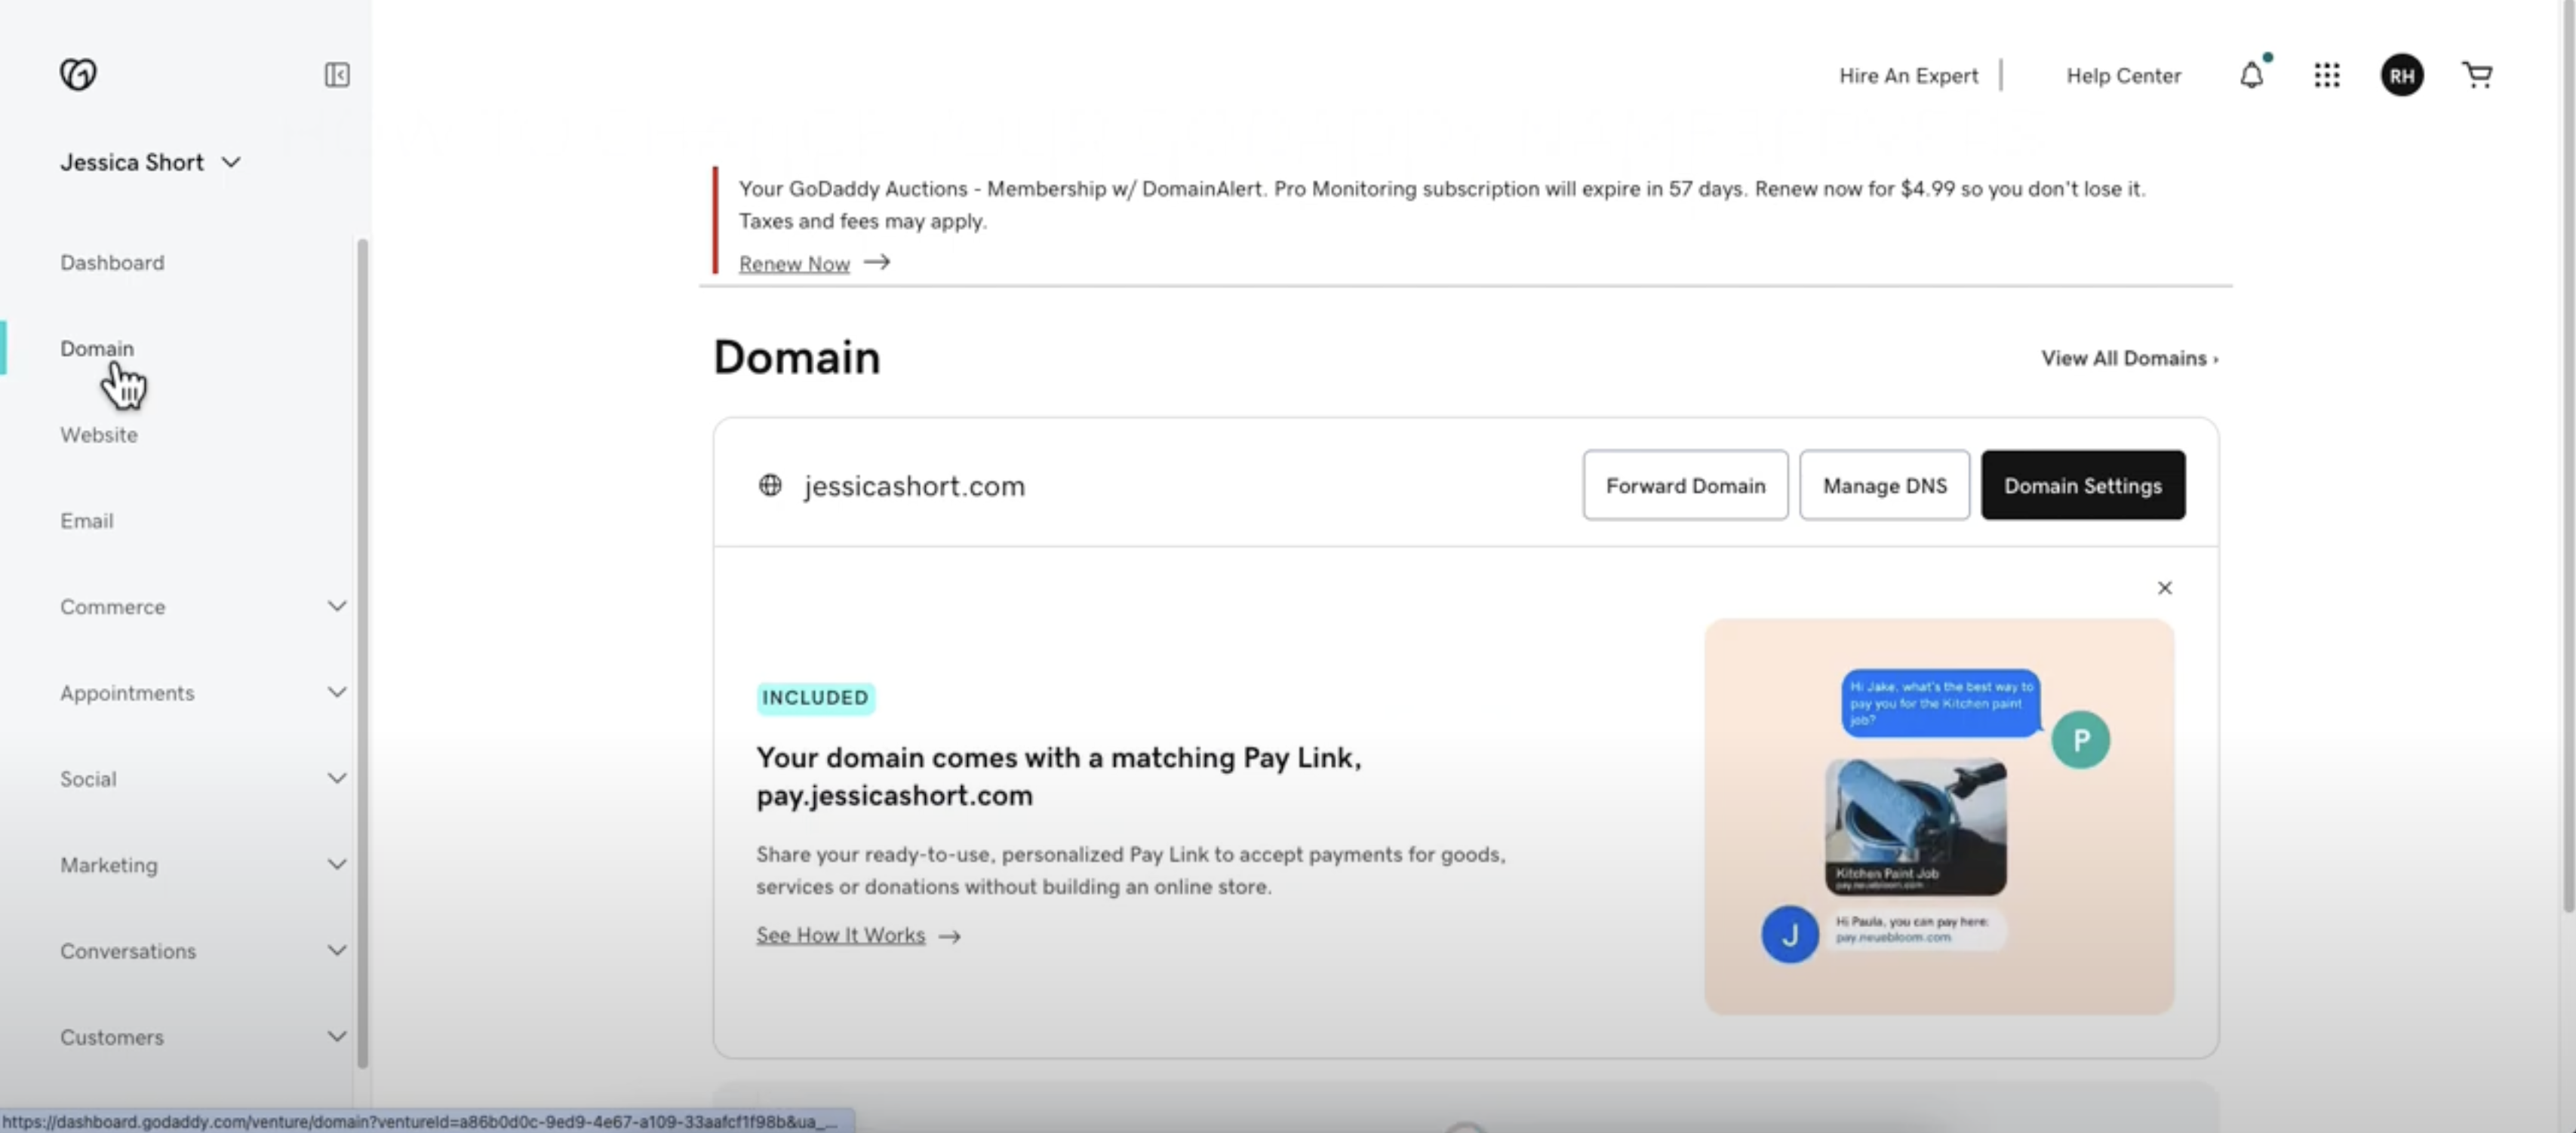
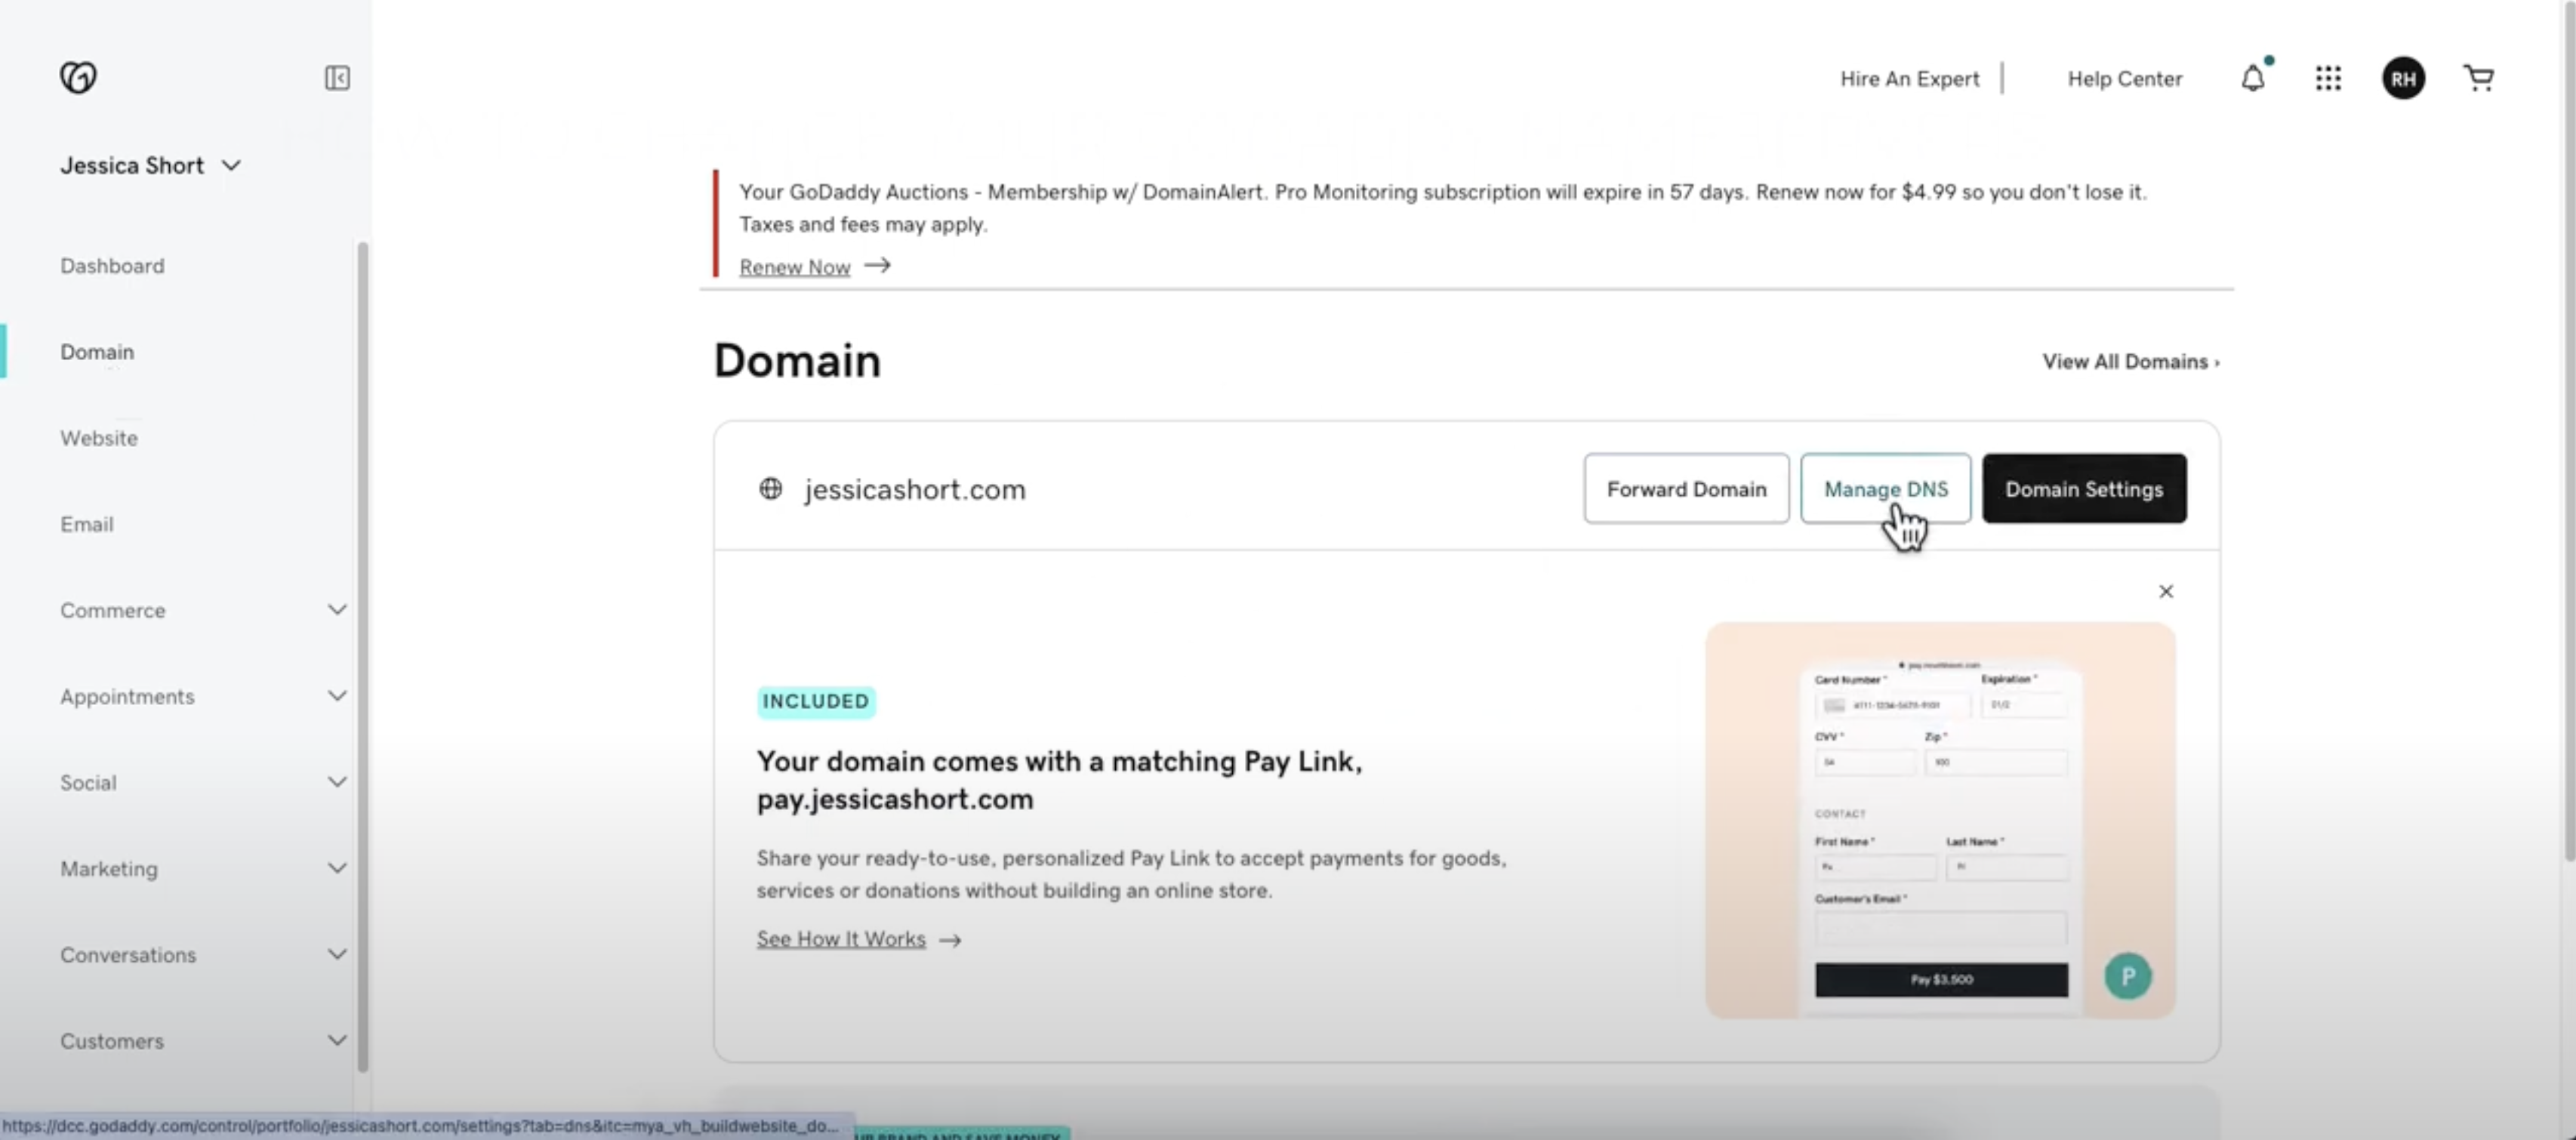
- Click on 'Manage DNS' next to the domain name.
3. Update Nameservers
- In the 'DNS Management' page, scroll down to the 'Nameservers' section.
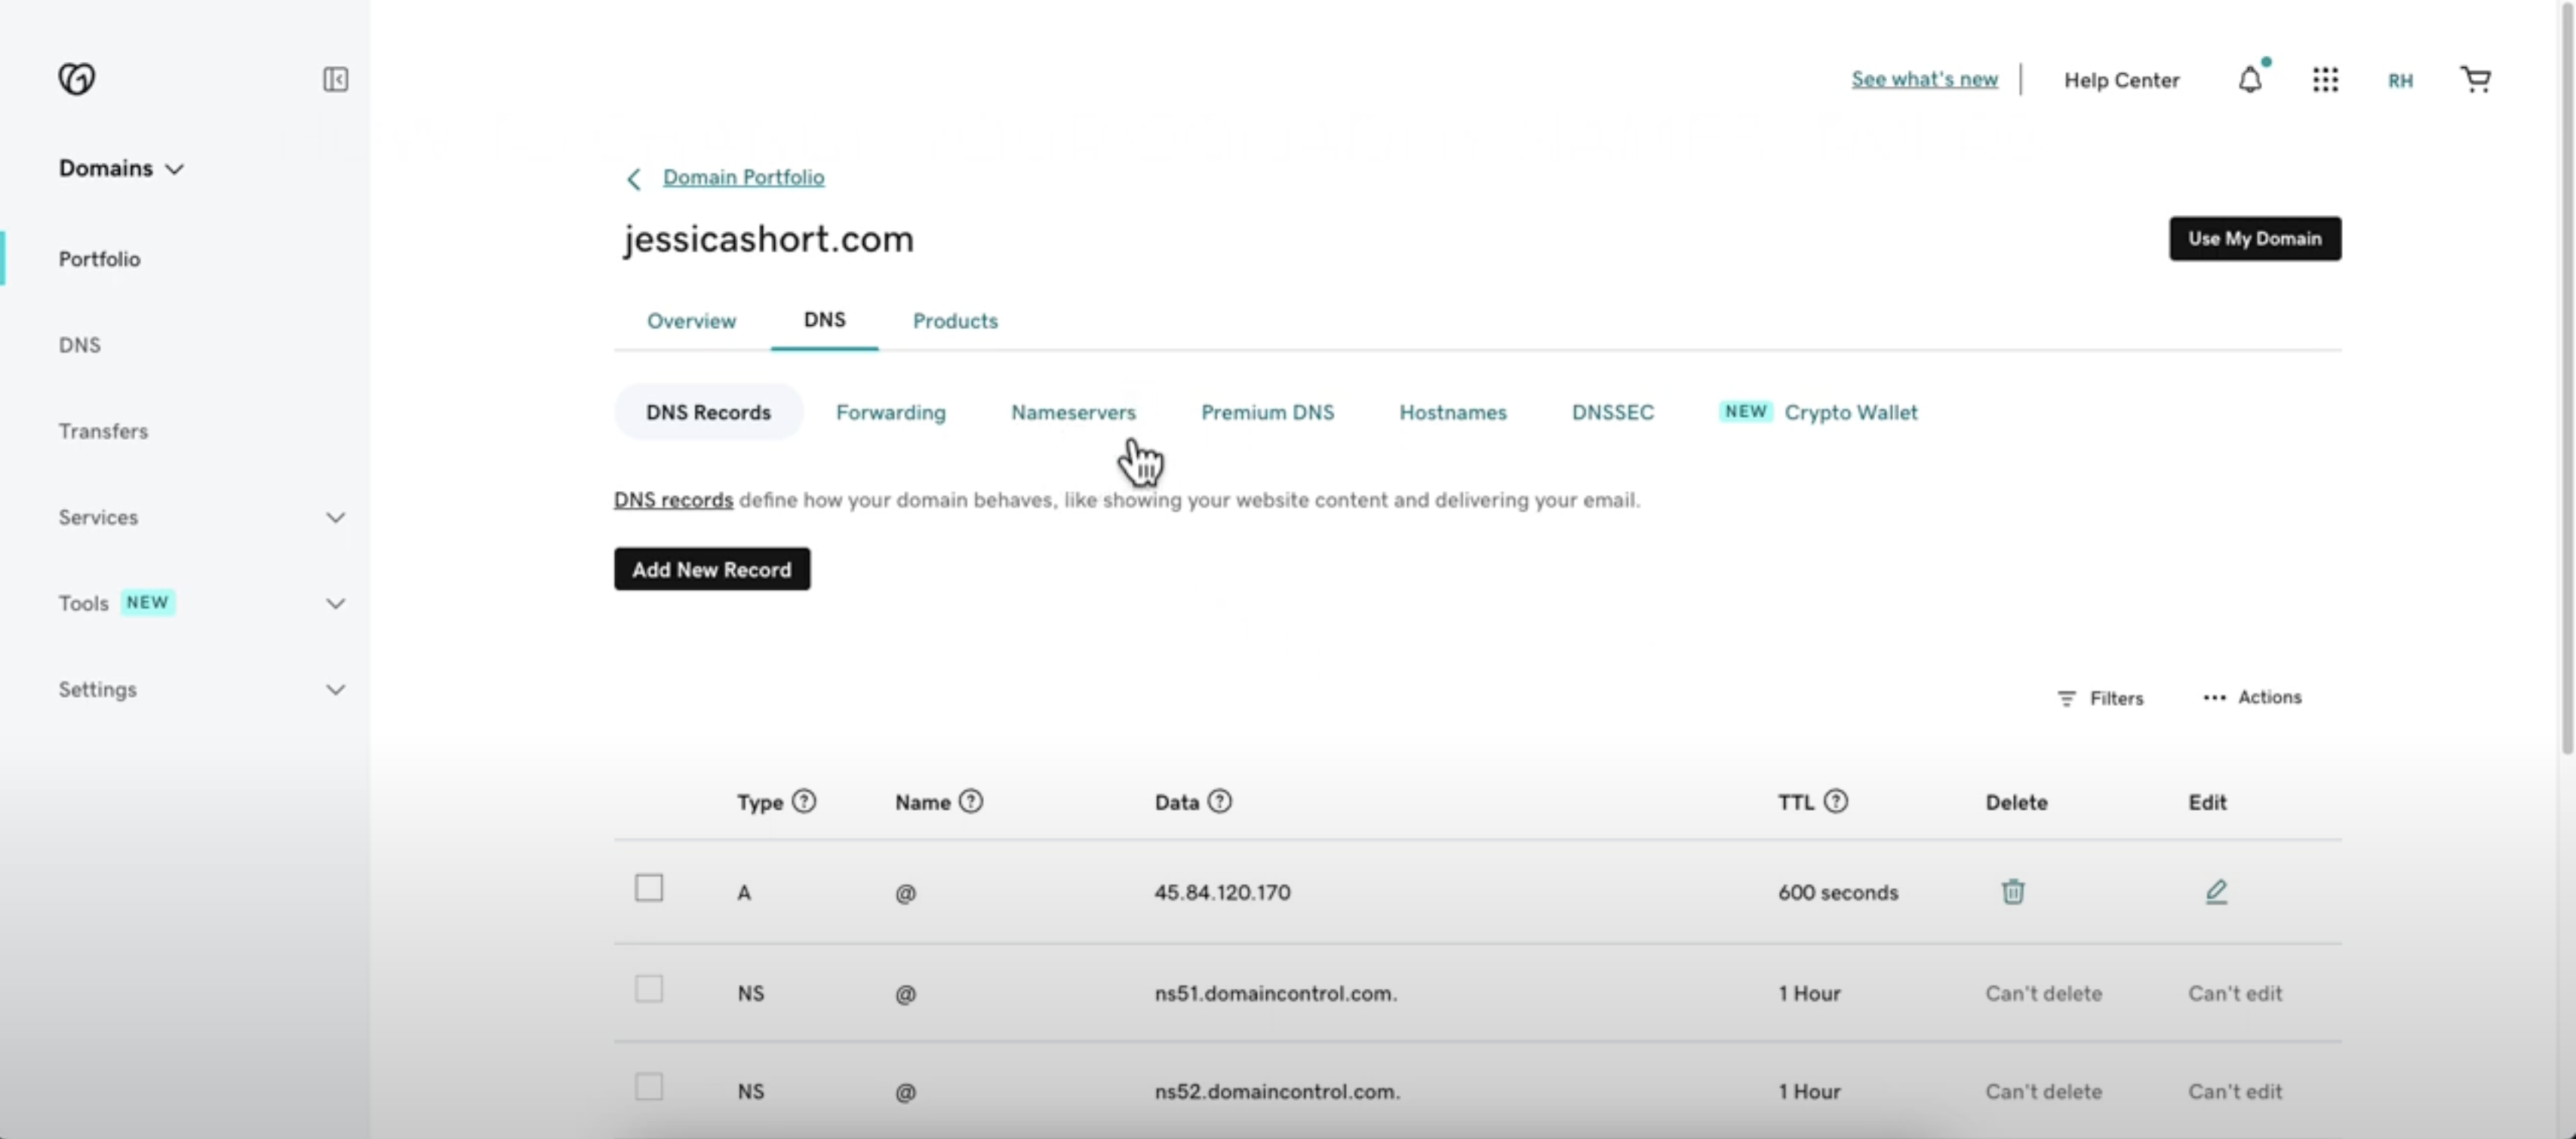
- Click on the 'Change Nameservers' button.
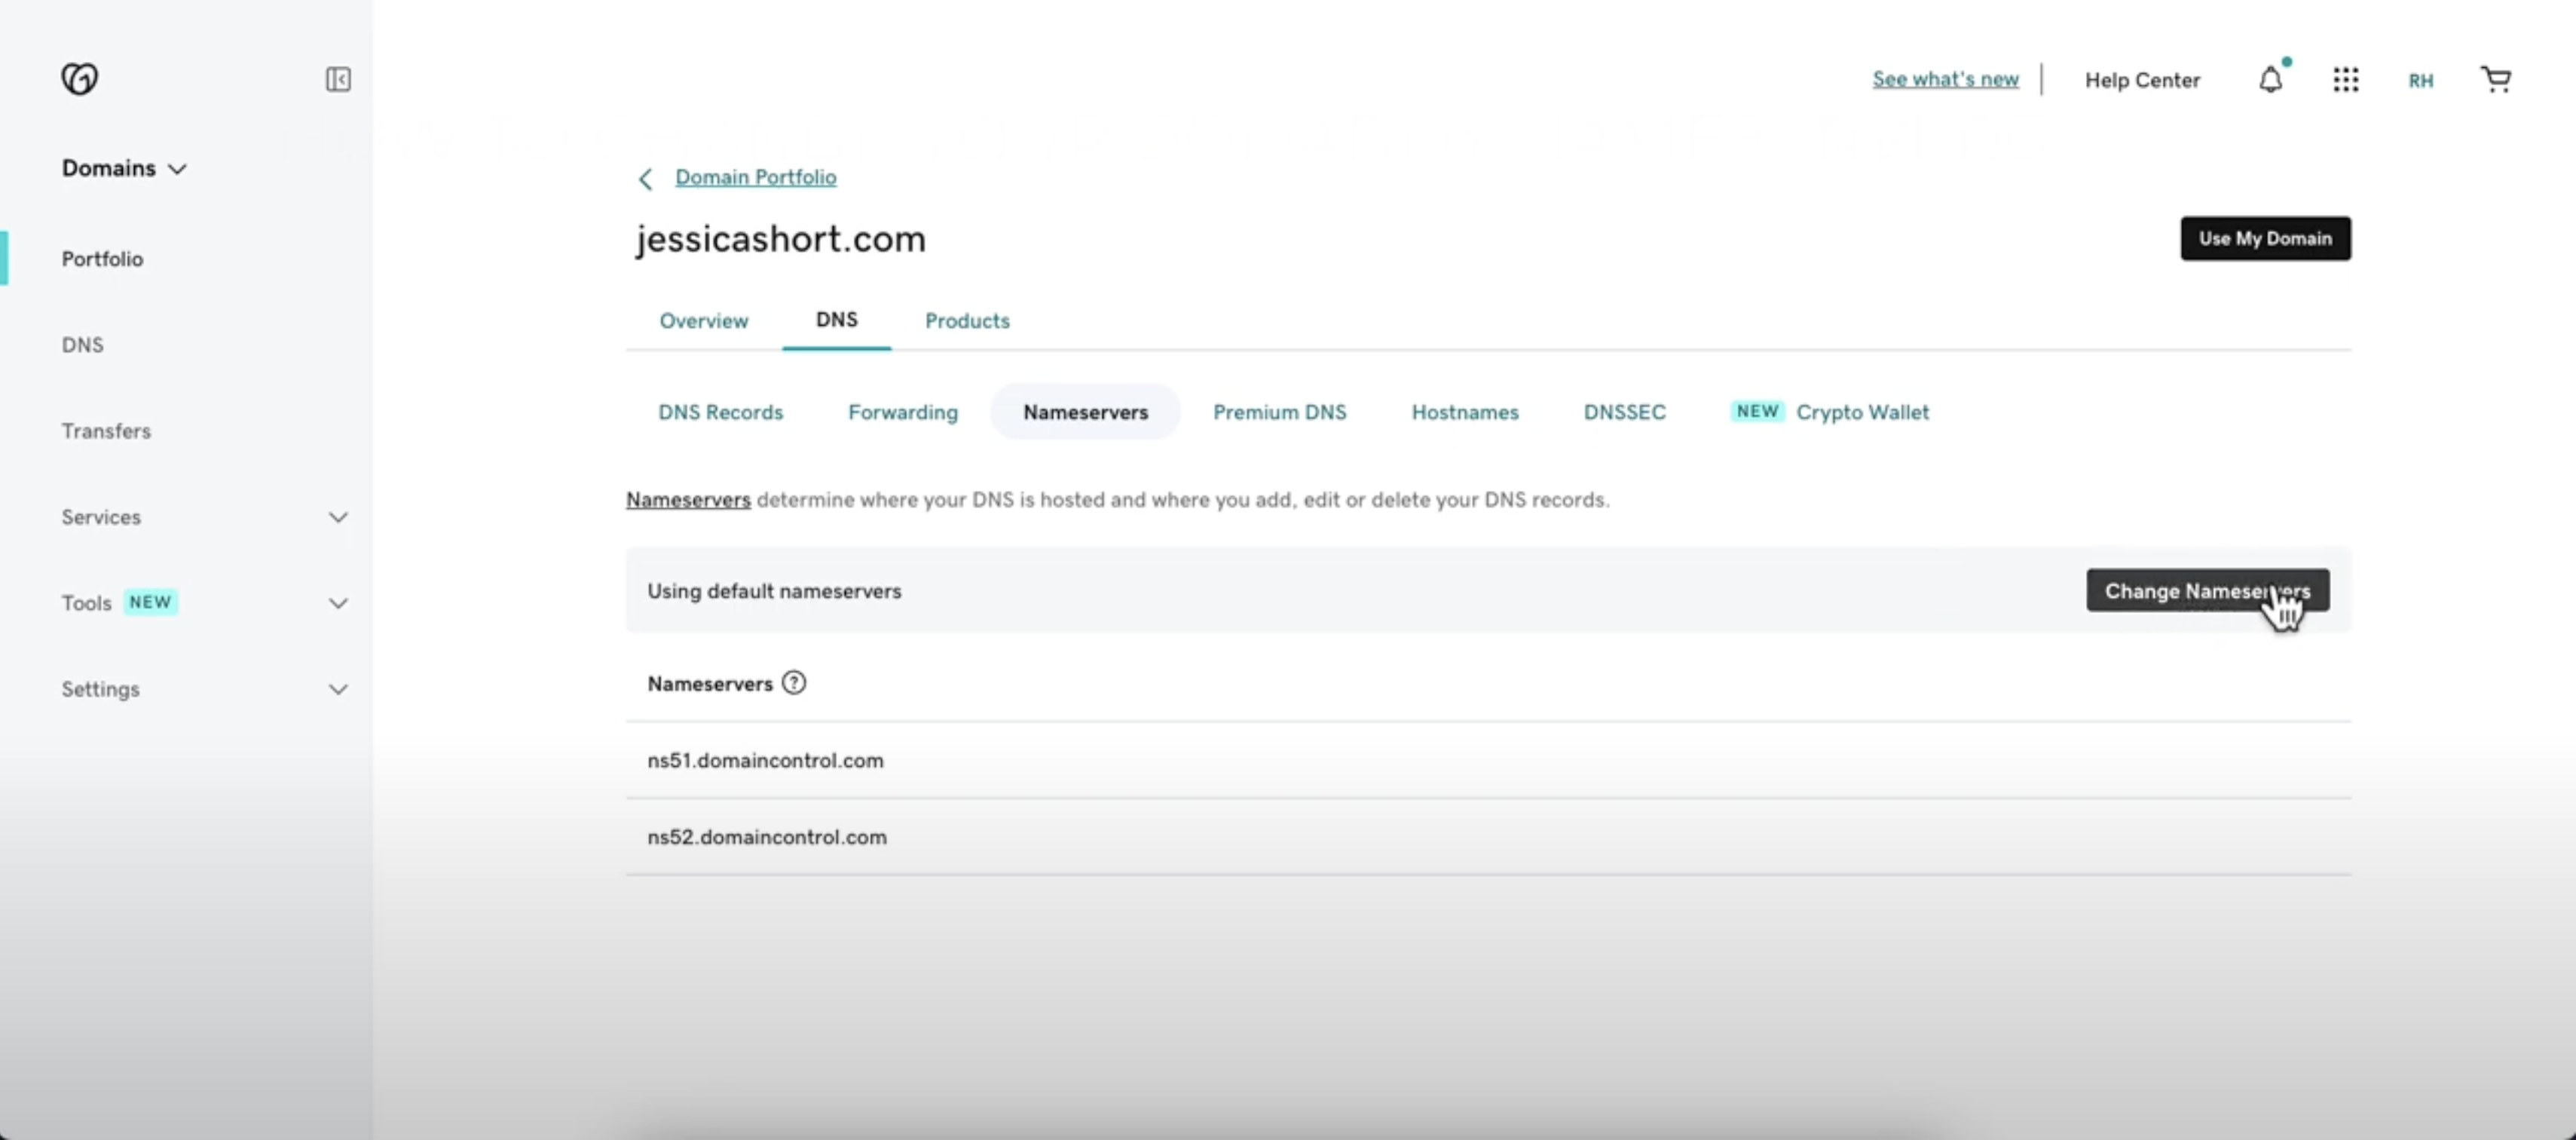
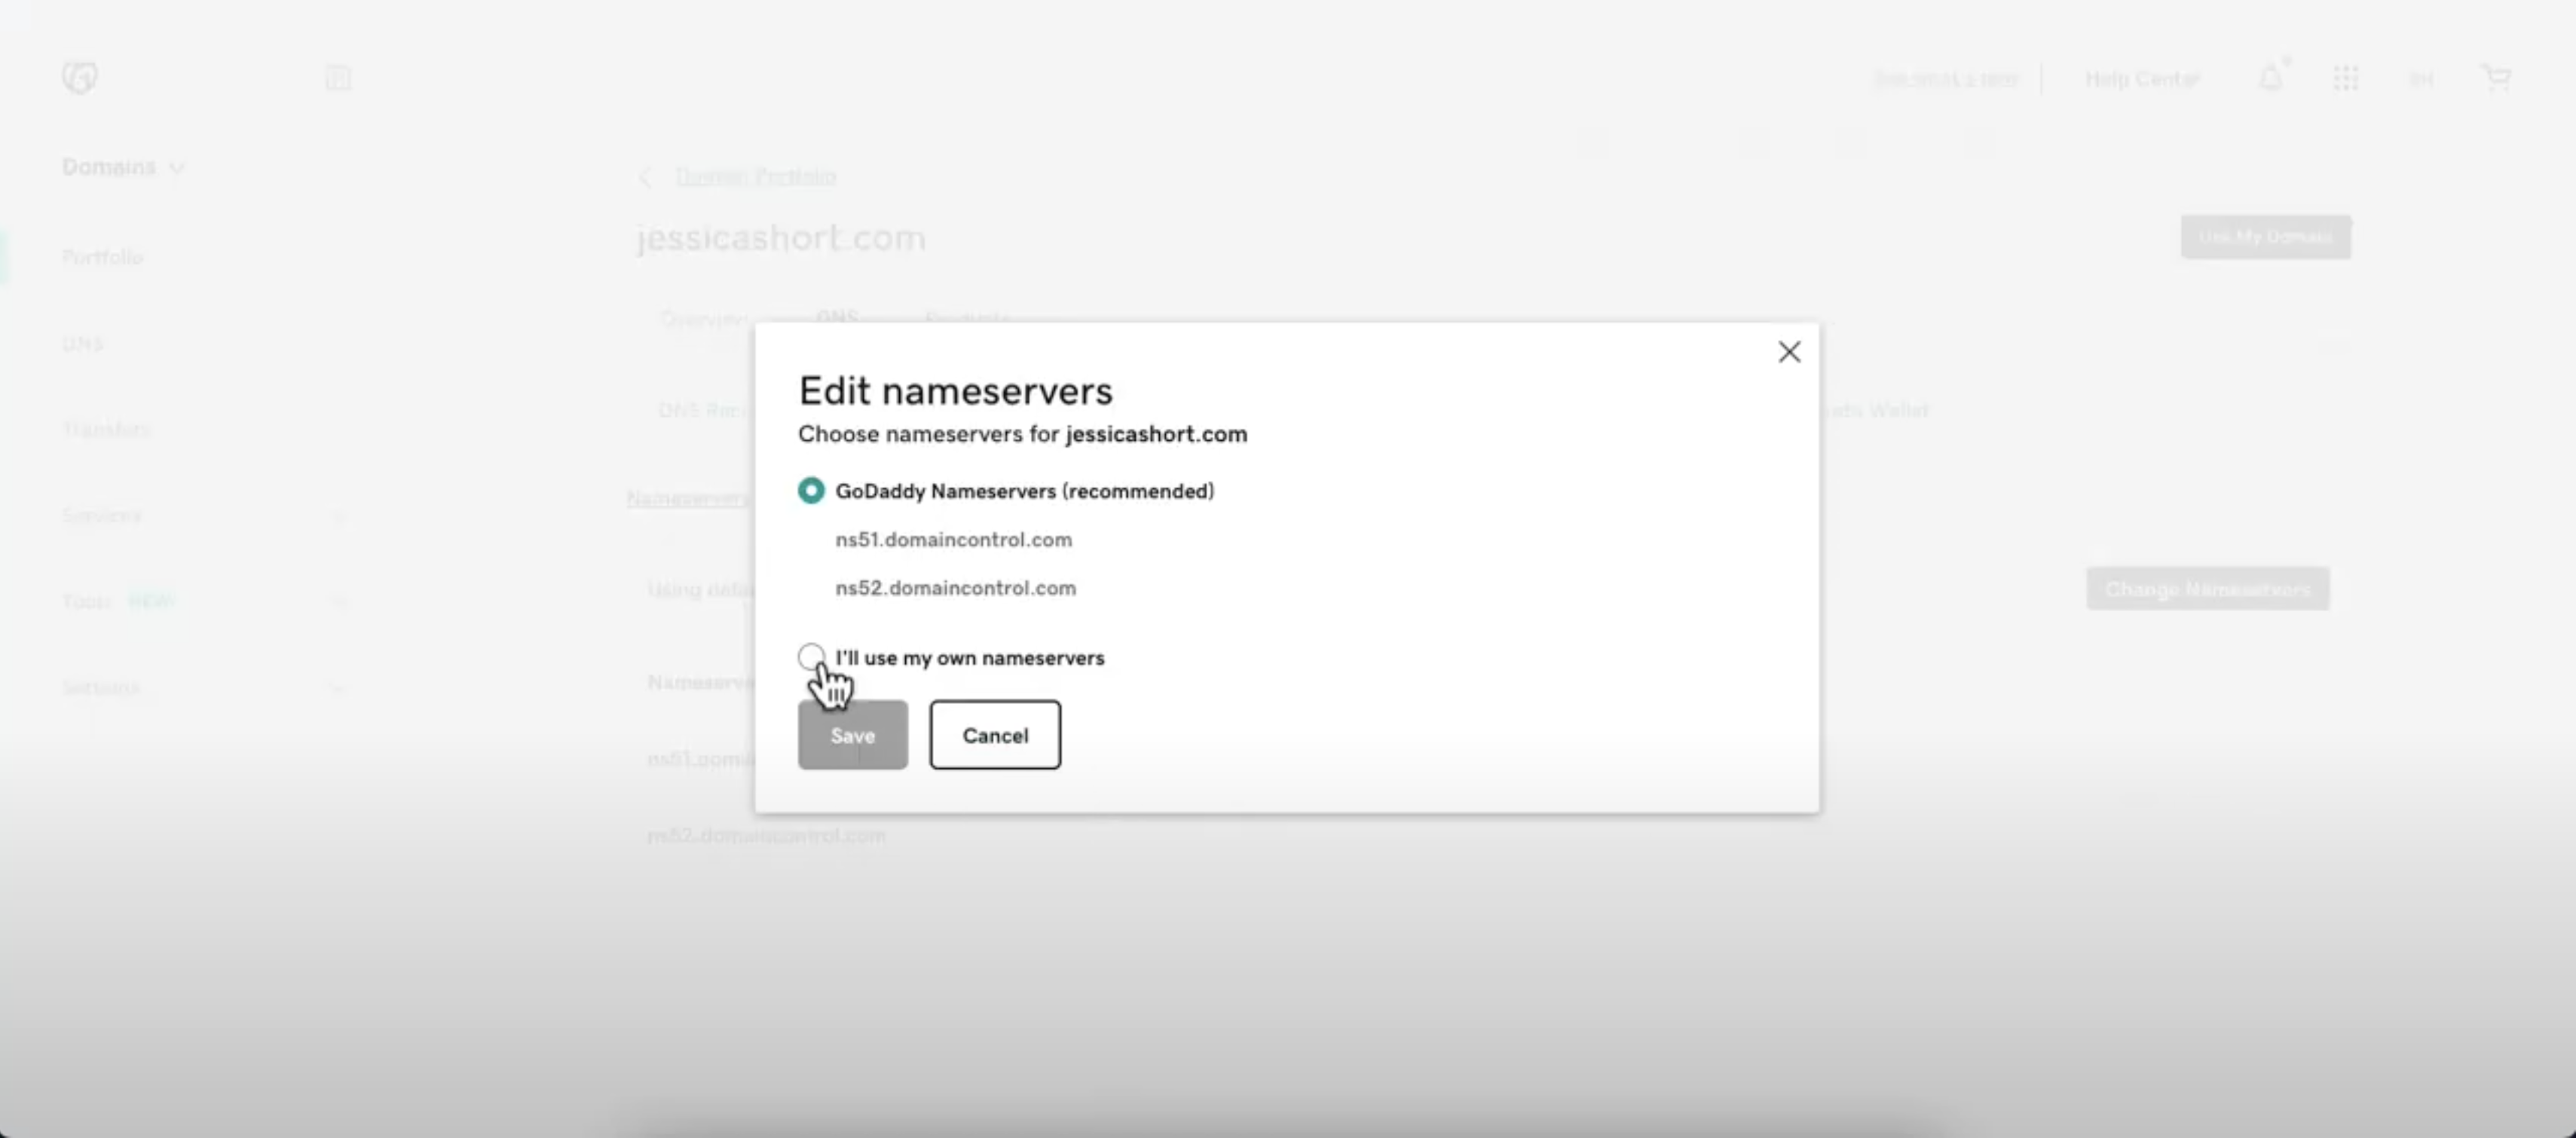
4. Choose Custom Nameservers
- A dialog box will appear. Select 'I'll enter my own nameservers'.
5. Enter Mailforge Nameservers
- Enter the nameservers provided by Mailforge in the fields.
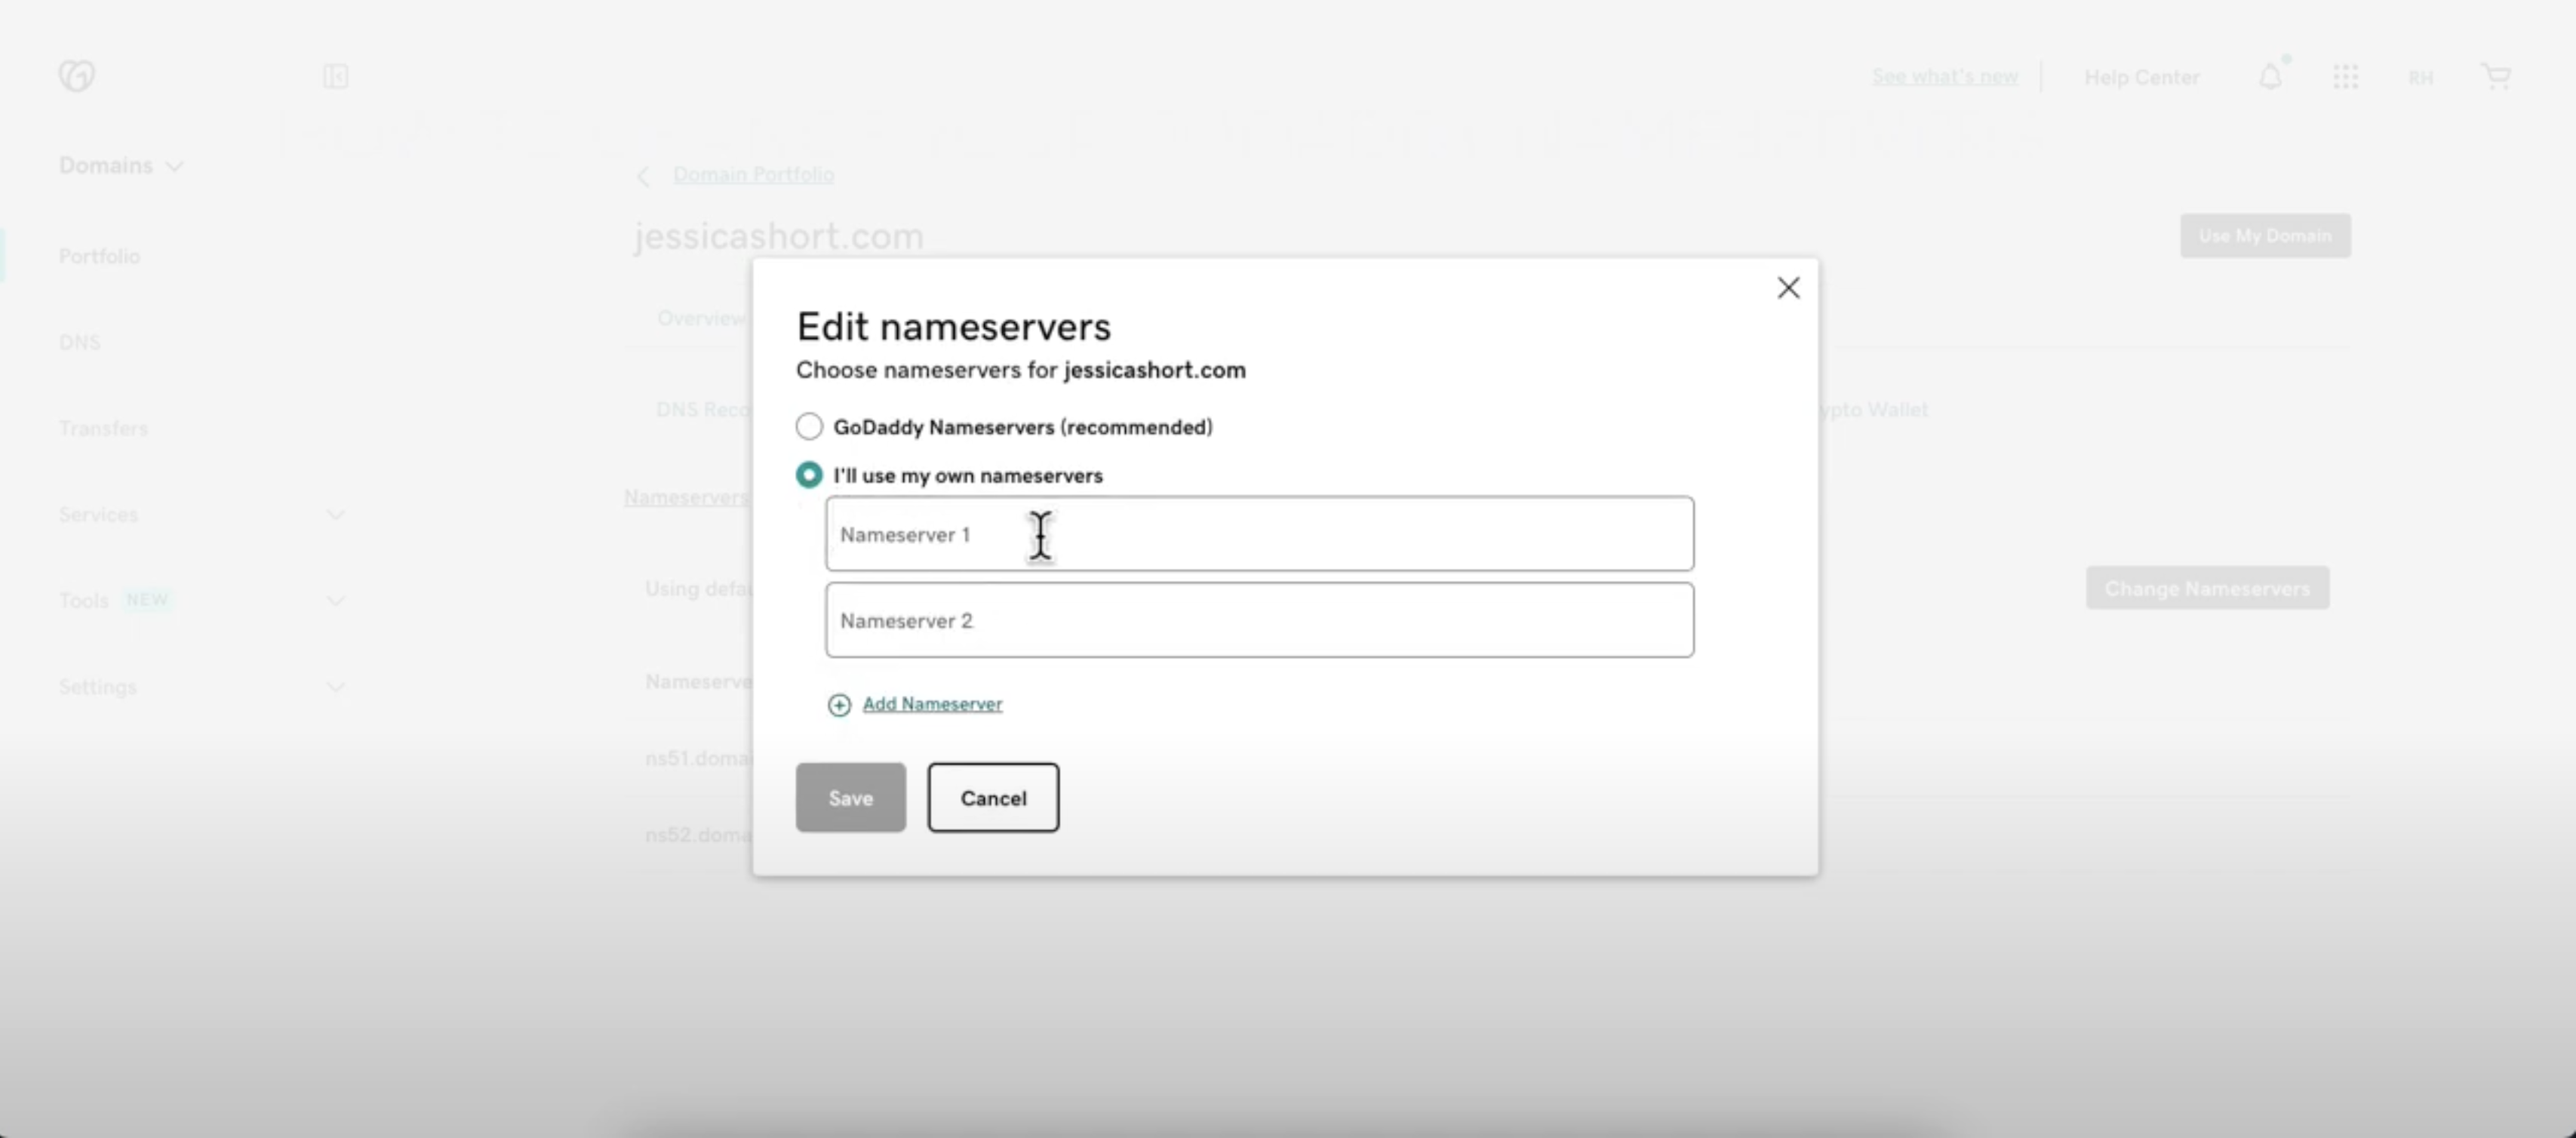
dns1.name-services.com
dns2.name-services.com
dns3.name-services.com
dns4.name-services.com
dns5.name-services.com
6. Save Changes
- After entering the nameservers, click 'Save'.
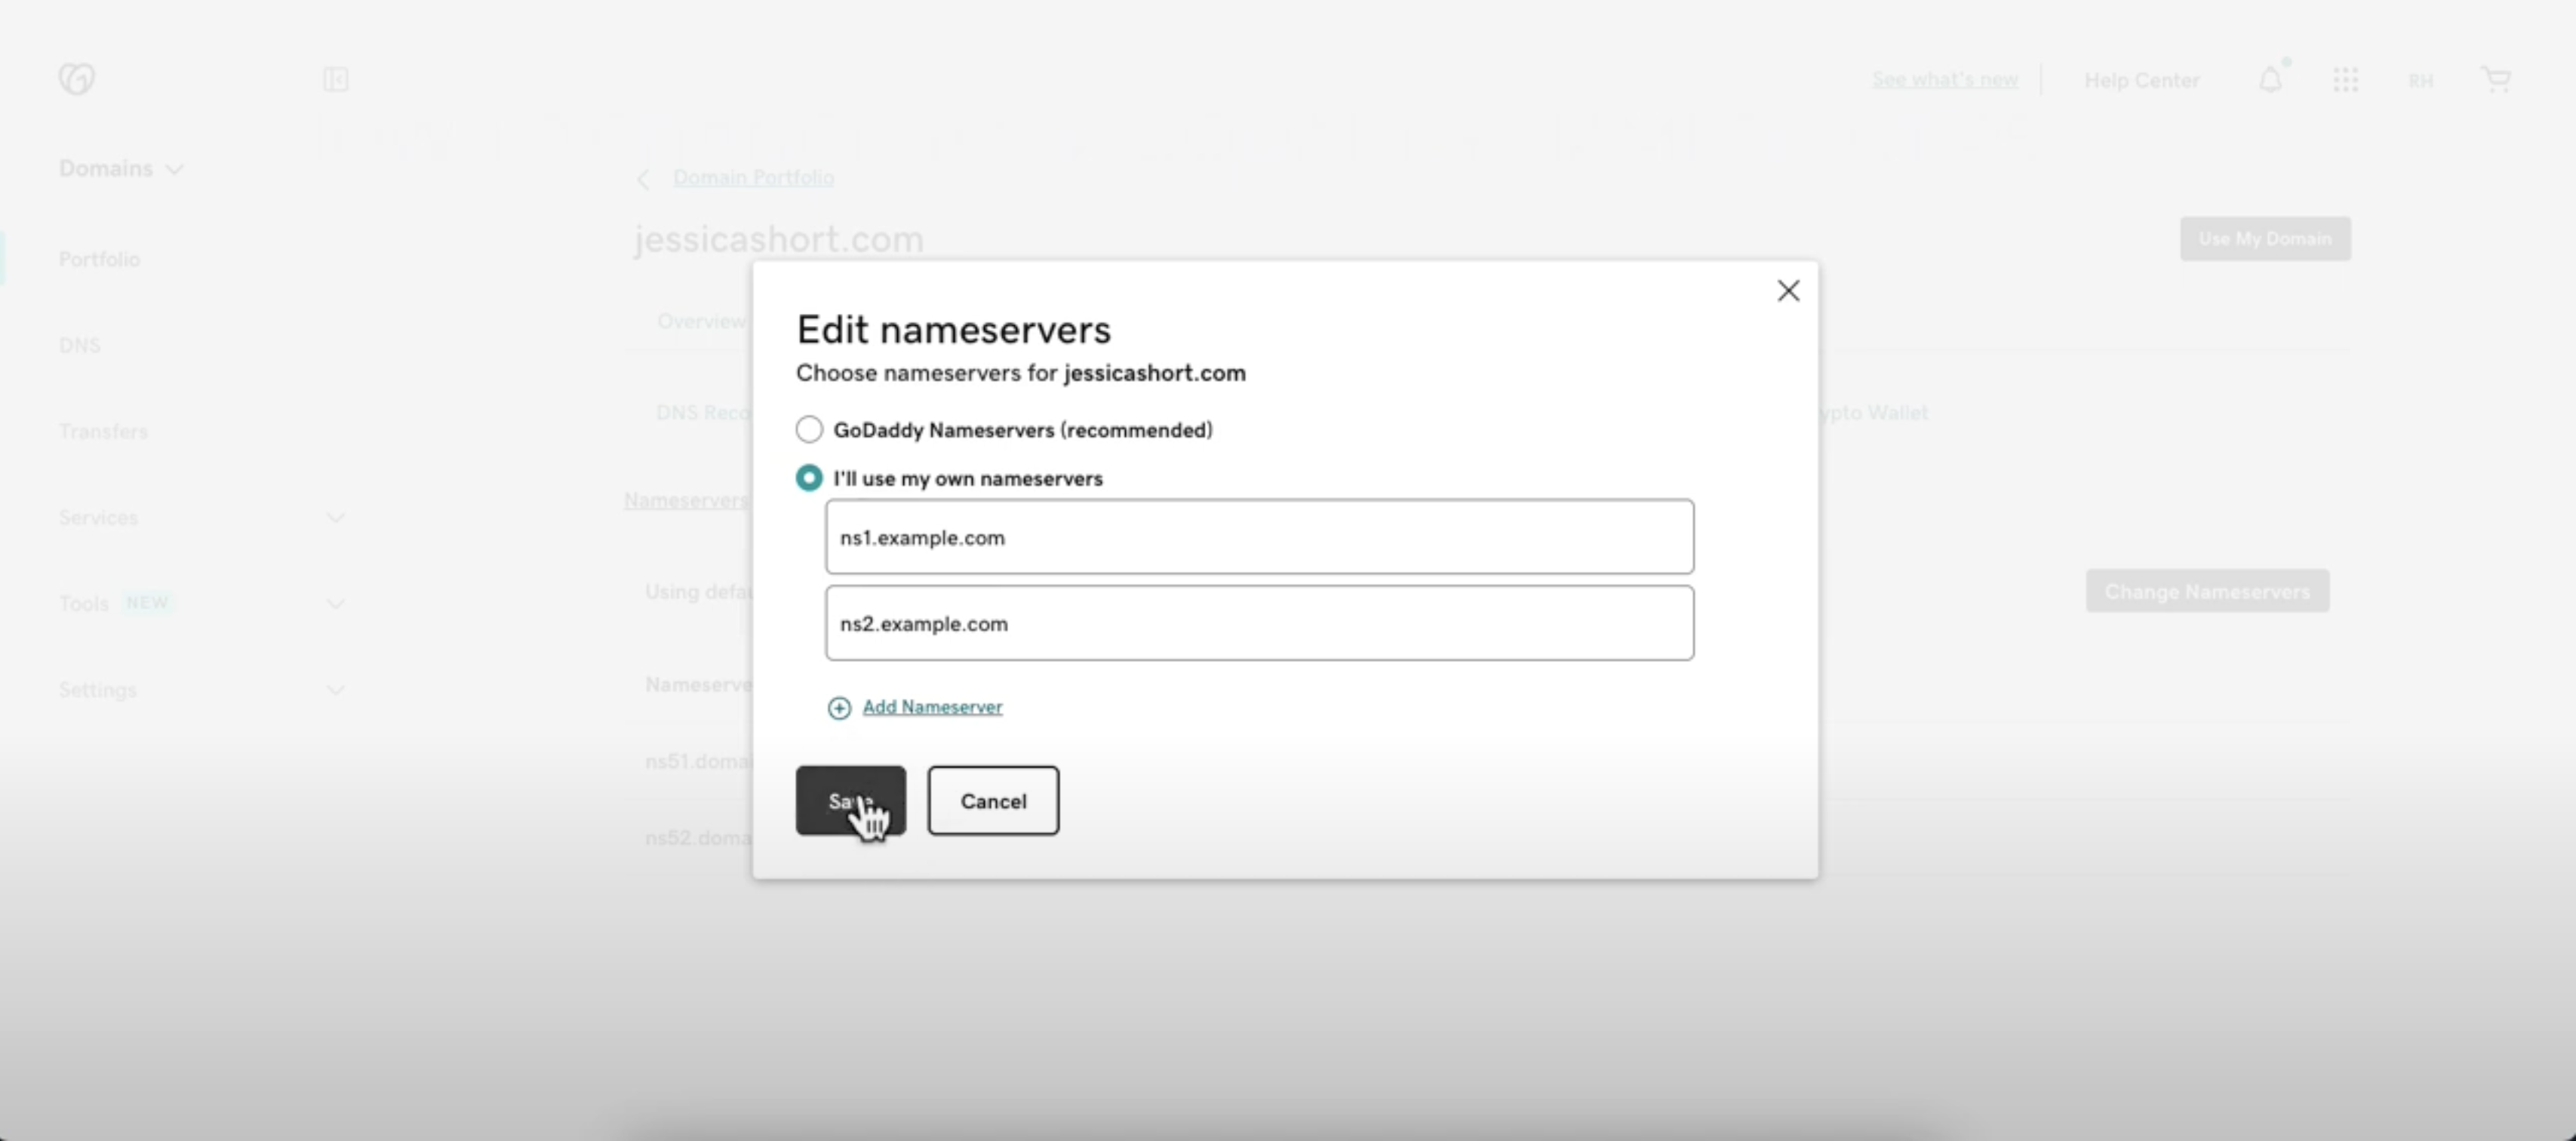
- GoDaddy might ask you to confirm the change by re-entering your account password or confirming via email.
7. Wait for DNS Propagation
- DNS changes can take up to 24-48 hours to propagate across the internet. During this time, your domain might experience downtime.
8. Verify the Update
- After waiting, you can use tools like What's My DNS to check if the nameserver update has been successfully propagated.
That's it! Your domain should now be pointing to the Mailforge nameservers.