company logo

Salesforge Helpdesk

Go to Salesforge
Agent FrankLeadsforge - Search Engine For LeadsPrimeforge - Google & MS365Mailforge - Distributed Email InfrastructureInfraforge - Private Email InfrastructureWarmforge - Email Deliverability Center
All collectionsConnecting Mailboxes 🔗Add or edit mailbox signatures in Salesforge

Add or edit mailbox signatures in Salesforge

Learn how signatures work in Salesforge, and how to add or edit them for one mailbox or in bulk.

Your signature is the closing block of your email, with your name, title, and company details. In Salesforge, you can set it for each mailbox individually or update many mailboxes at once.

How signatures work

  • A signature is saved on each mailbox and added to the end of the emails sent from that mailbox.

  • The first and last name variables are replaced with the actual name of the mailbox, so one signature can work across many mailboxes.

  • You can use spintax to vary your signature across emails.

  • You can run a spam check on your signature before saving it.

  • A good signature includes your name, job title, and company name. Website, address, and phone number are optional.

If you export mailboxes from Mailforge or Infraforge, their signatures are carried over to Salesforge. For Primeforge mailboxes, the signatures are not carried over so you need to set it up separately on Salesforge.

Add or edit a signature for one mailbox

  1. Log in to your Salesforge account.

  2. Go to Senders & Mailboxes.

  3. Open the Mailboxes tab.

  4. Click on the empty space beside the mailbox you want to update. This opens a pop-up.
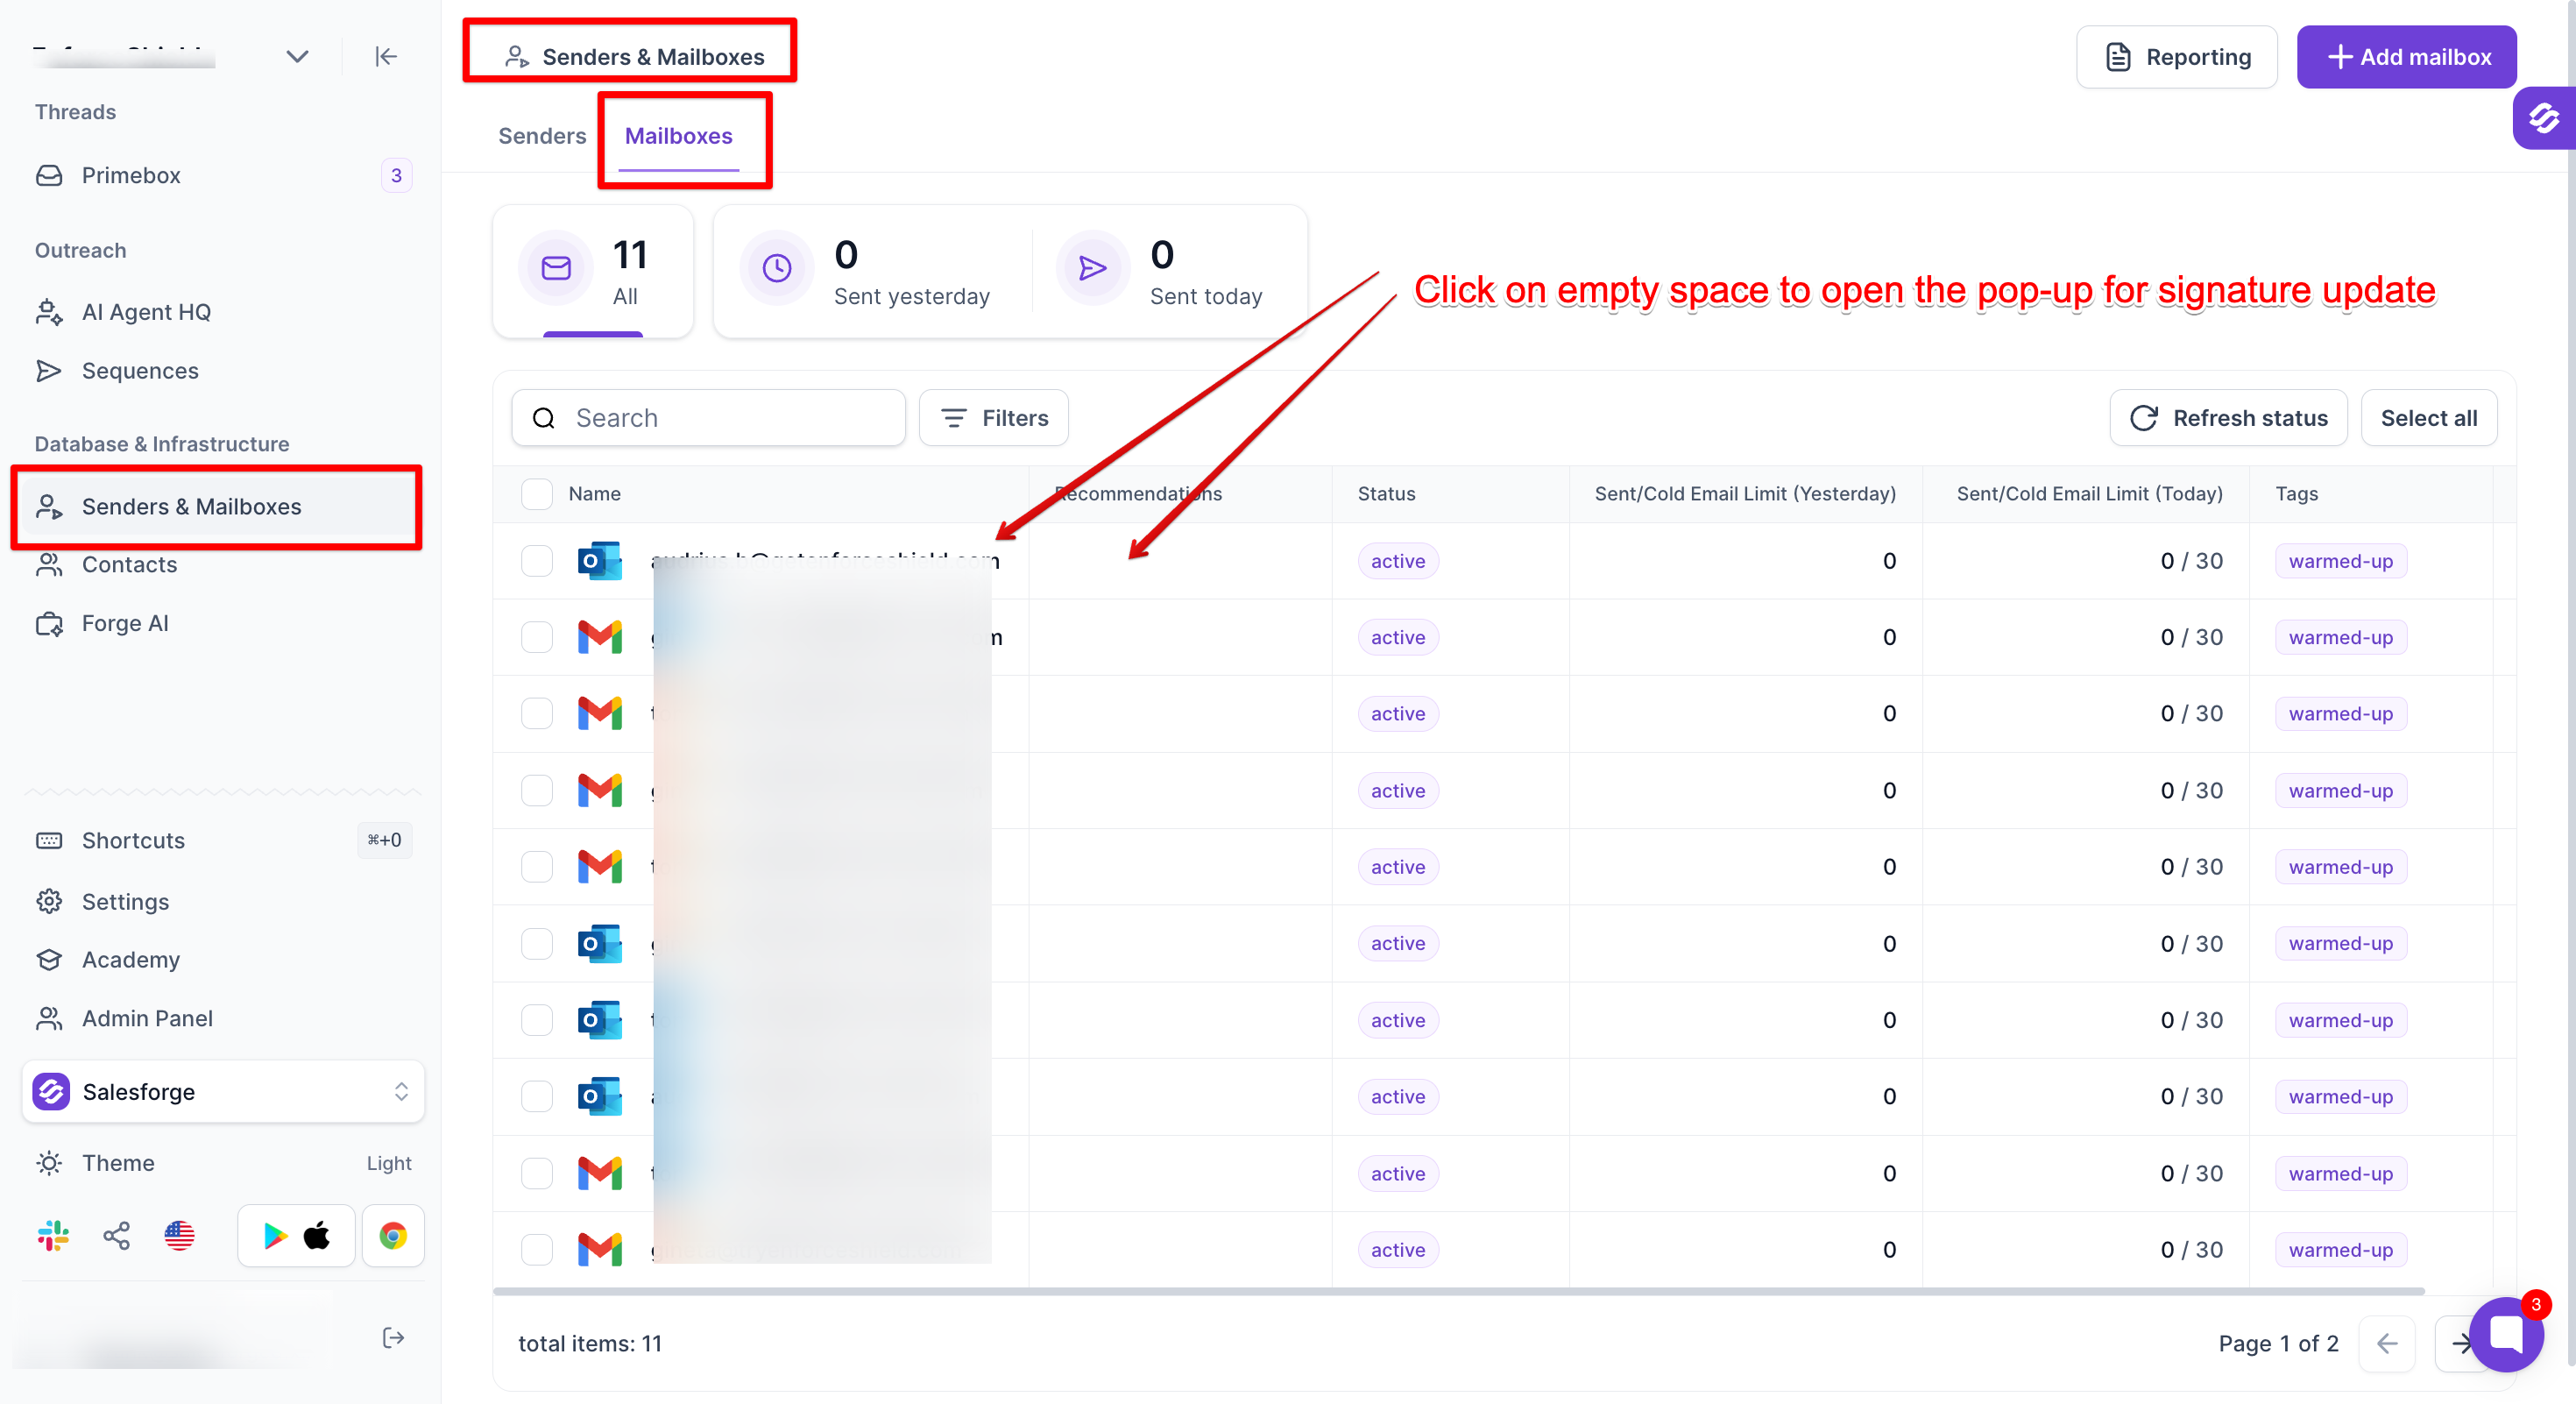
The Senders & Mailboxes page is open on the Mailboxes tab, with red arrows pointing to empty spaces in mailbox rows where the annotation says to click to open the signature update pop-up. Visible: Senders & Mailboxes, Senders, Mailboxes, Reporting, Add mailbox, All.

  1. Go to the Signature tab, add or edit your signature, and click Update.
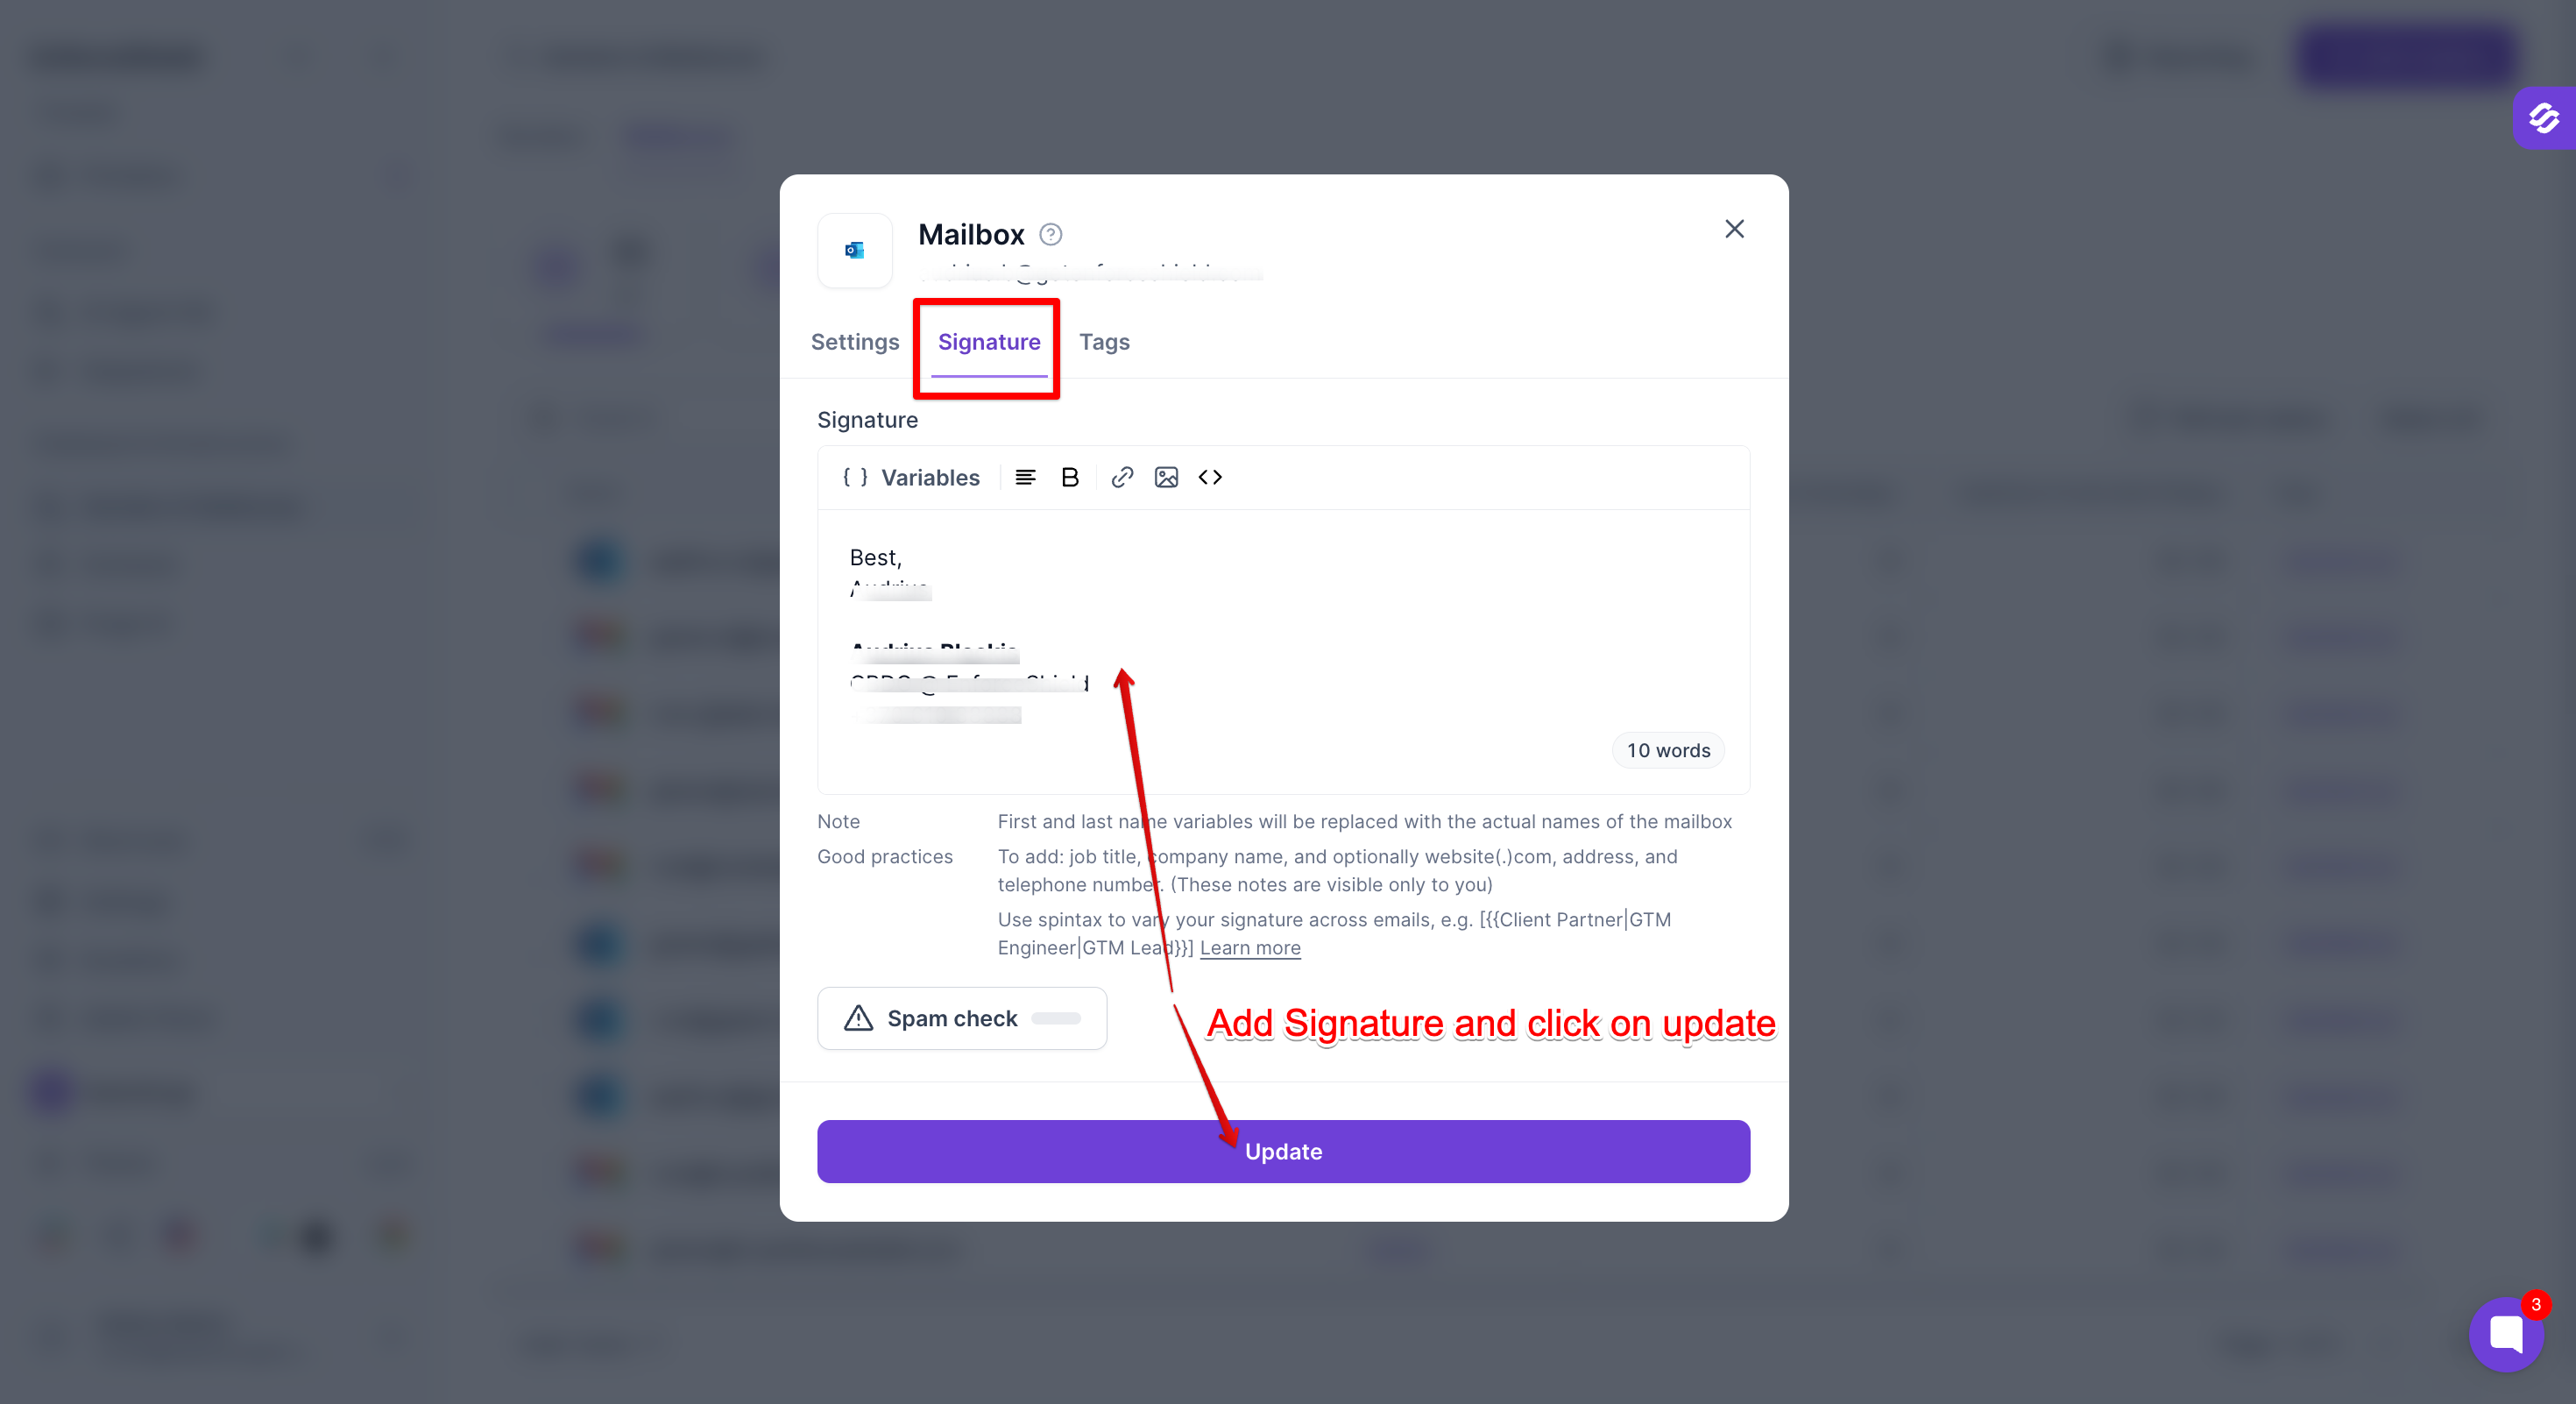
Mailbox settings modal with the Signature tab selected, showing a signature editor and Update button; red annotations point to the editor and Update button. Visible: Mailbox, Settings, Signature, Tags, Variables, Best.

Add or edit signatures in bulk

  1. Log in to your Salesforge account.

  2. Go to Senders & Mailboxes.

  3. Open the Mailboxes tab.

  4. Click Select all to select all your mailboxes across every page. If you only want to update a few, tick the checkboxes beside those mailboxes instead.
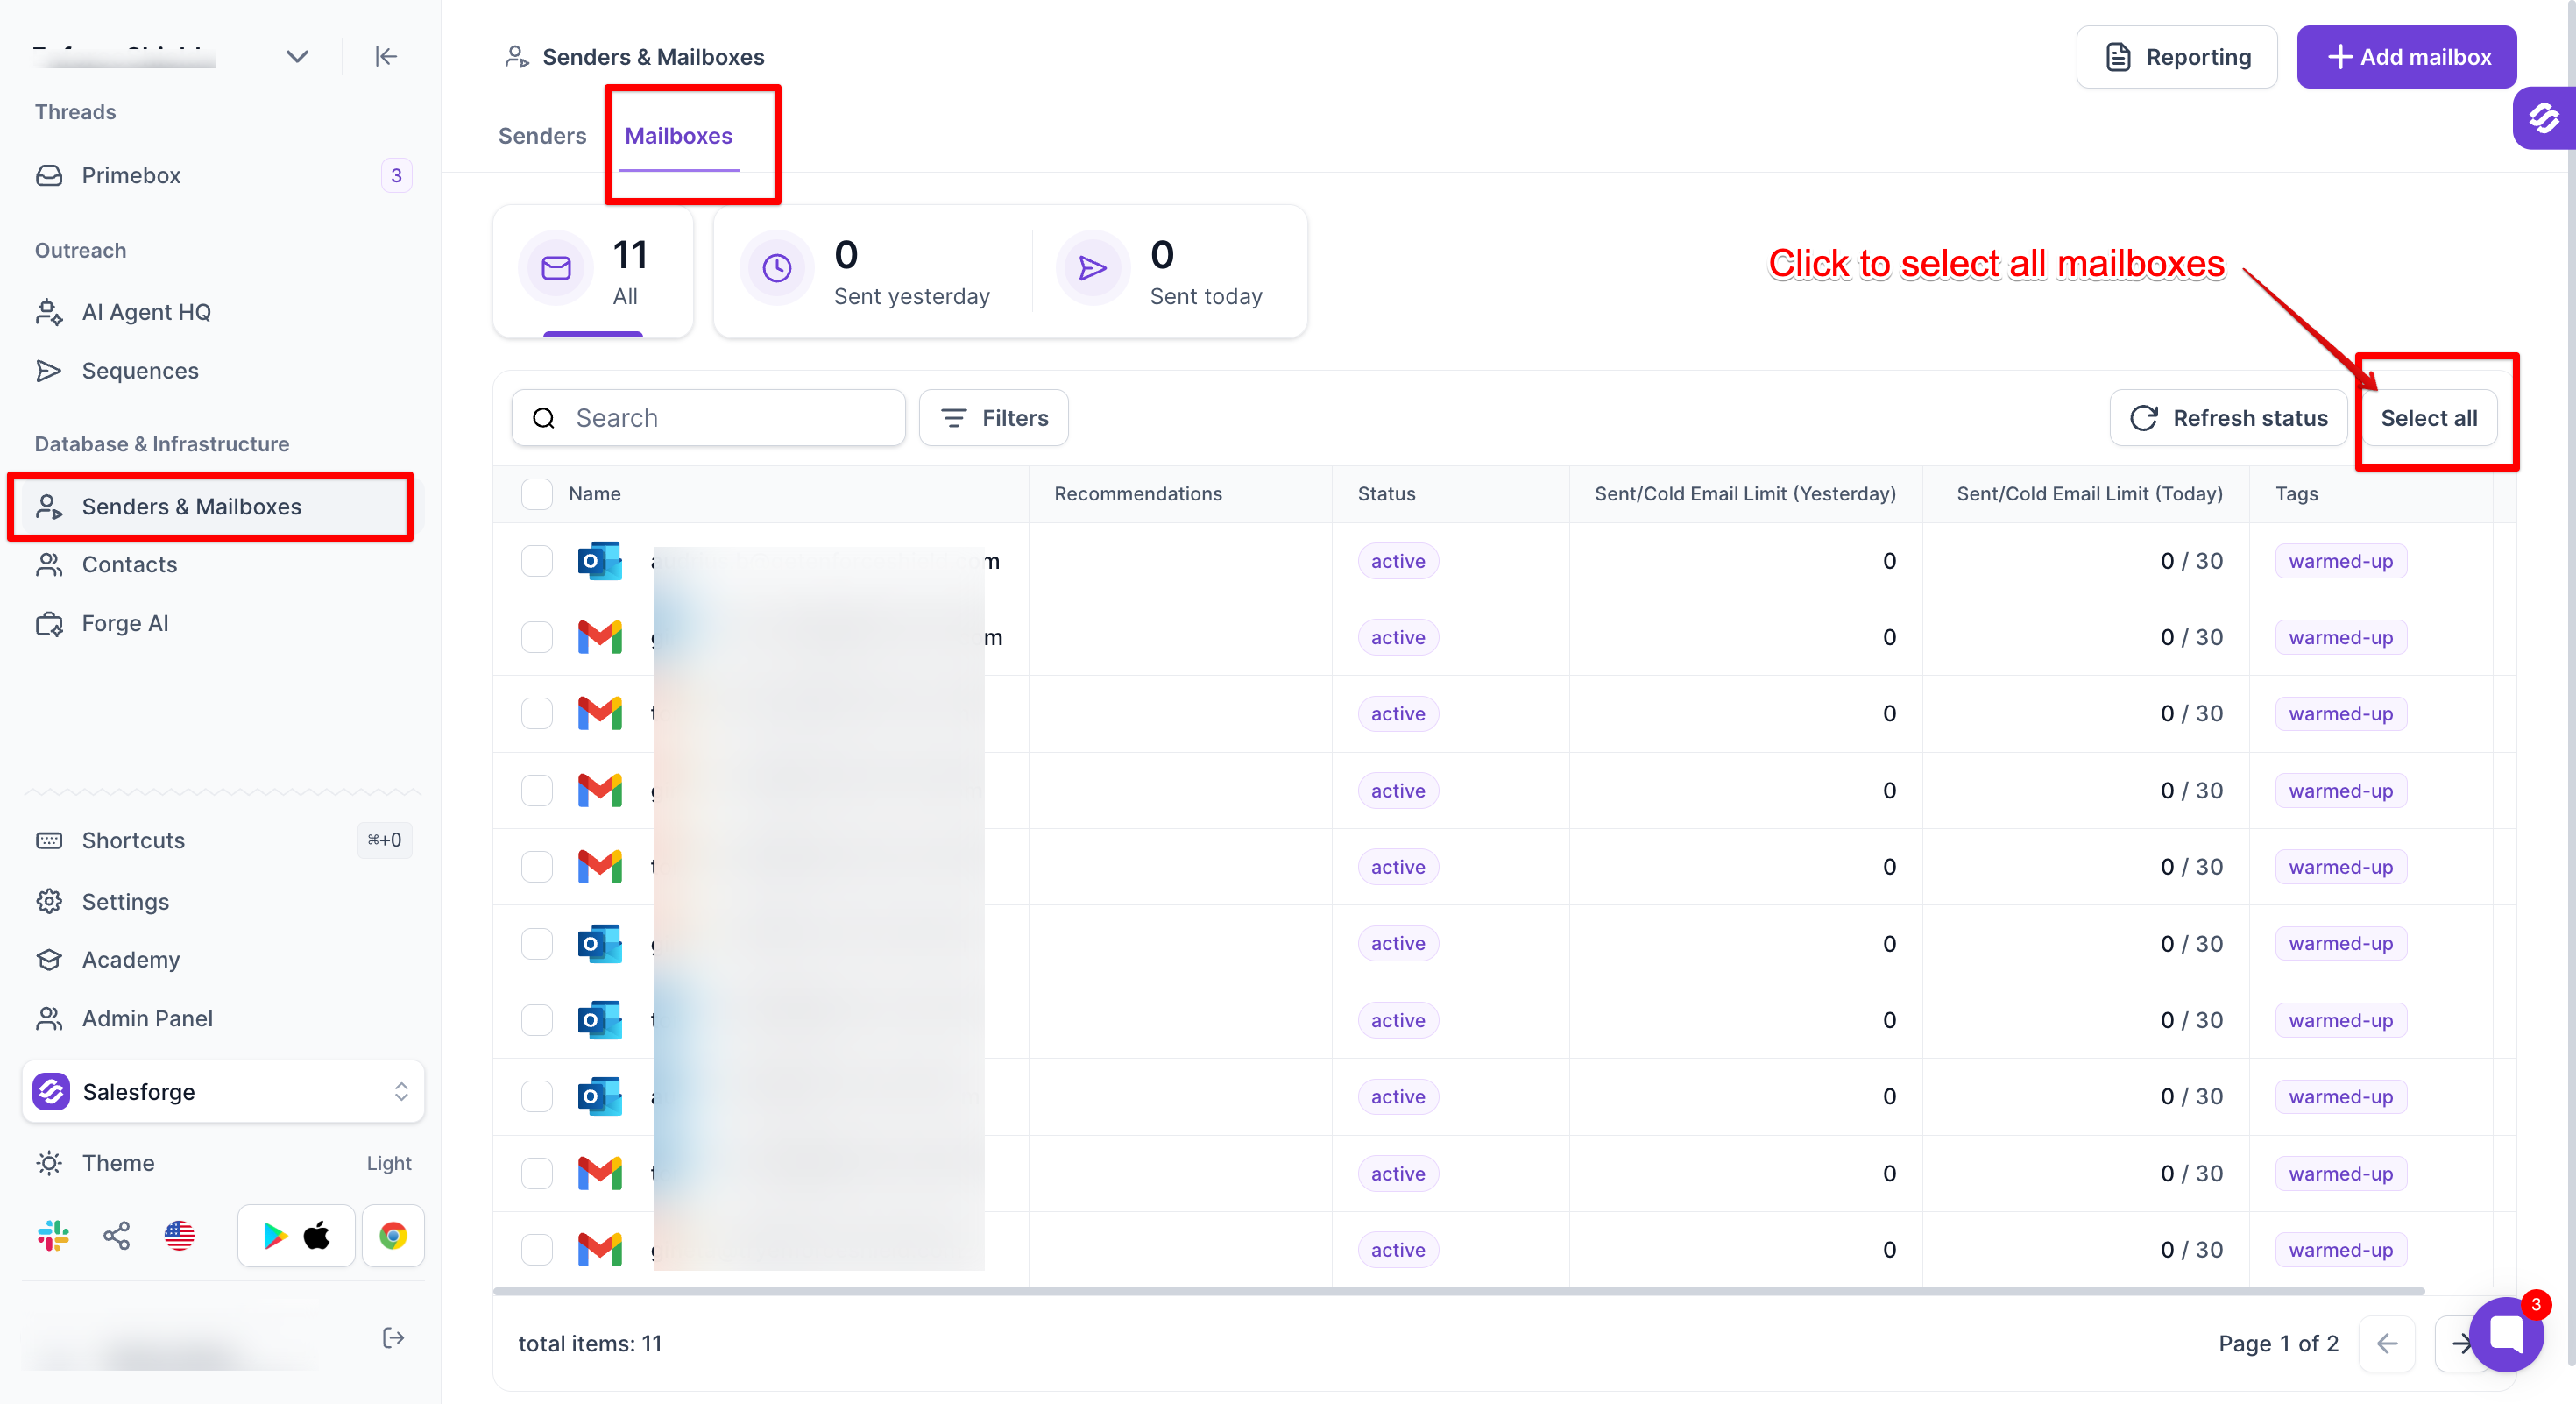
The Senders & Mailboxes page has the Mailboxes tab open, with a red arrow pointing to the Select all button above the mailbox table. Visible: Senders & Mailboxes, Senders, Mailboxes, Search, Filters, Refresh status.
  1. Click the gear icon in the bar that appears above the list to open the bulk update settings.
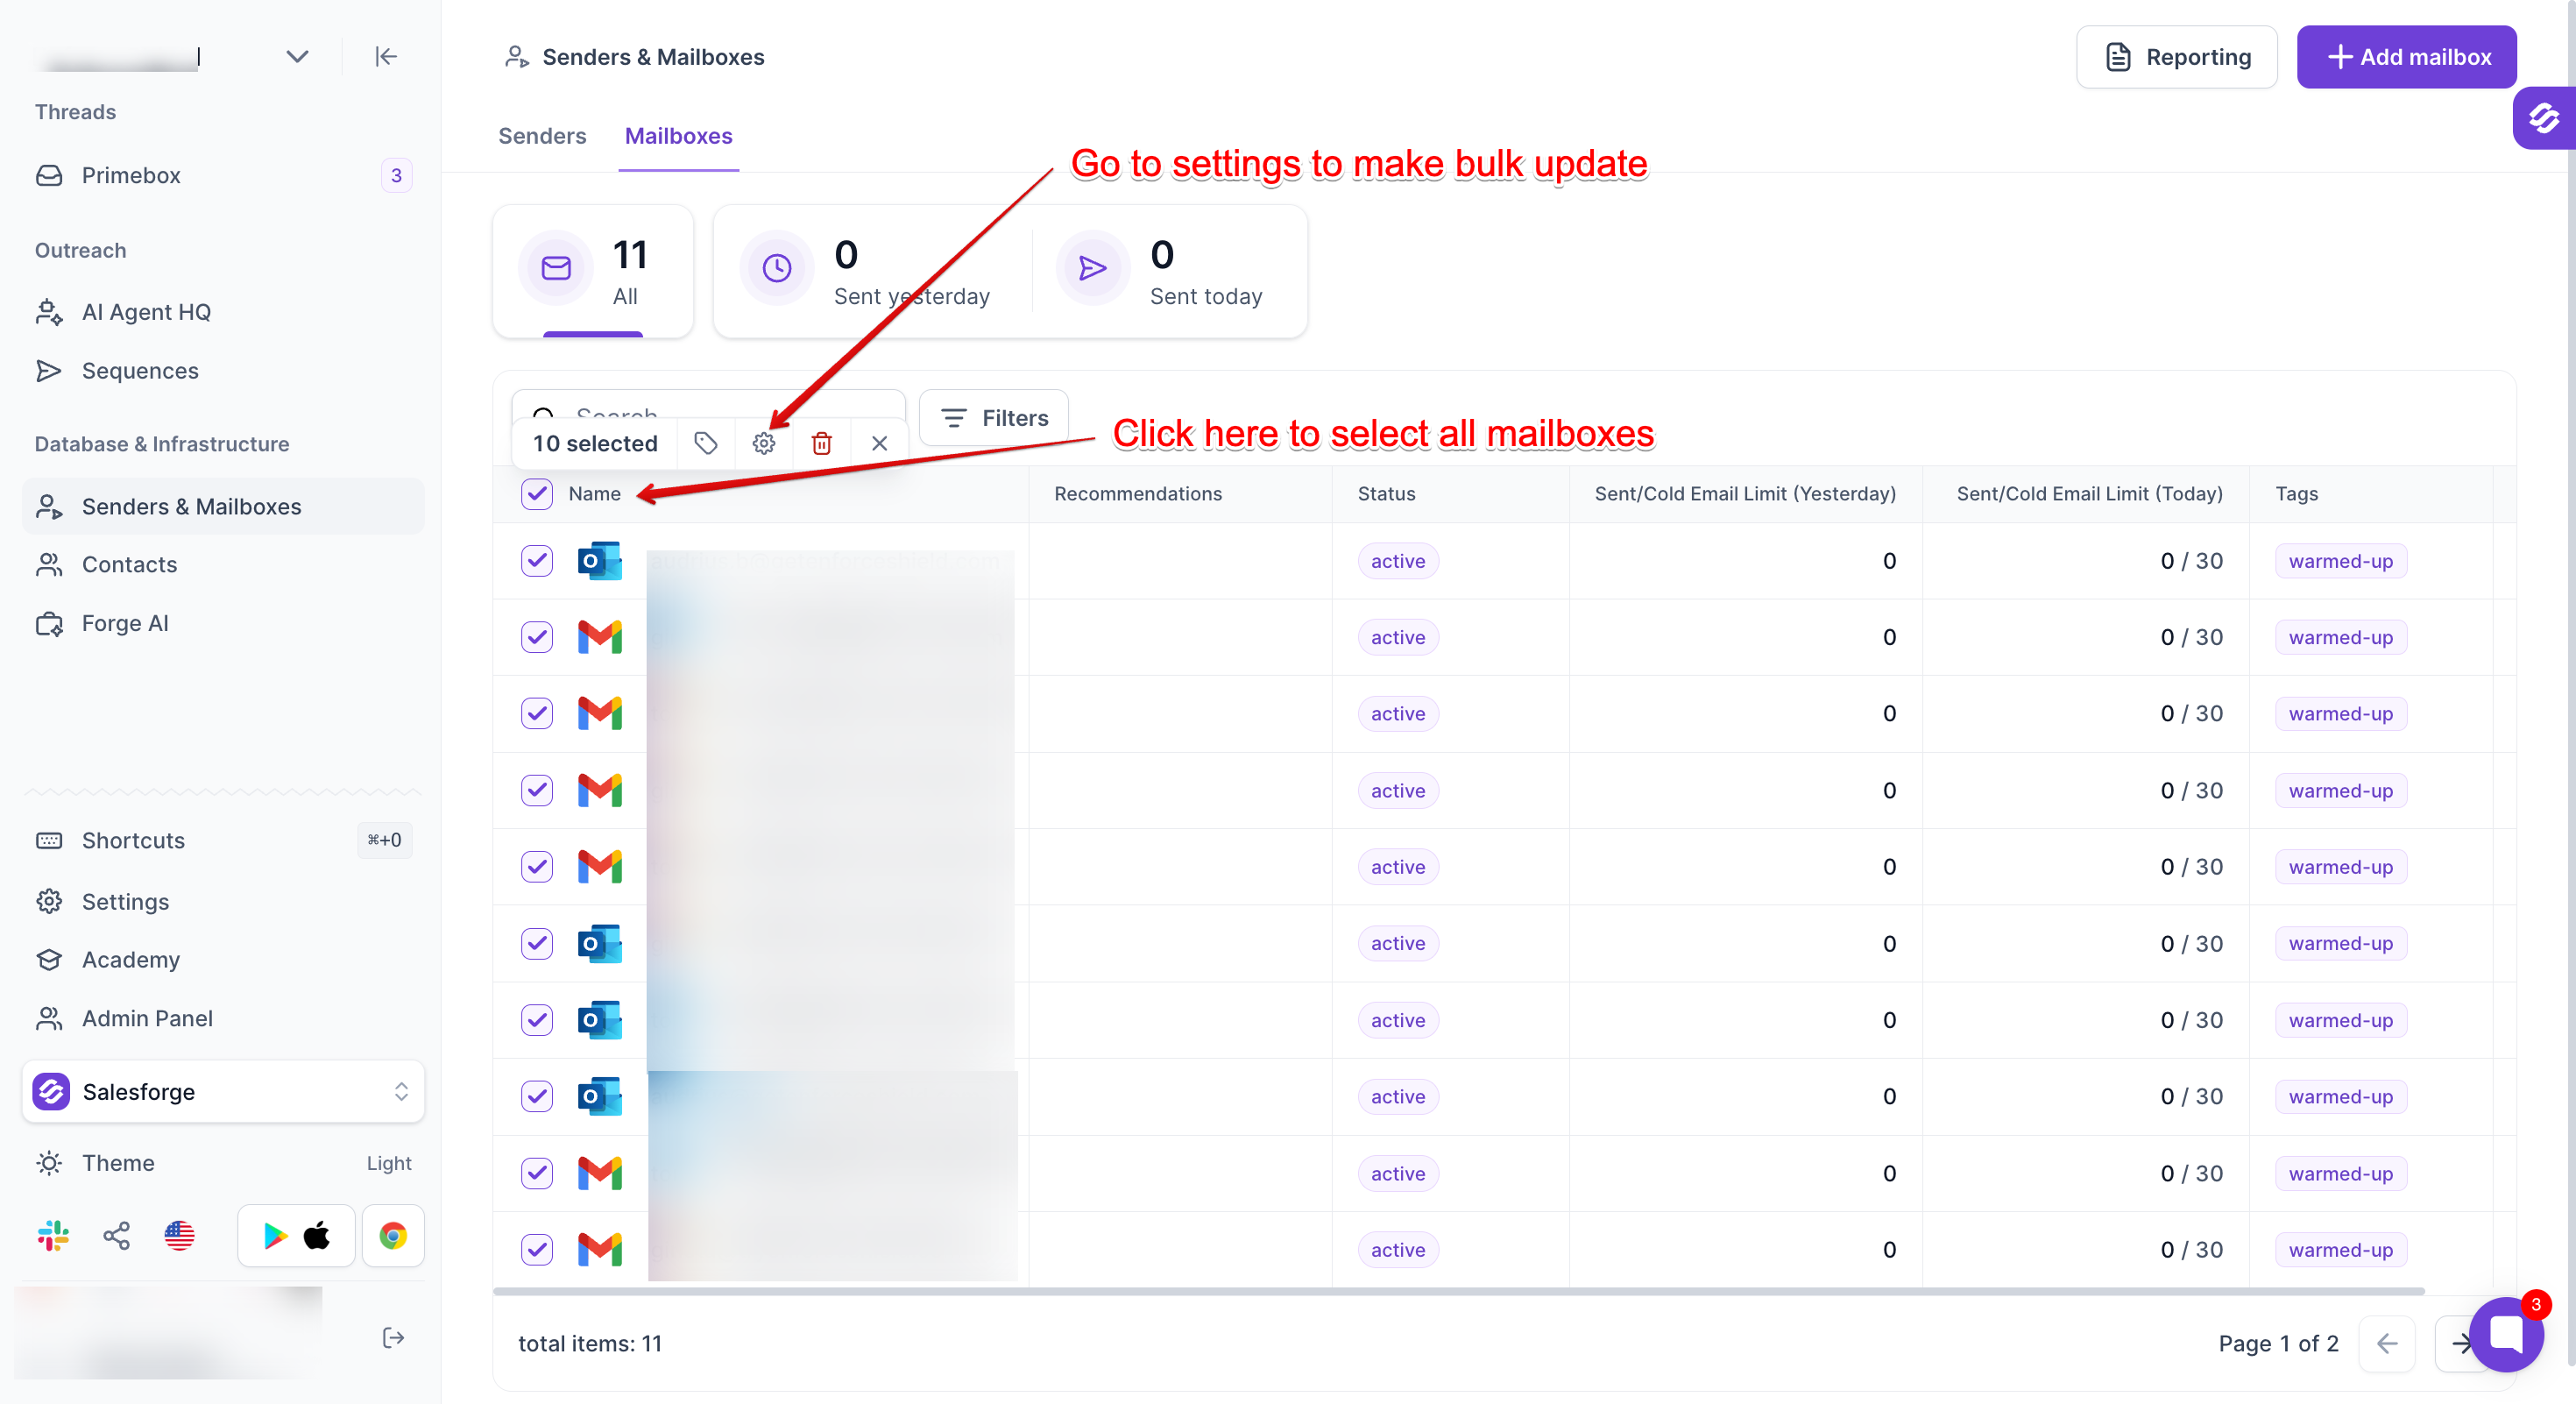
The Senders & Mailboxes Mailboxes table shows selected mailbox rows; red arrows point to the bulk settings gear and the select-all checkbox beside Name. Visible: Senders & Mailboxes, Senders, Mailboxes, Reporting, Add mailbox, 10 selected.

  1. In the Bulk update pop-up, go to the Signature tab, add your signature, and click Update.
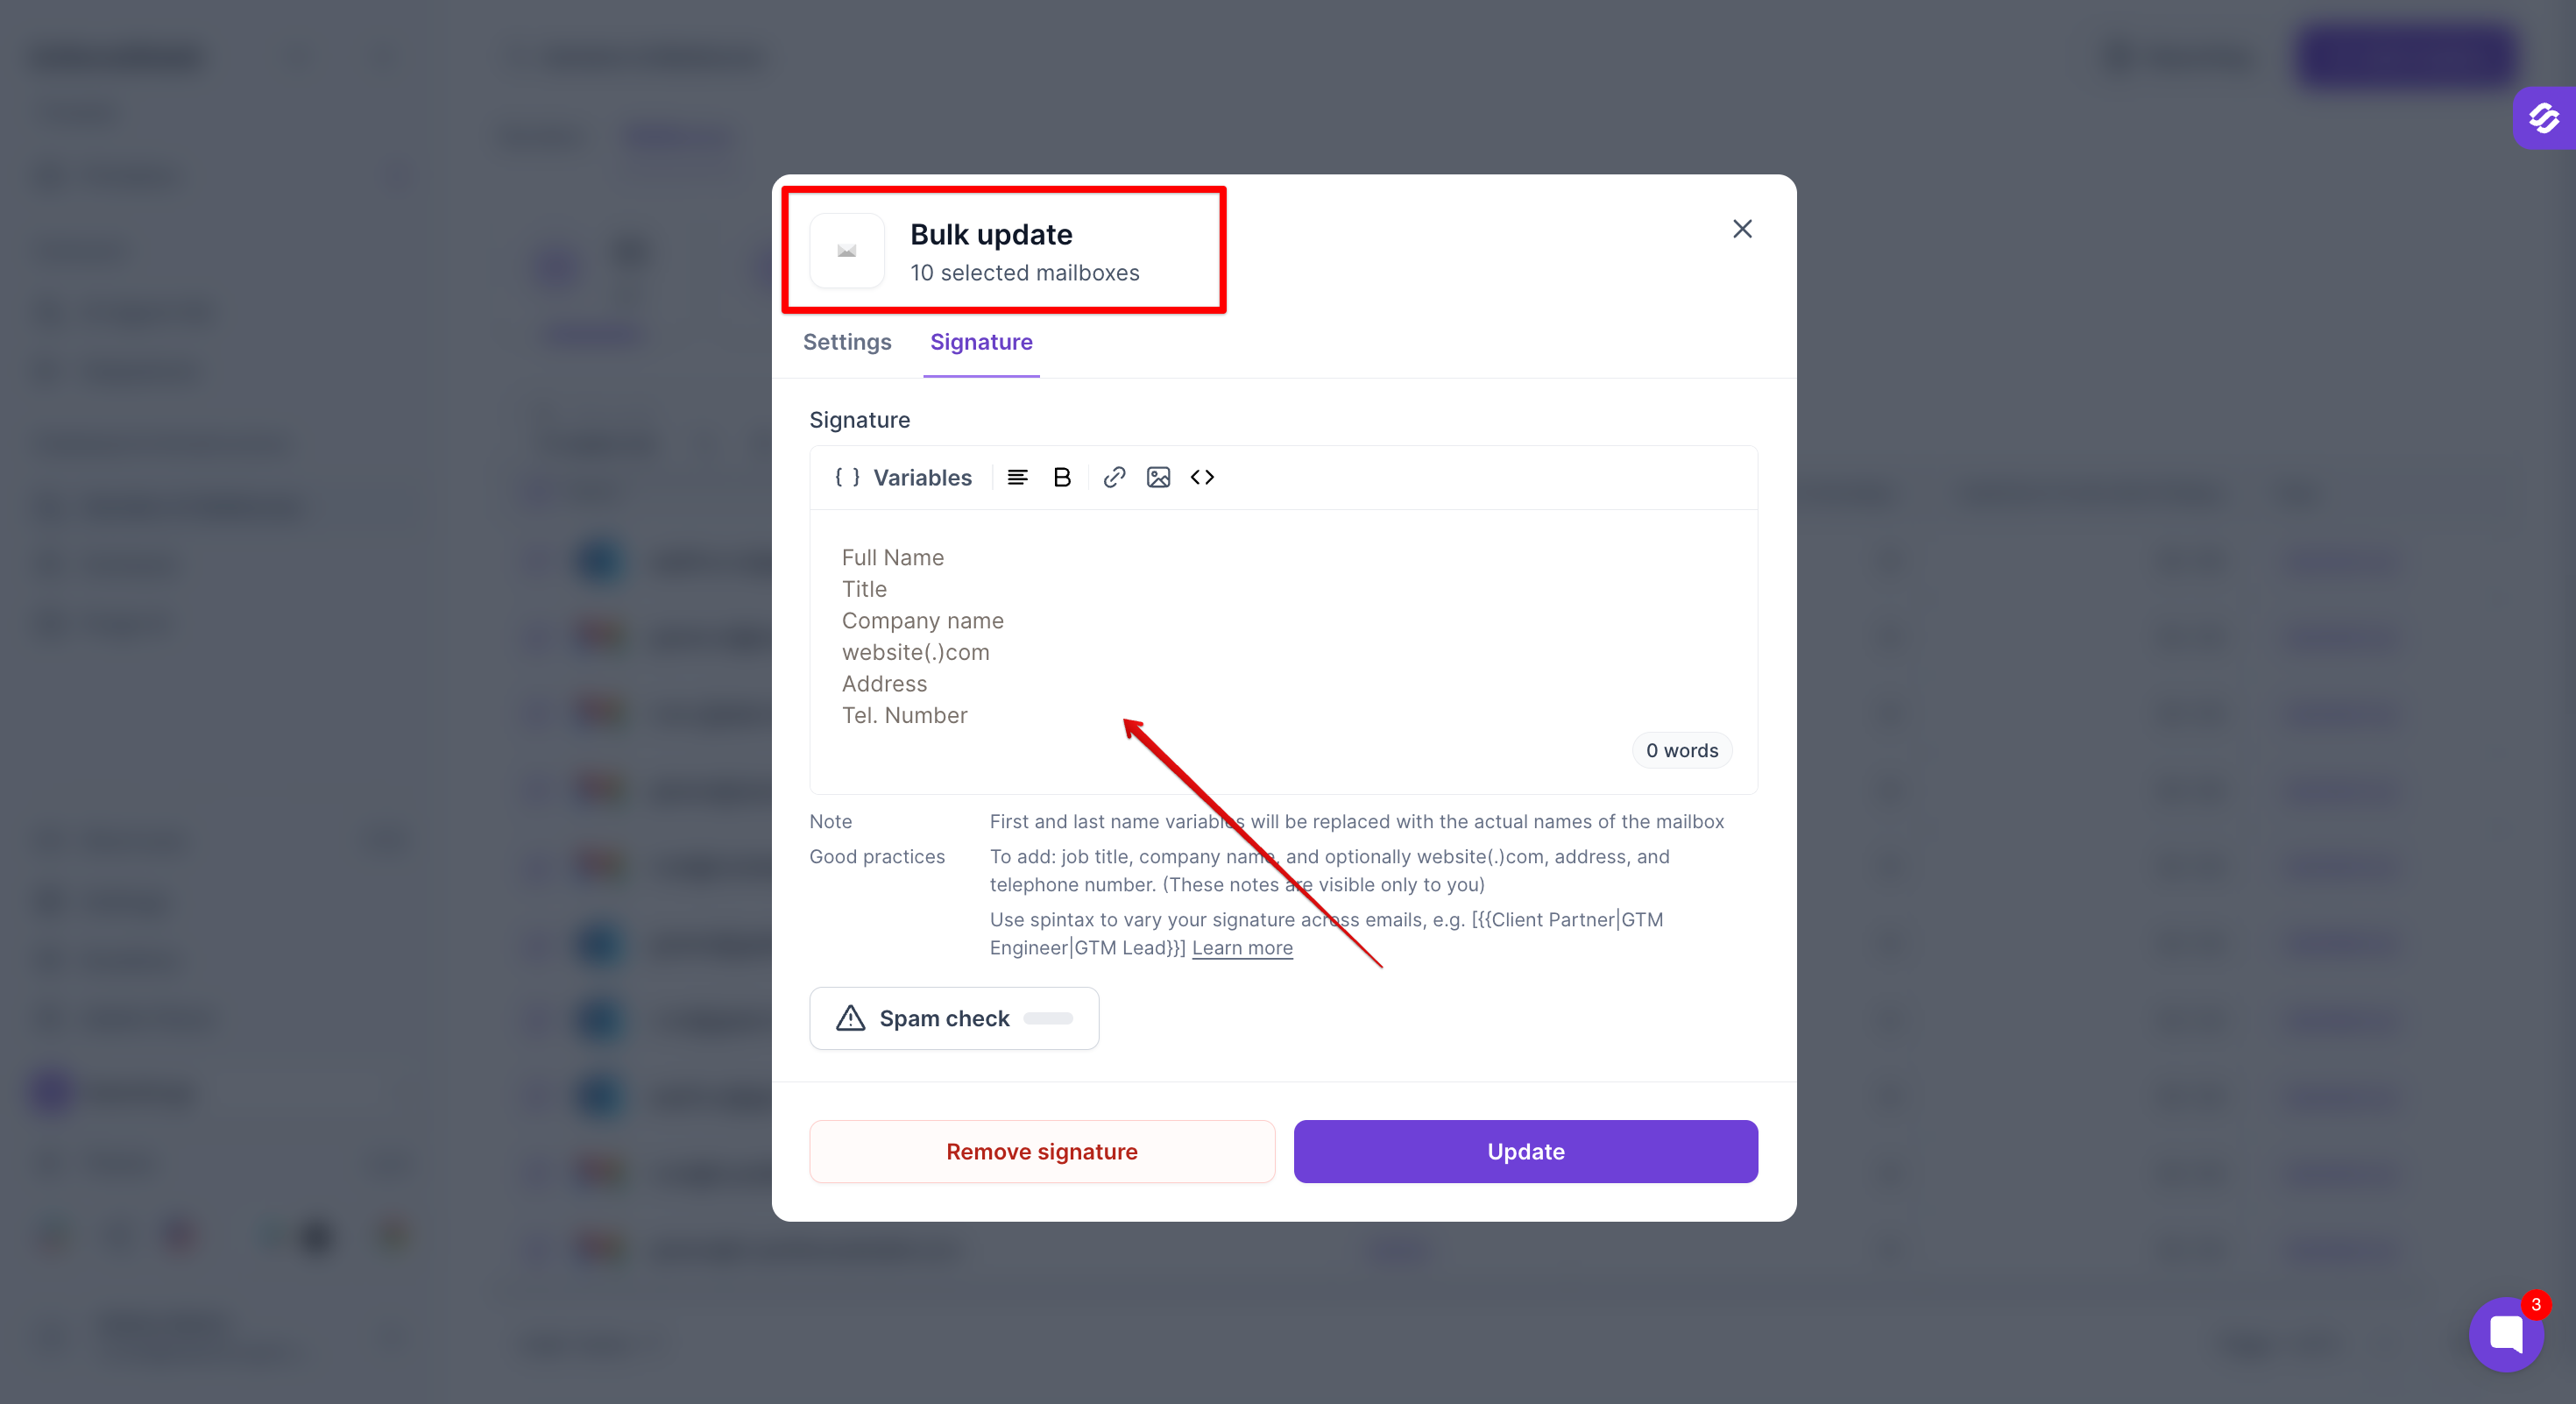
Bulk update dialog for 10 selected mailboxes with the Signature tab open; a red box highlights the dialog header, and an arrow points to the signature editor fields. Visible: Bulk update, 10 selected mailboxes, Settings, Signature, Variables, Full Name.

Need help?

If you run into any issue, reach out to our support team through the chat widget and we will be happy to help.

Did this answer your question?
😞
😐
😁