company logo

Salesforge Helpdesk

Go to Salesforge
Agent FrankLeadsforge - Search Engine For LeadsPrimeforge - Google & MS365Mailforge - Distributed Email InfrastructureInfraforge - Private Email InfrastructureWarmforge - Email Deliverability Center
All collectionsWhat is Salesforge? πŸ€”How to Invite User

How to Invite User

The Forge Stack (Salesforge, Mailforge, Infraforge, Primeforge, Leadsforge, Warmforge) lets you add teammates to your account. The core invite rules below apply the same way across every Forge product.

How inviting works (applies to all Forge products)

One account equals one workspace.

This means:

  • A person can only belong to one account/workspace under a given email address, across the entire Forge Stack.

  • Anyone being invited to your workspace must create their account through the invite link sent to their email β€” not by signing up on their own. If they sign up independently, that creates its own separate account and workspace, not a membership in yours.

  • If someone already created their own workspace on their own, they cannot be invited into your workspace afterward β€” this isn't something that can be done from the invite flow. In this case, contact support for assistance.

Add Existing User vs Add New User:

  • Add Existing User β€” use this for someone who was previously part of your workspace and was removed. Click Add Existing User to bring them back, instead of sending a new invite.

  • Add New User β€” use this for anyone who has never been part of your workspace. This sends an invitation email, and they must use that link to create their account.

Inviting a user should be done in 2-easy steps:

  1. From your Forge Account, go to Settings
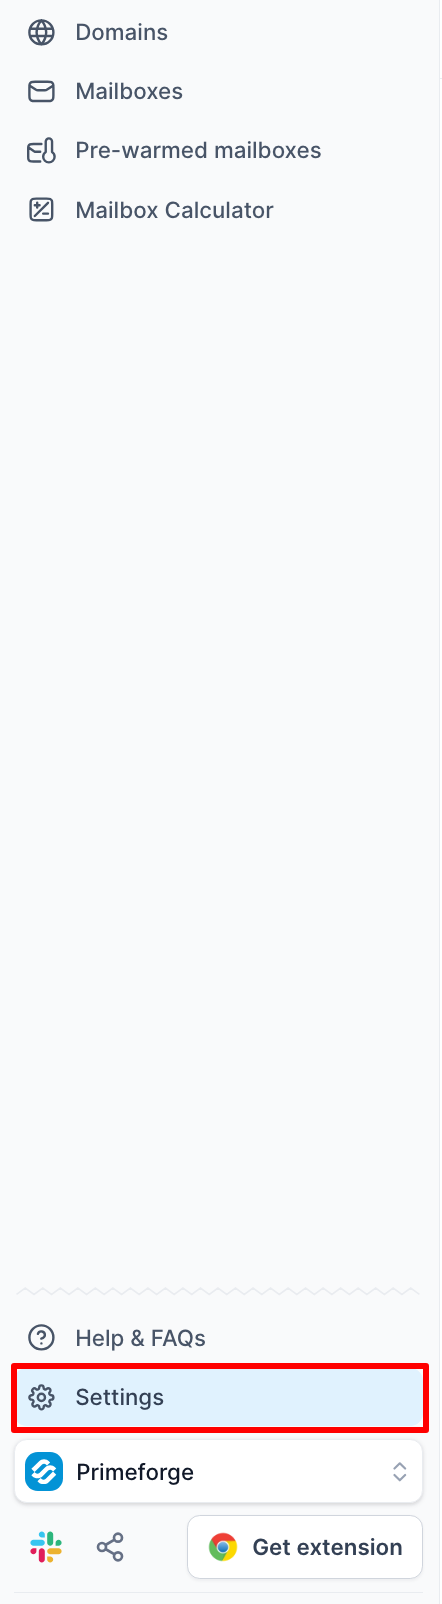
Left navigation sidebar showing Domains, Mailboxes, Pre-warmed mailboxes, Mailbox Calculator, Help & FAQs, and Settings, with Settings outlined in red. Visible: Domains, Mailboxes, Pre-warmed mailboxes, Mailbox Calculator, Help & FAQs, Settings.
  1. Click β€œUsers” or β€œUser & Roles”

    The settings navigation shows Billing, Users & Roles, Contact details, and API & MCP tabs; a red rectangle highlights Users & Roles. Visible: Billing, Users & Roles, Contact details, API & MCP.
  2. You will see this buttons on the right side of your screen:
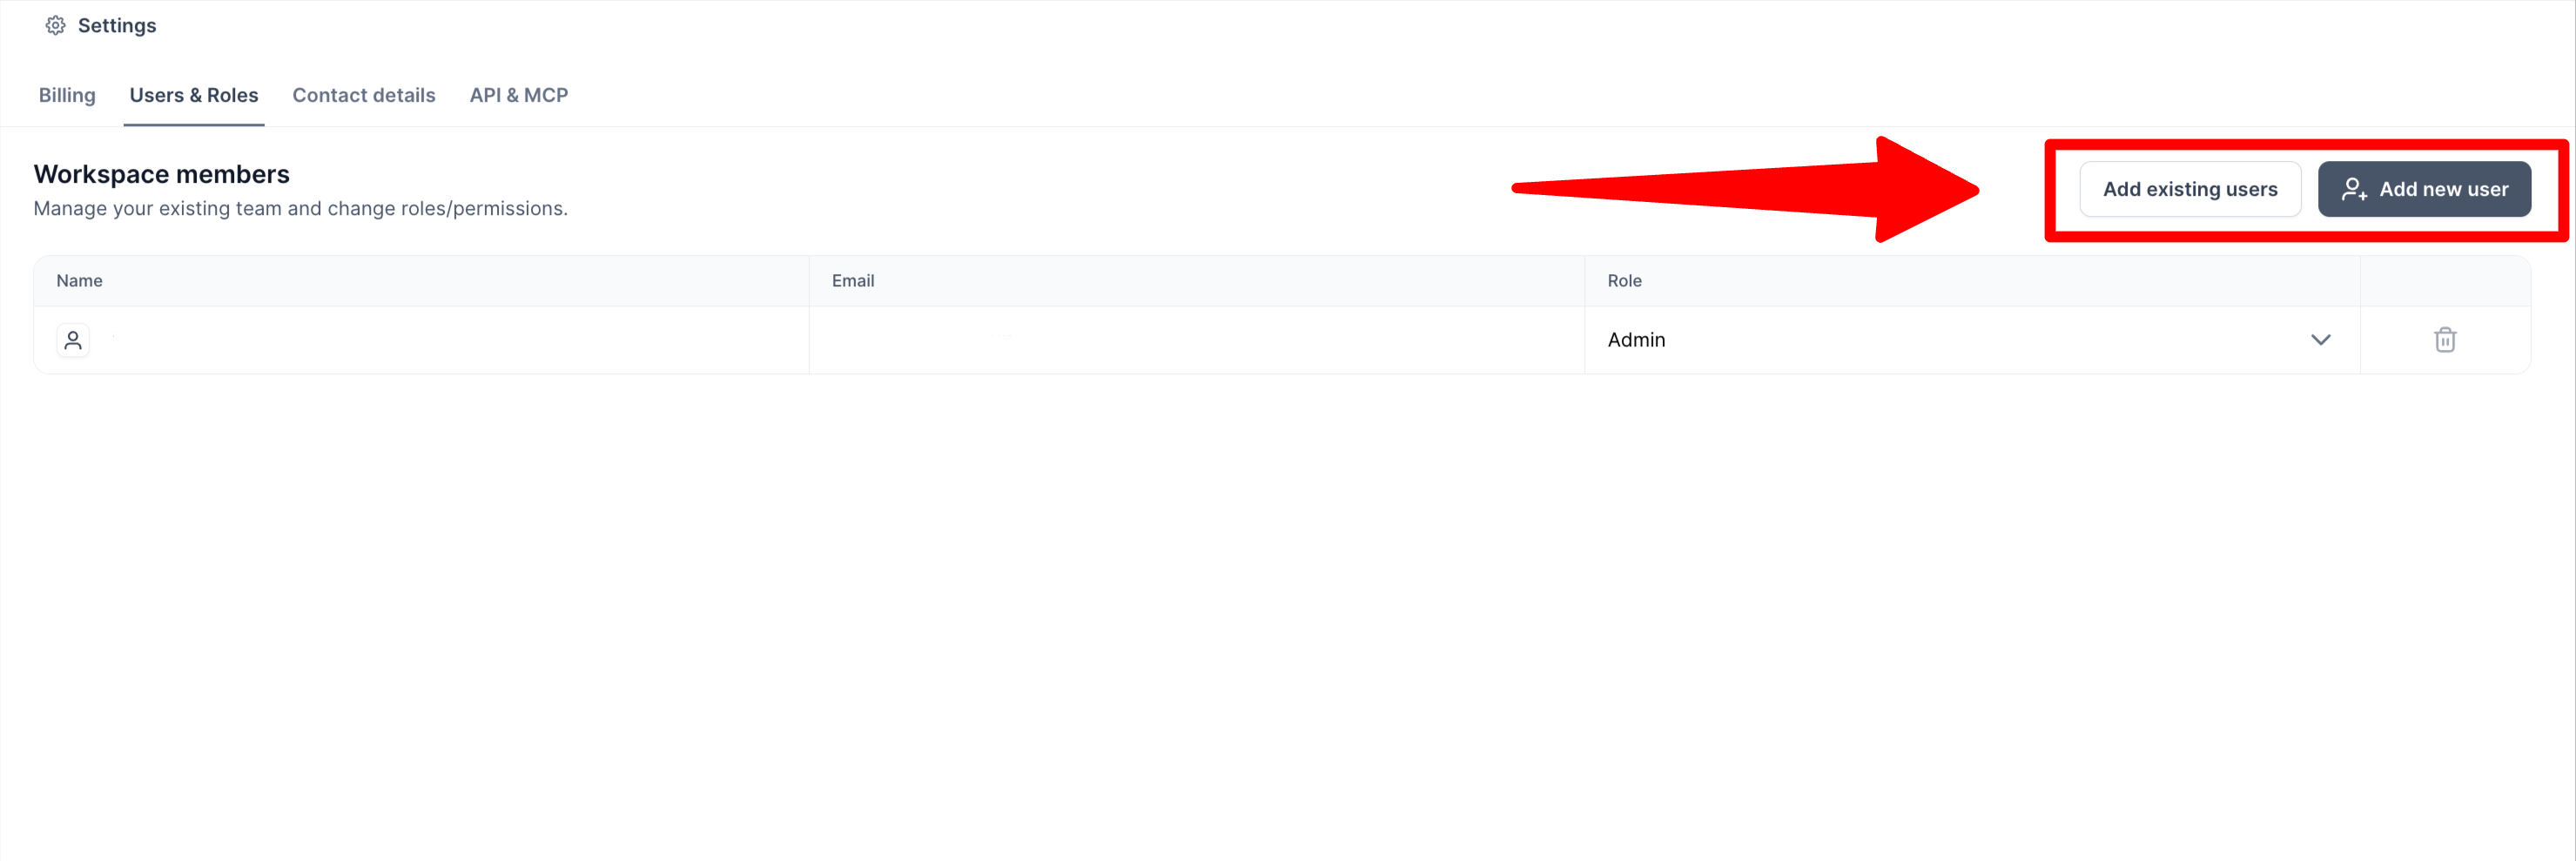
    Settings > Users & Roles shows Workspace members, with a red arrow and box highlighting the Add existing users and Add new user buttons. Visible: Settings, Billing, Users & Roles, Contact details, API & MCP, Workspace members.

  3. If you want to add existing users on your workspace, click β€œAdd Existing Users”. Quick Note: Clicking the Select option with a drop-down button will show you the previous users you would like to add in your workspace. Once selected, click Add user to a workspace.
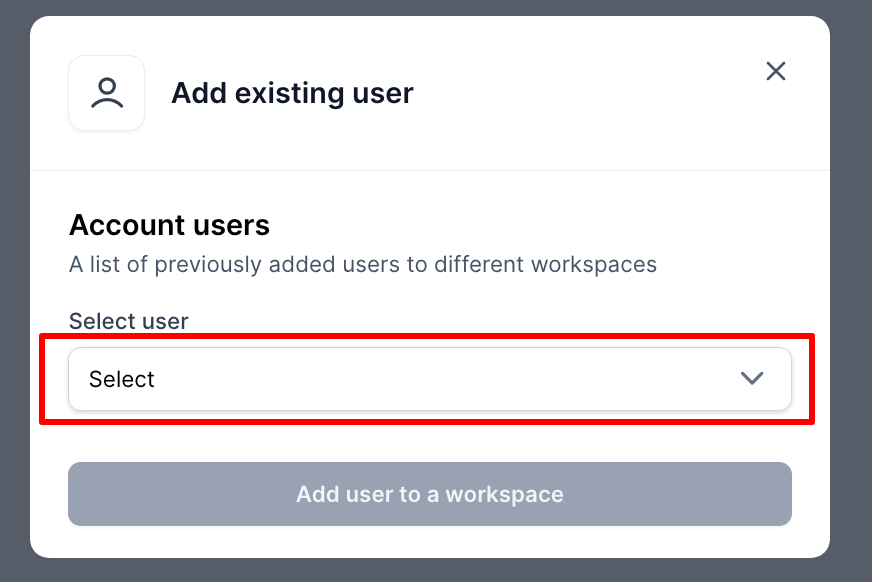
    The Add existing user dialog shows Account users and a Select user dropdown outlined in red above a disabled Add user to a workspace button. Visible: Add existing user, Account users, A list of previously added users to different workspaces, Select user, Select, Add user to a workspace.
  4. For New Users, click β€œAdd new users”. You are required to share their active email address to complete the signup and invitation.
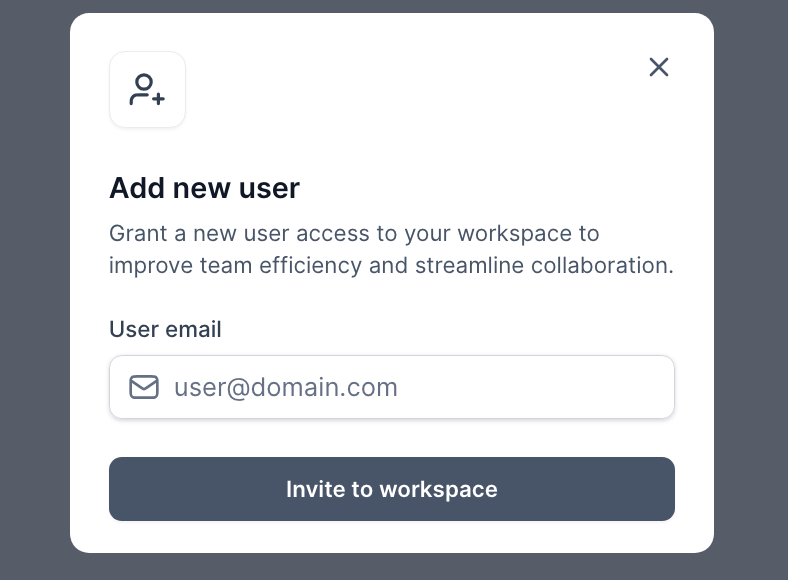
The Add new user dialog shows a User email field and an Invite to workspace button for granting a user access. Visible: Add new user, Grant a new user access to your workspace to improve team efficiency and streamline collaboration., User email, user@domain.com, Invite to workspace.

Salesforge-specific: Plan Limits

On the Pro plan, your Salesforge account is limited to 1 user. Inviting additional teammates requires the Growth plan, which supports multiple/unlimited users. This limit is specific to Salesforge β€” Mailforge, Primeforge, Warmforge, Leadsforge and Infraforge allow inviting users at no extra cost regardless of plan, since their pricing is based on mailbox slots, not seats.

Did this answer your question?
😞
😐
😁
