With Bitscale connected to Salesforge, you can:
Find and enrich people or companies in Bitscale
Retrieve verified emails and data using Email Waterfall
Push contacts directly into Salesforge
Automatically add contacts into sequences
Keep your outbound workflow centralized in Salesforge
Open Salesforge
Go to Settings
Navigate to API
Click Add new key
Copy the generated API key

You will use this key inside Bitscale
Open Bitscale
Go to Integrations from the sidebar
Click Add Integration
Select Salesforge (Salesforge integration)
Enter:
Integration name
Your Salesforge API key
Click Verify
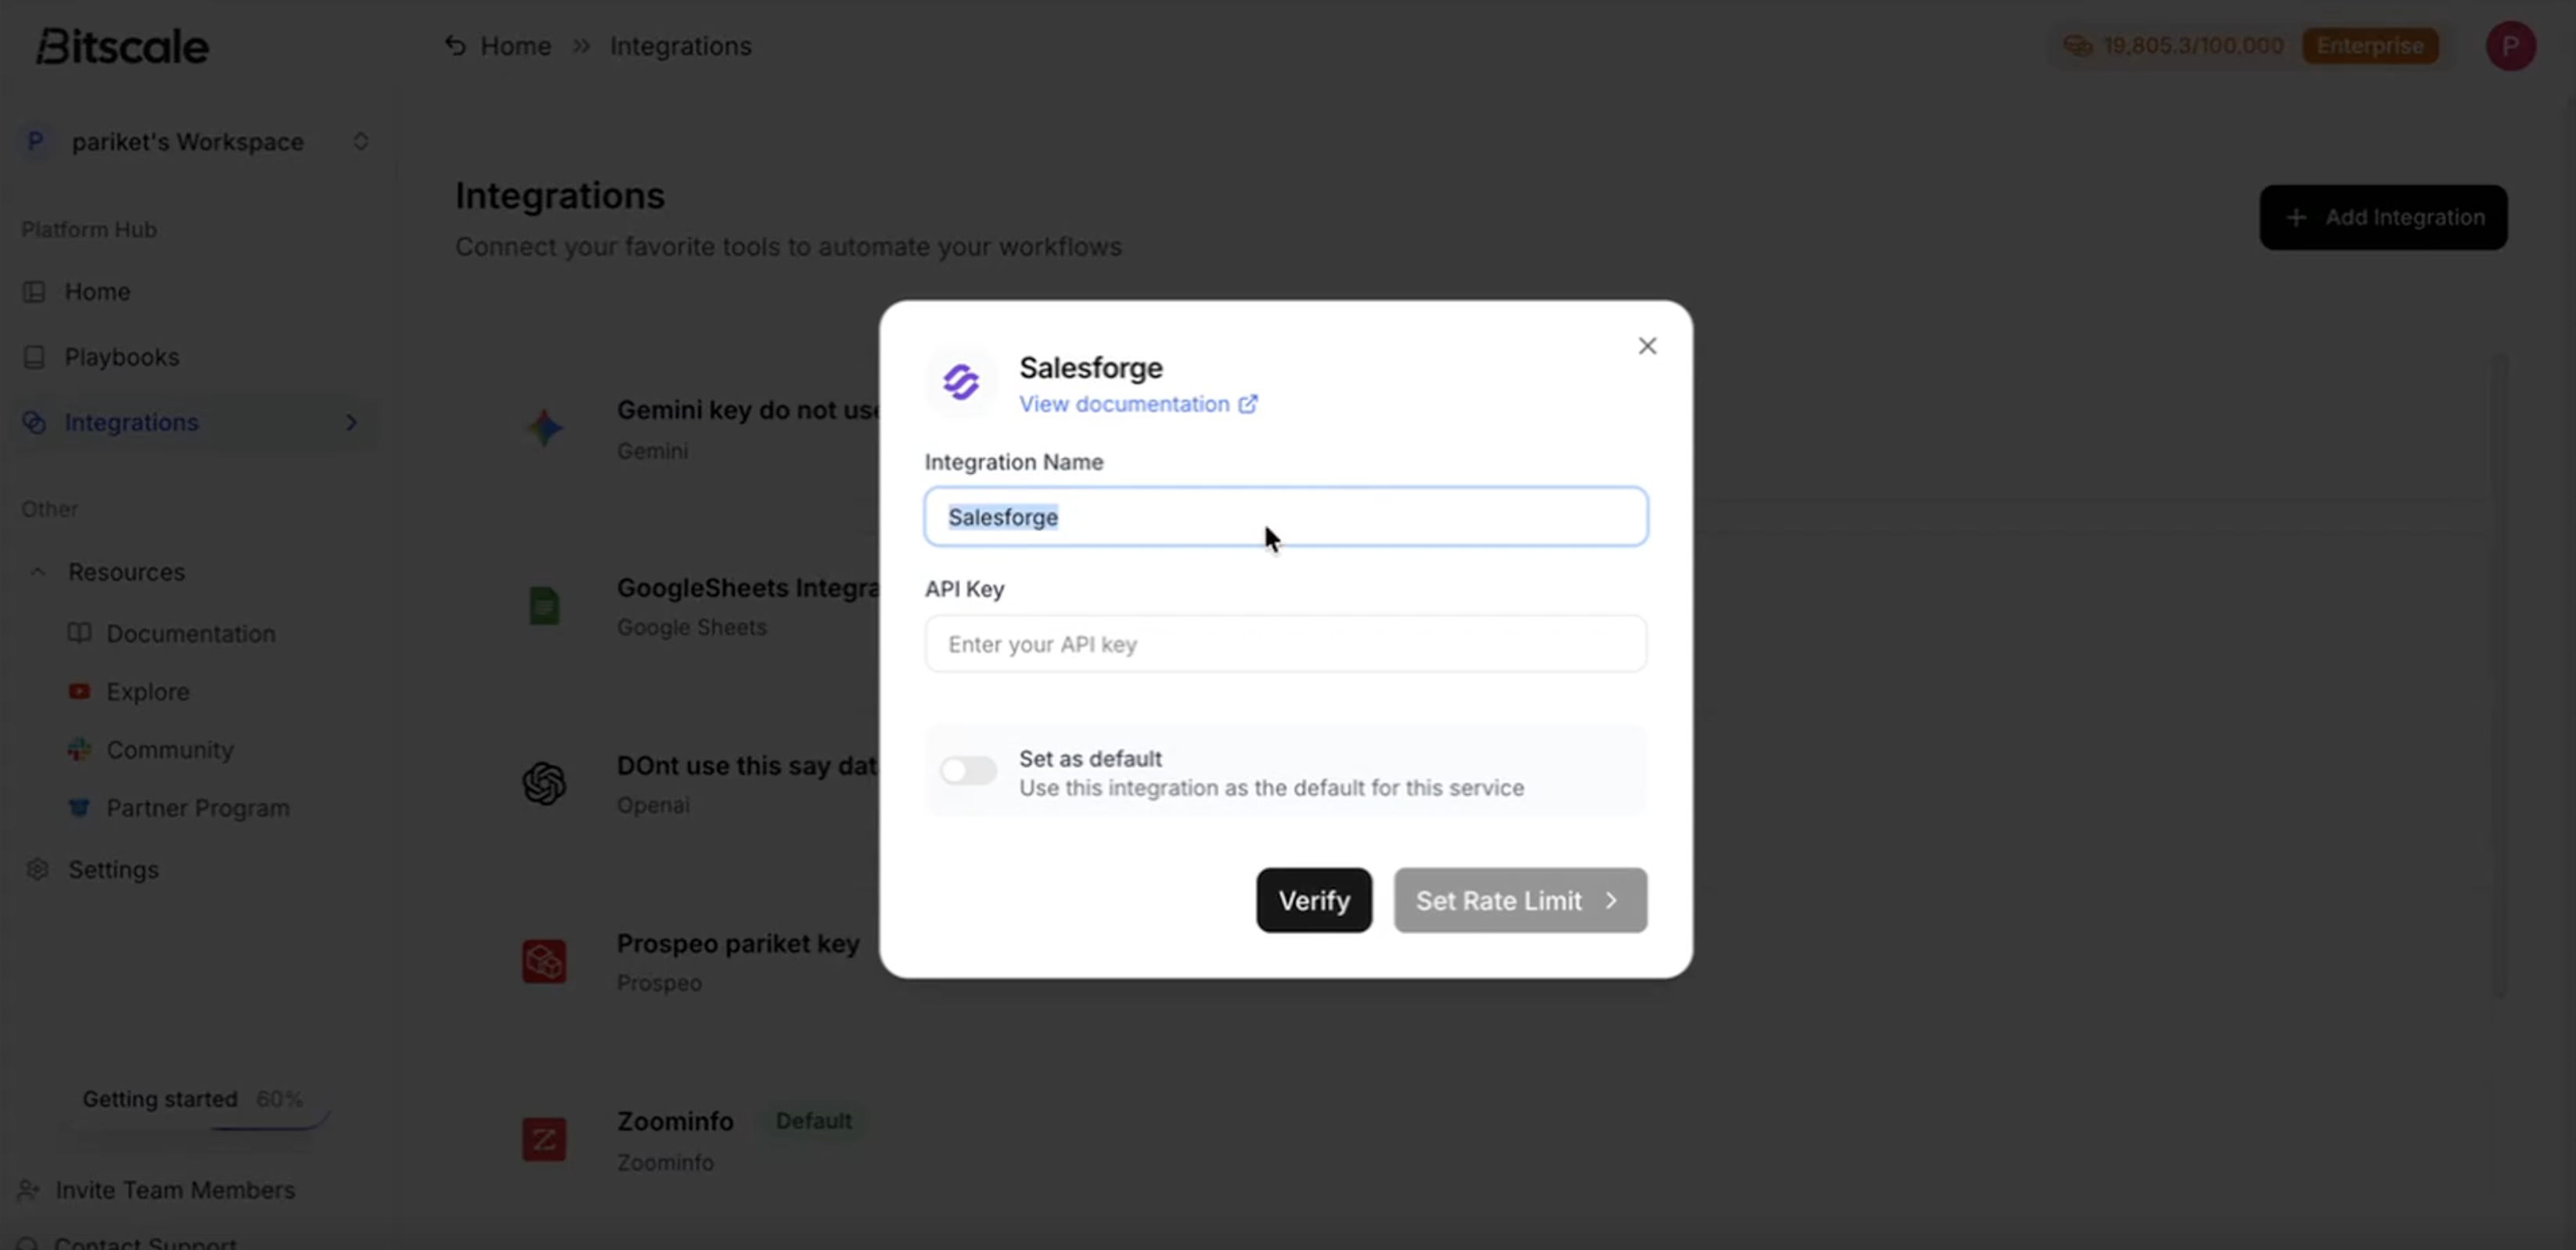
Once verified, the integration is ready to use.
Go to Home
Click Find People
Apply filters such as:
Location
Industry
Company attributes
Preview results
Click Import to New Grid or add to an existing grid
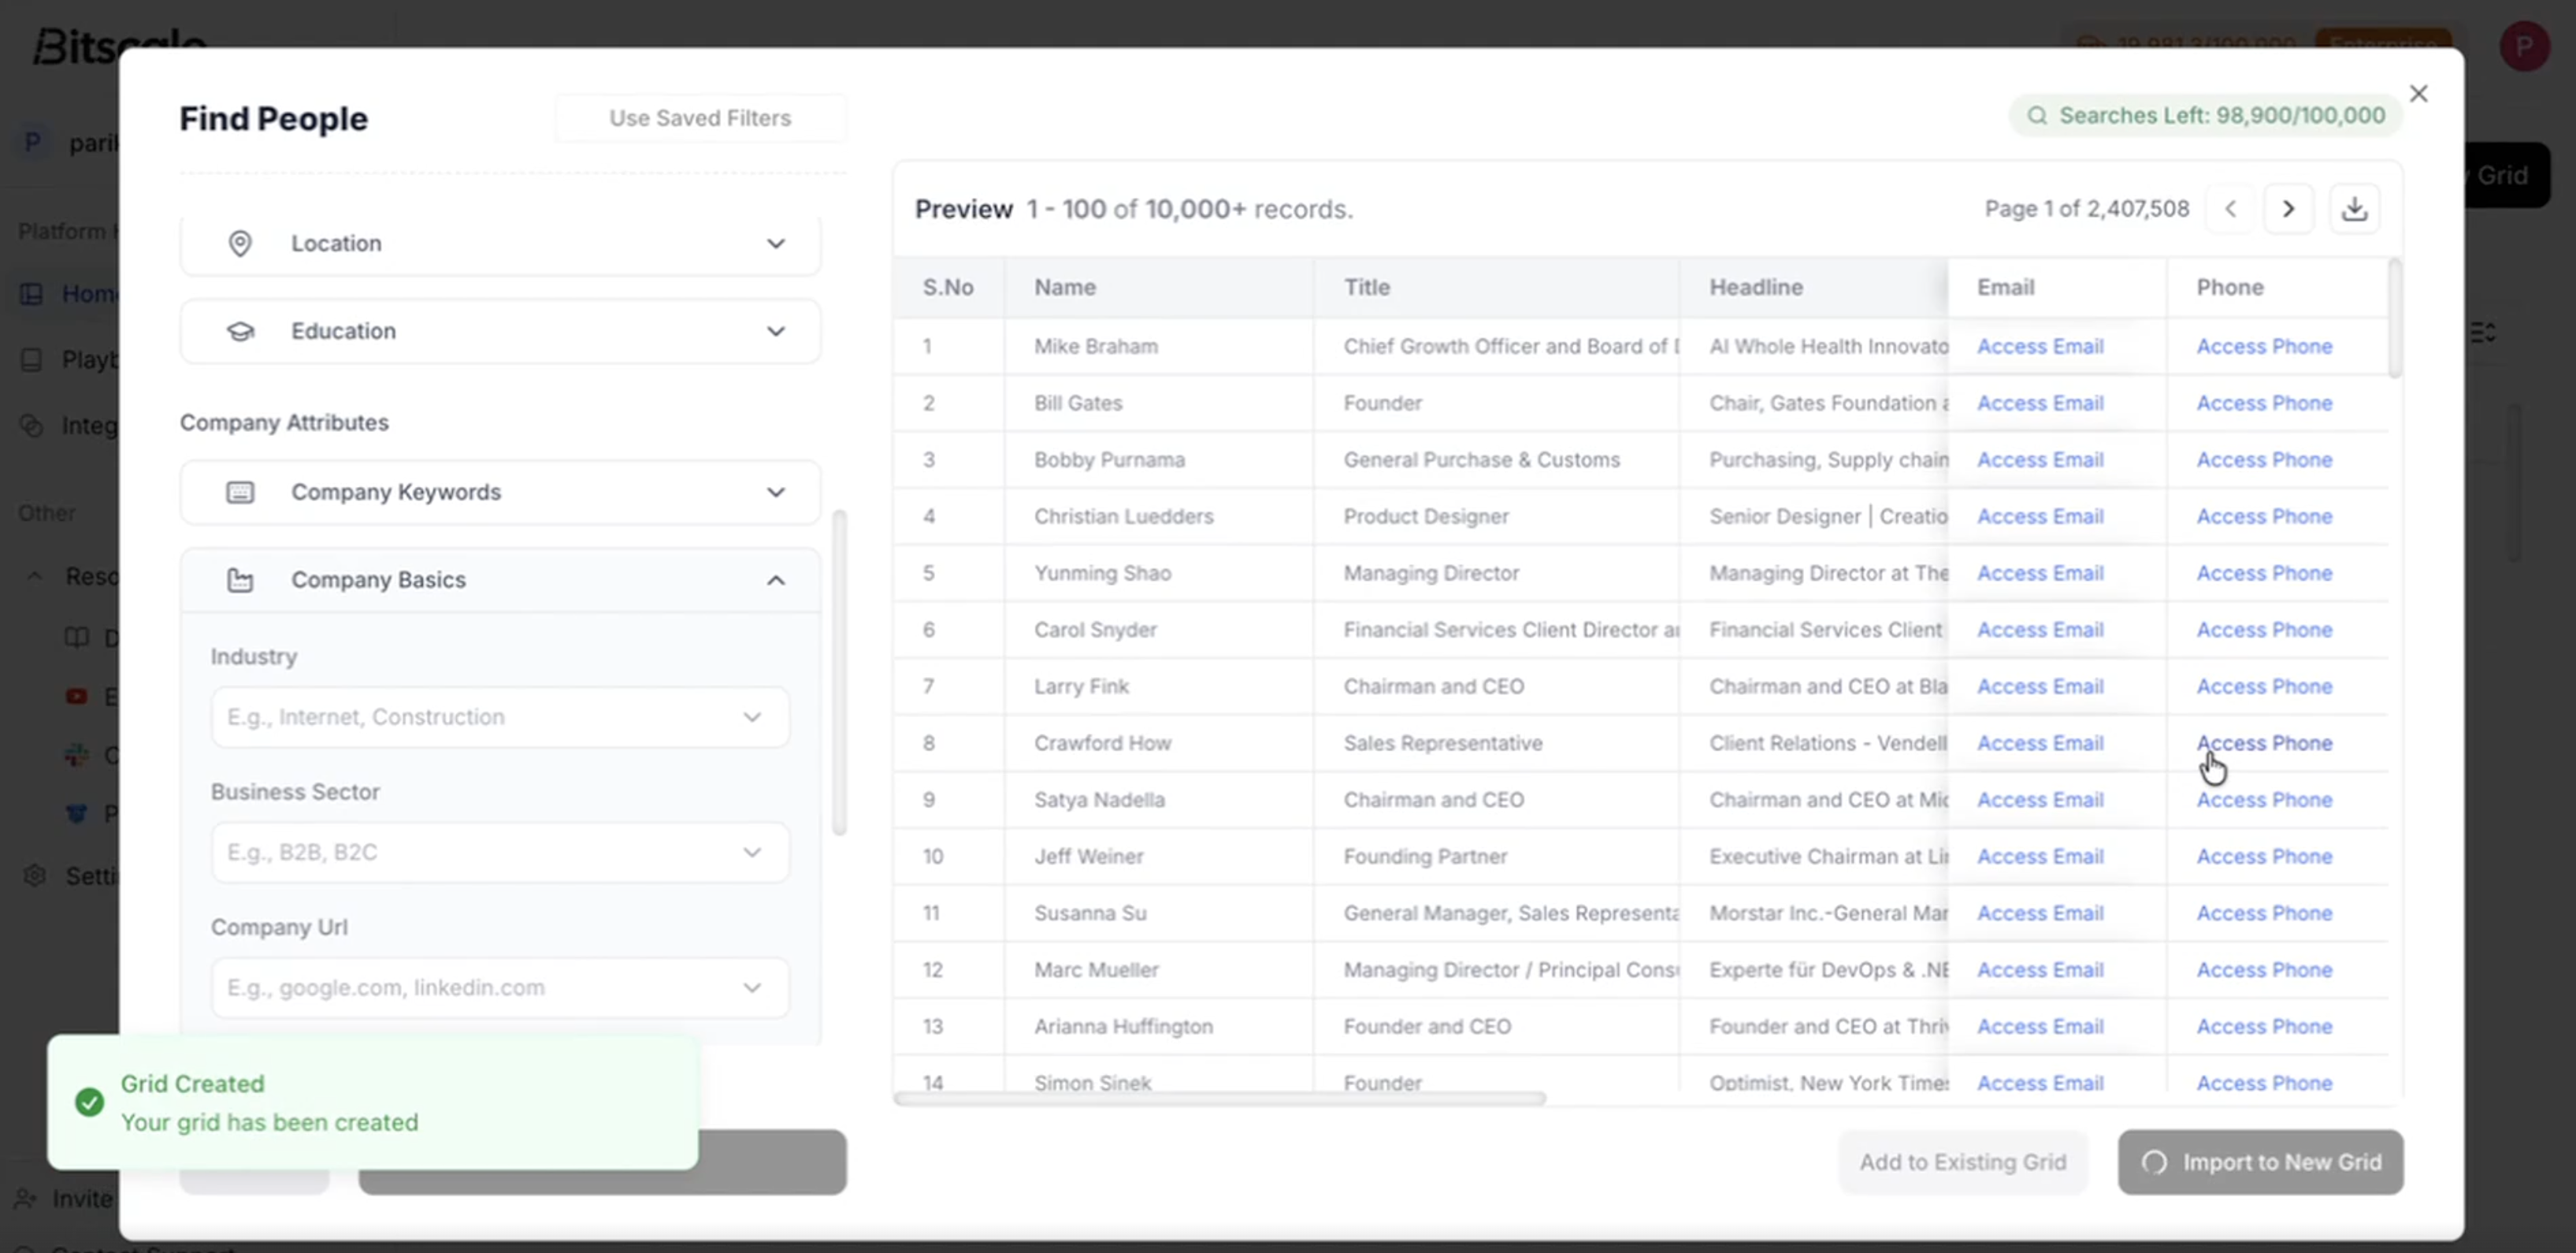
You now have a working dataset inside Bitscale.
Open your grid
Click Enrichment
Select Email Waterfall
Choose:
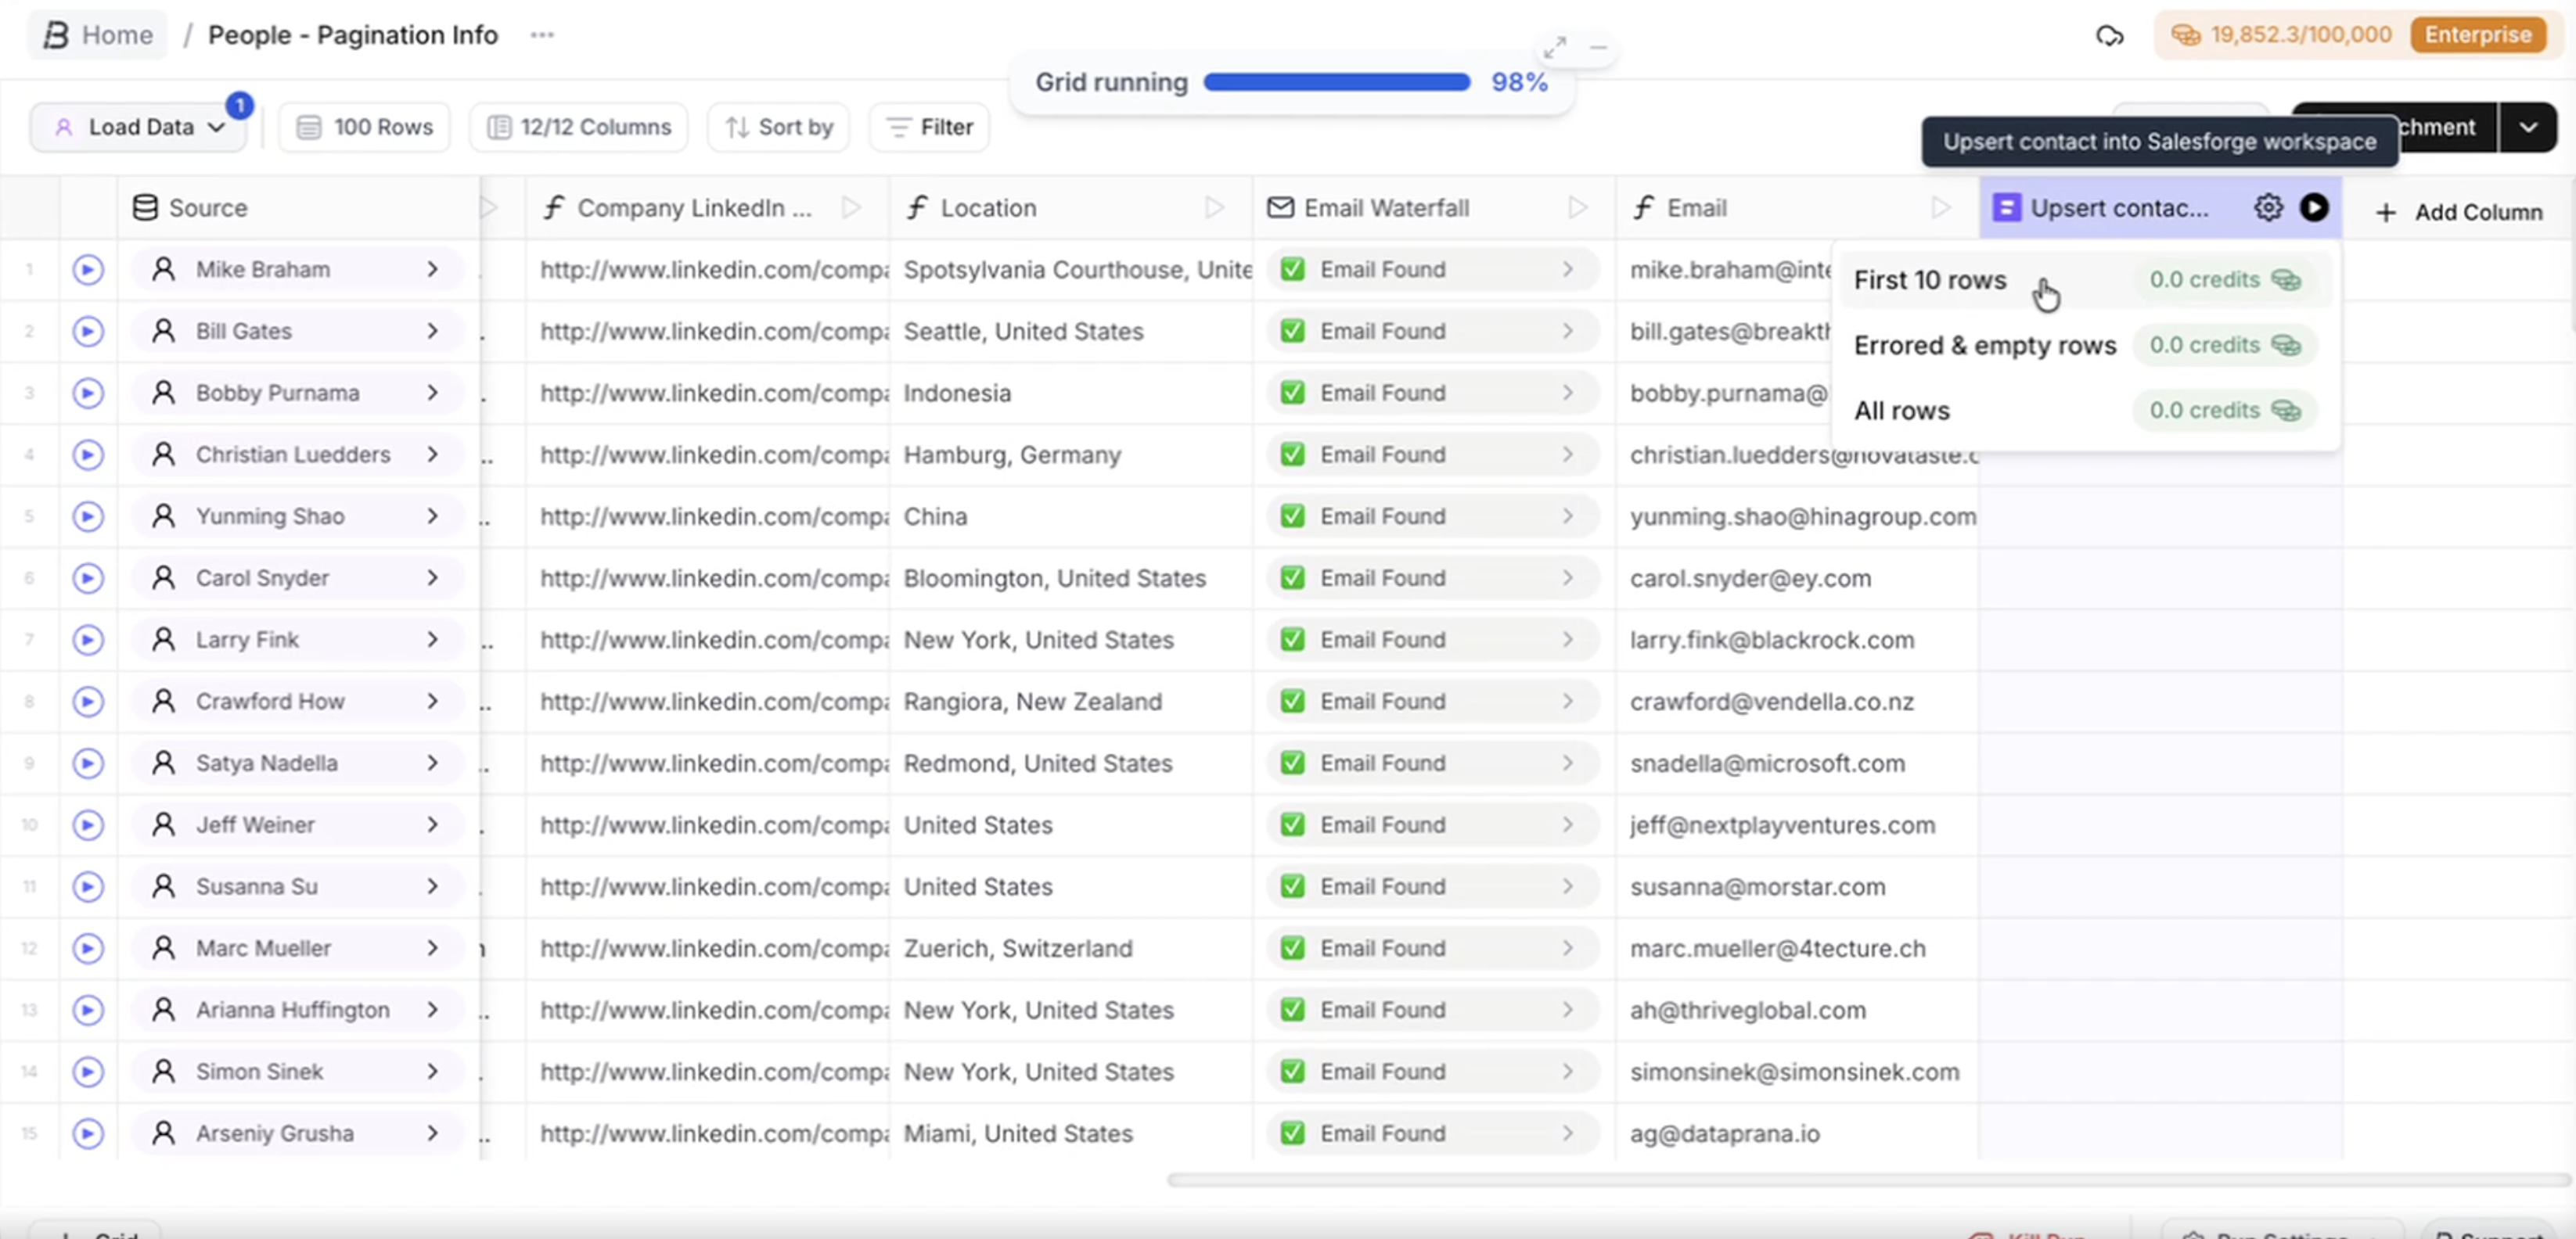
First 10 rows
All rows
Run enrichment
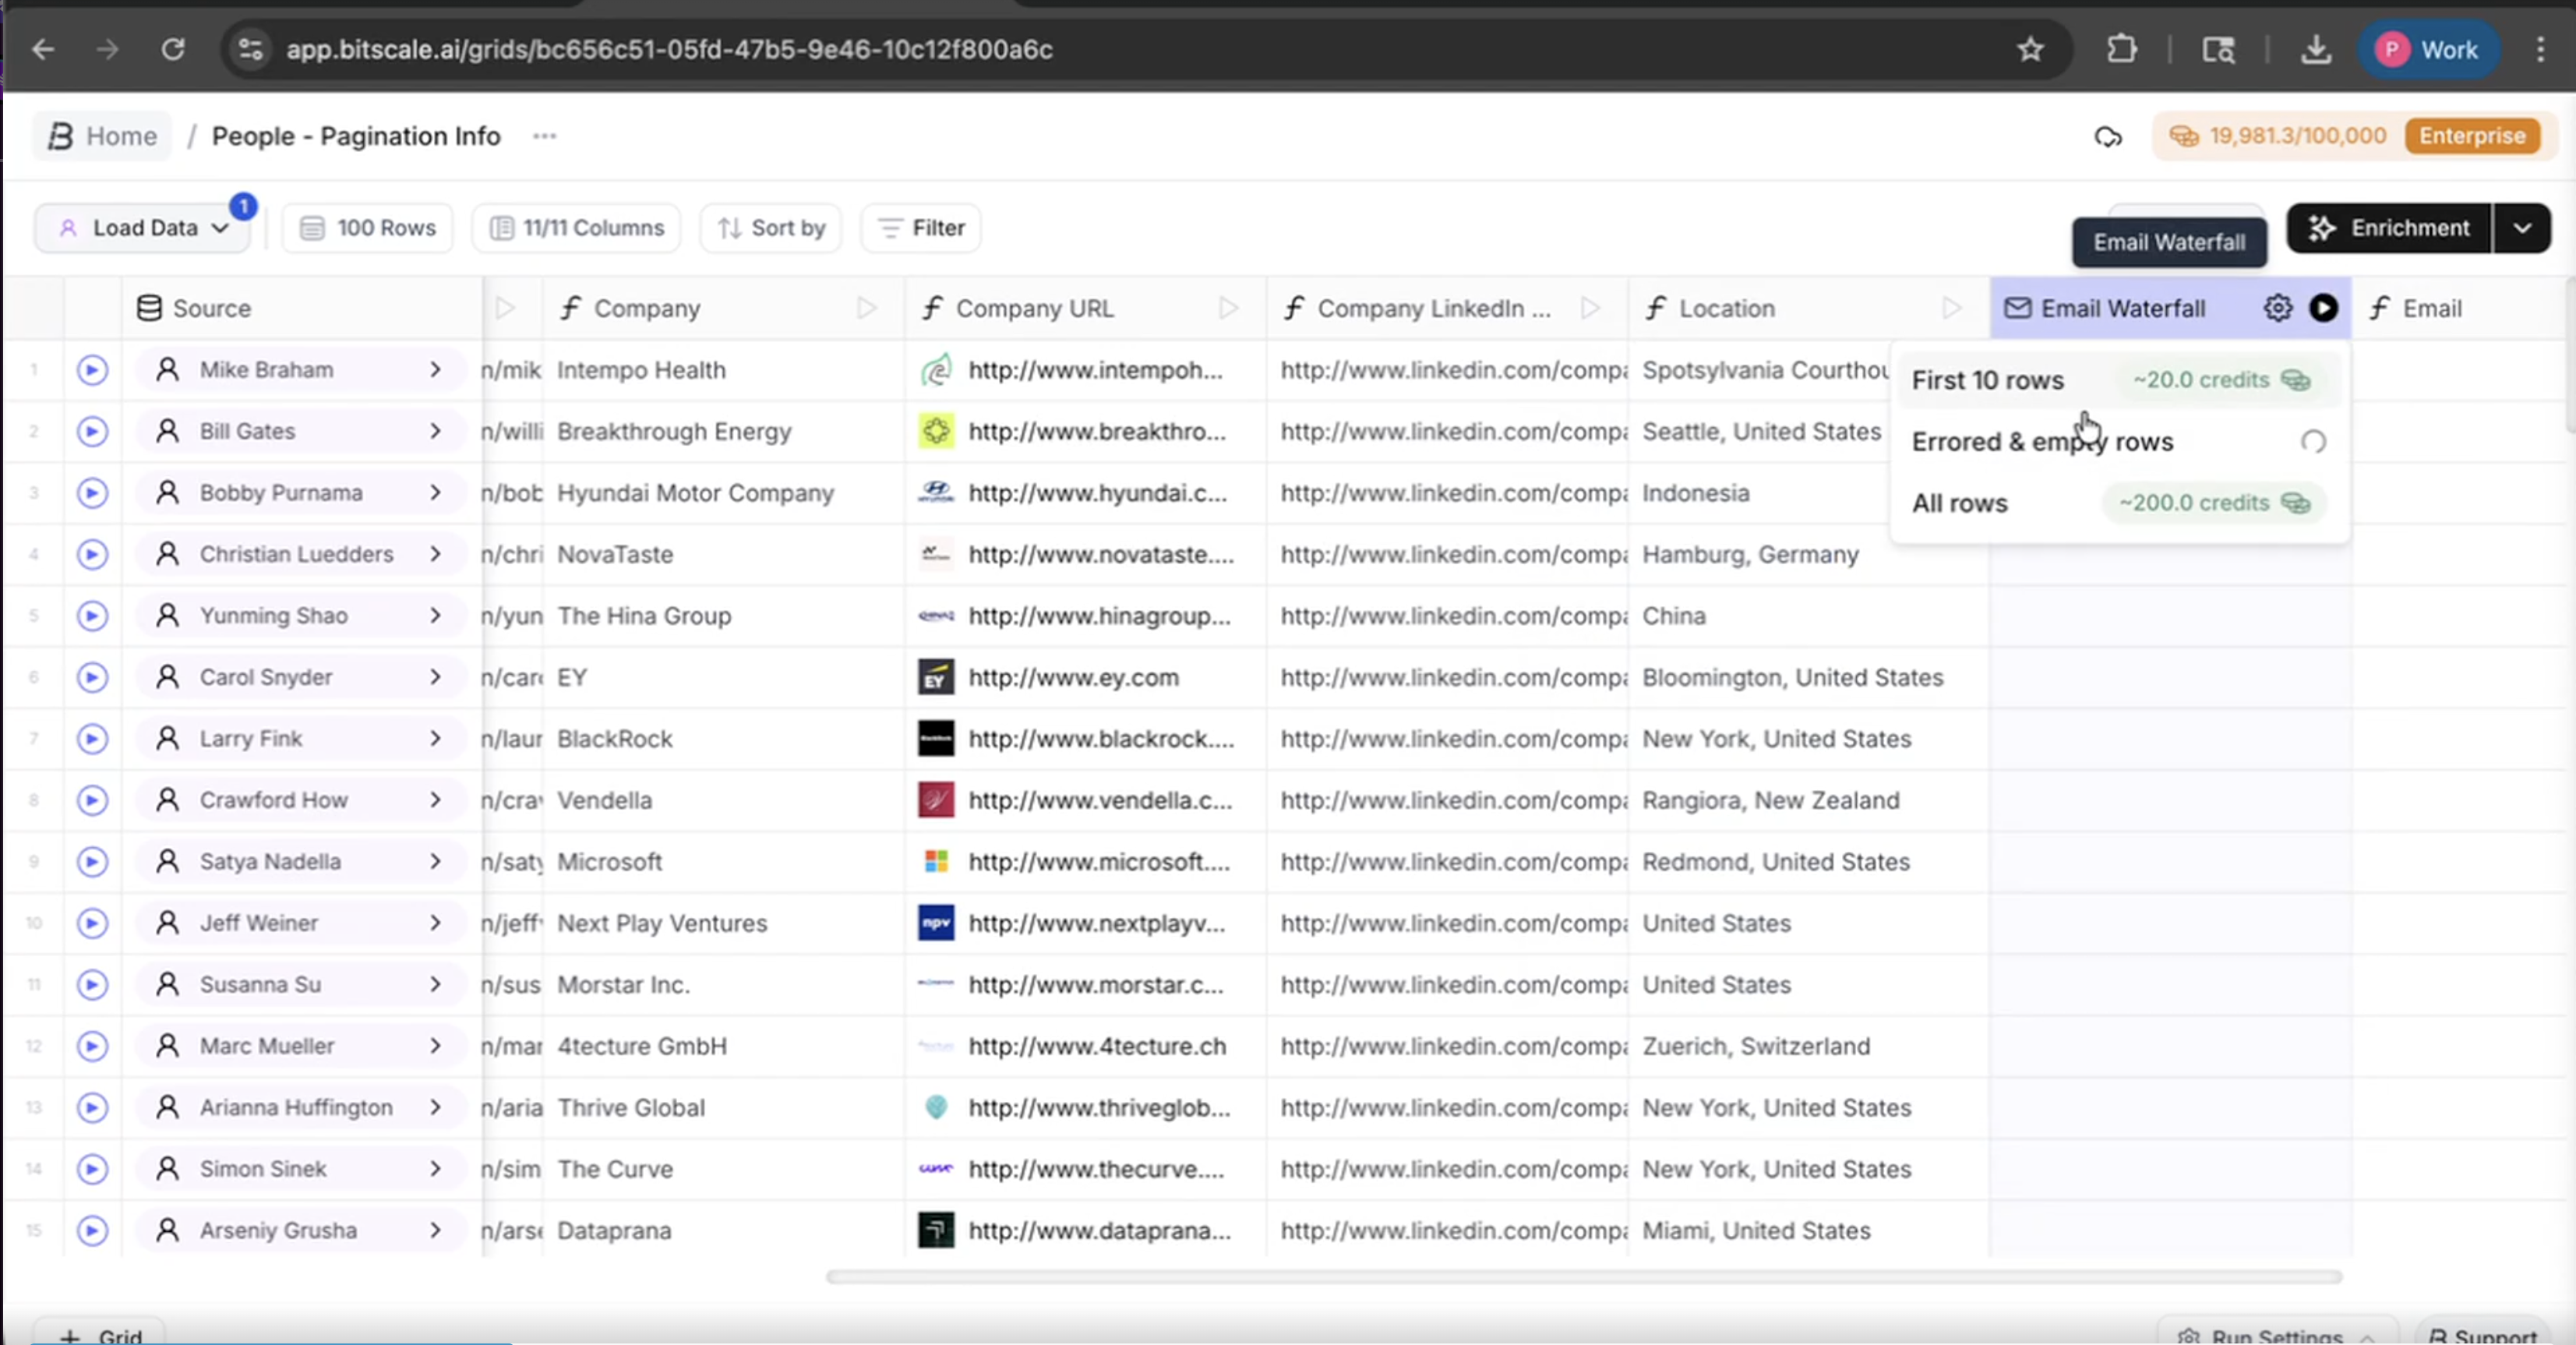
Once complete, you will see verified emails marked as “Email Found”.
In the grid, click Enrichment again
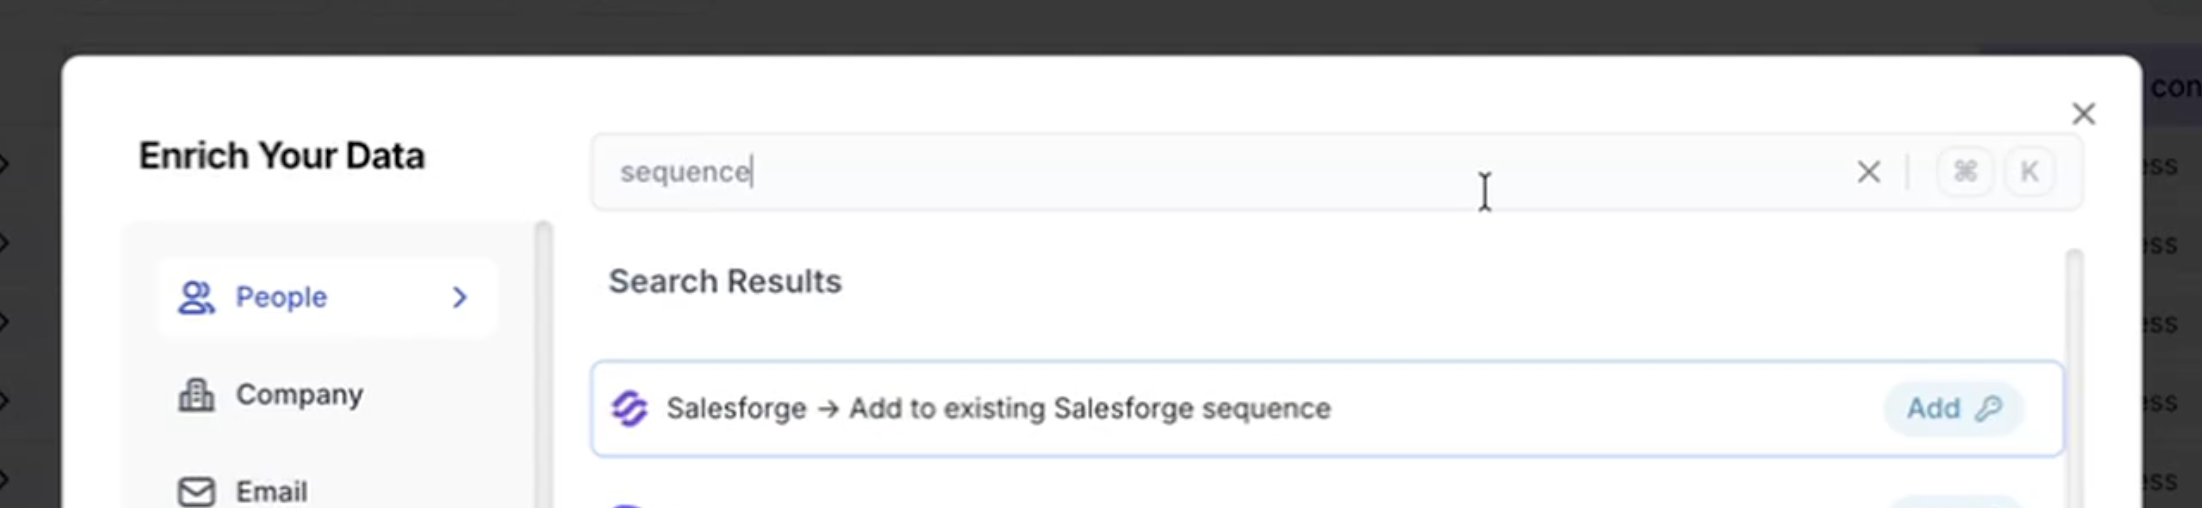
Search for Salesforge
Select Upsert contact into Salesforge workspace
Click Add
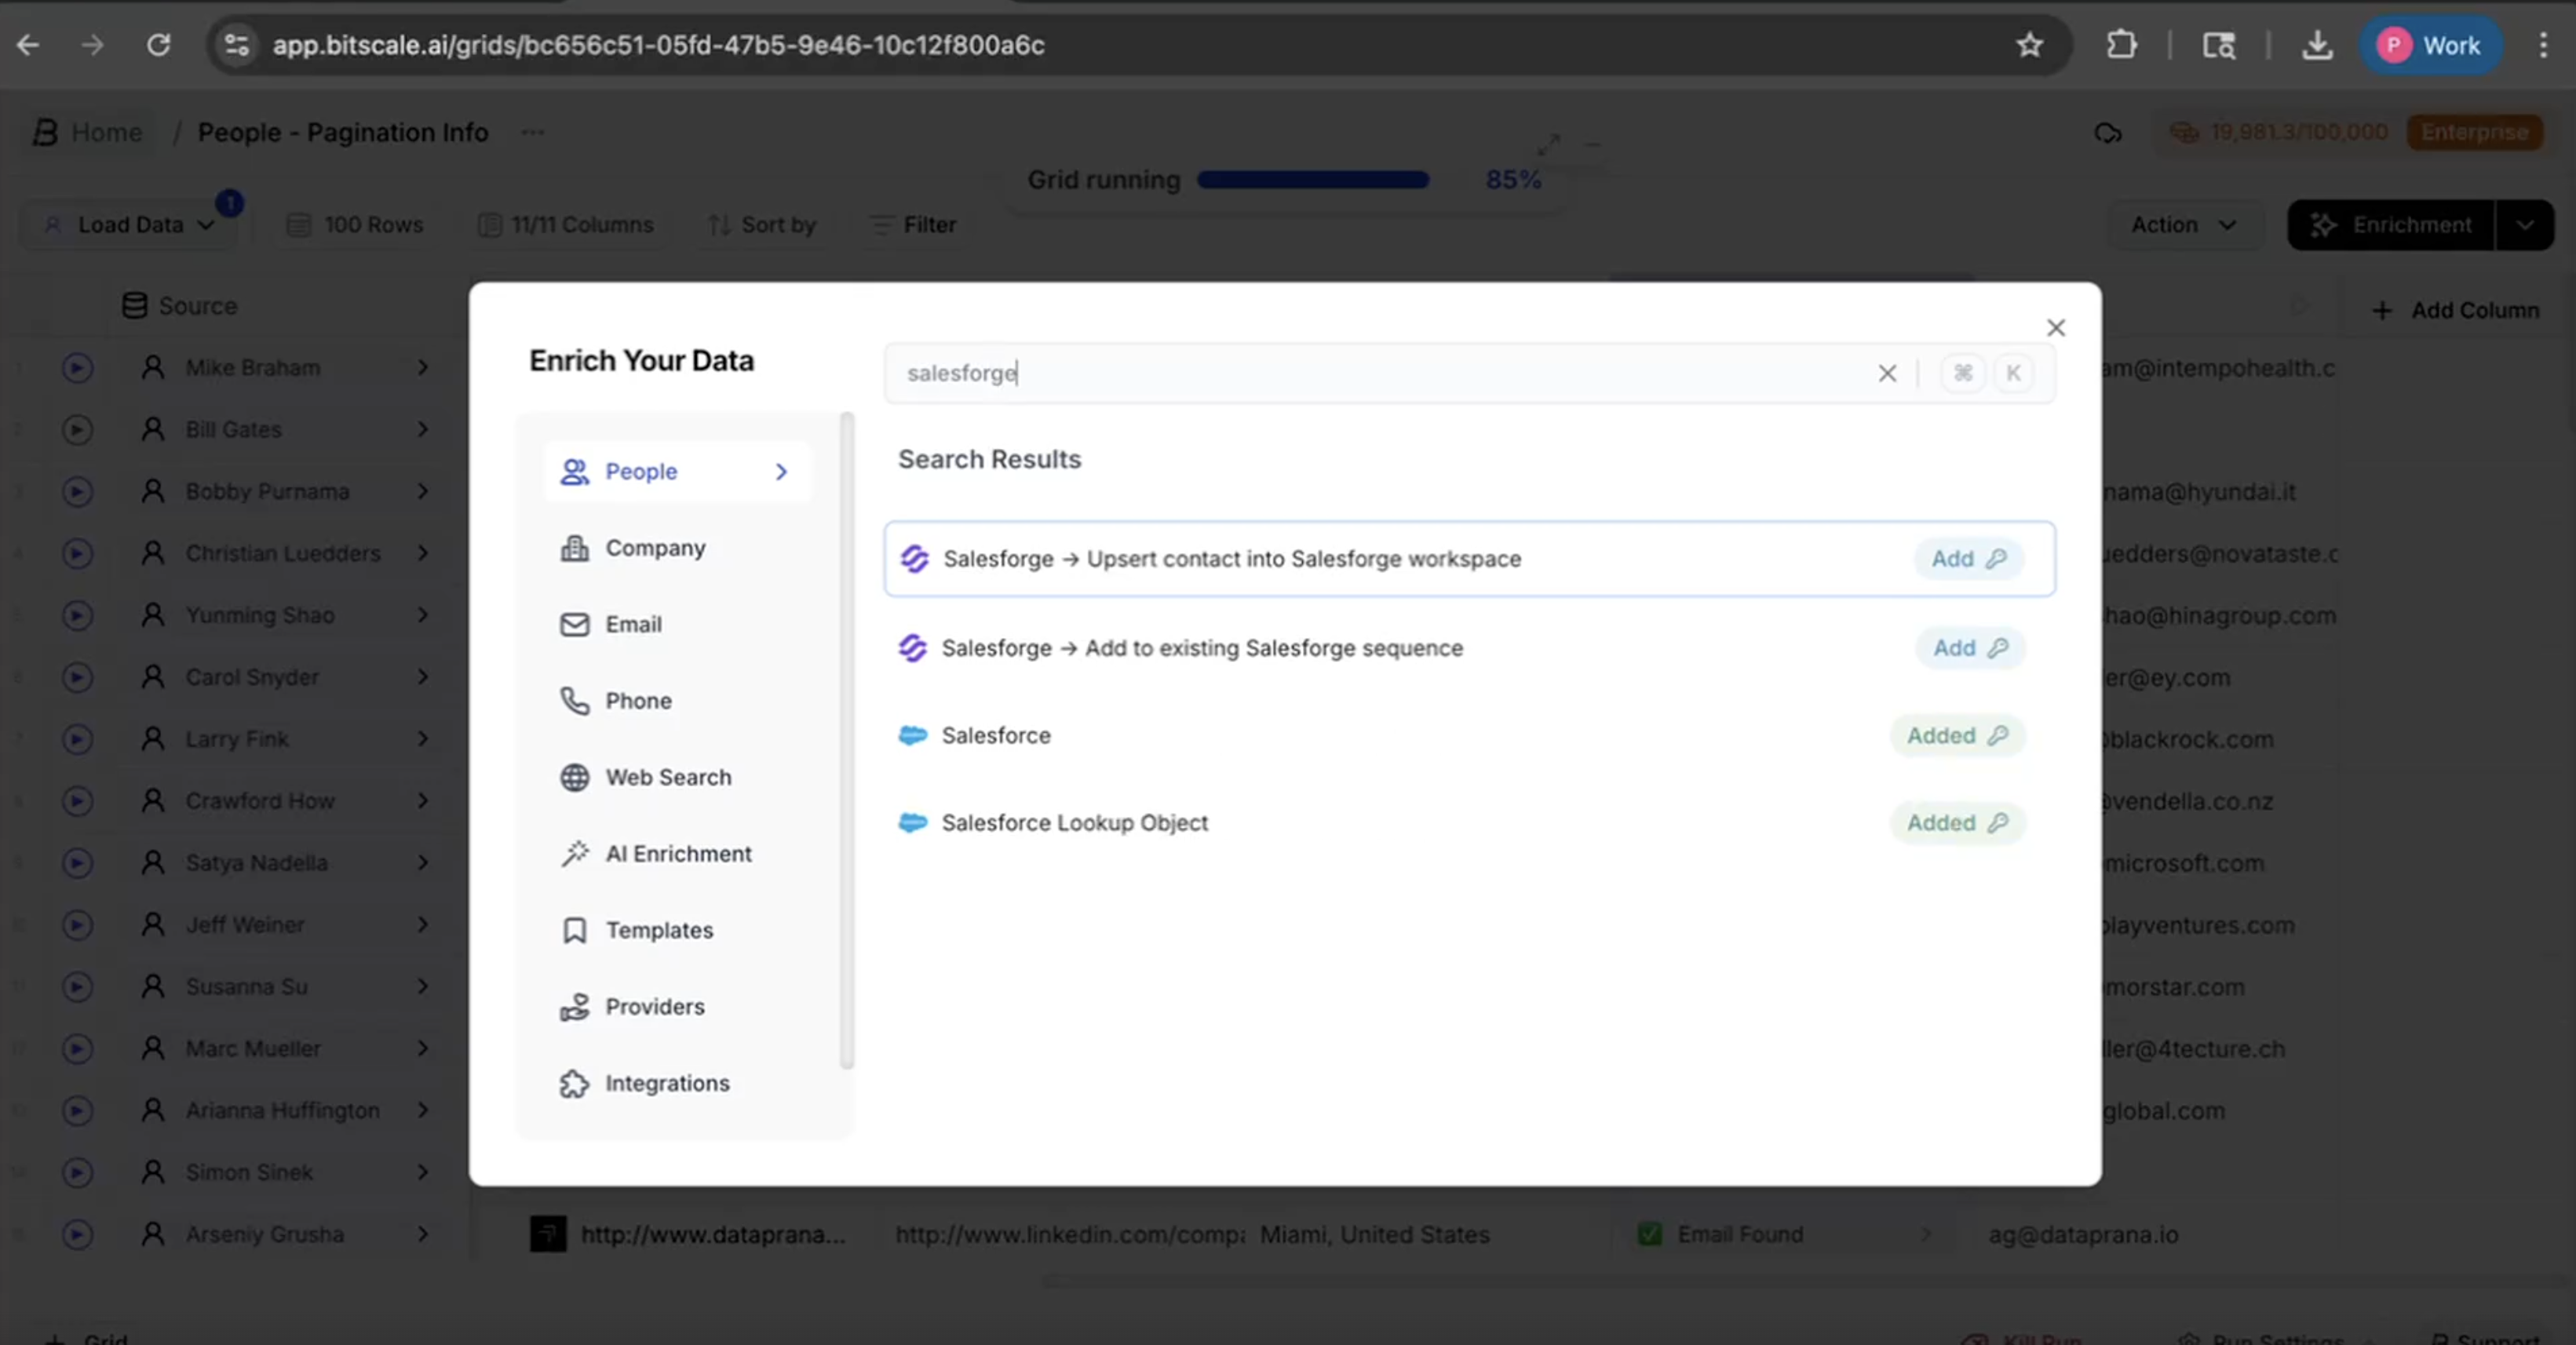
You must configure required fields before saving:
Required fields:
Account
Workspace
Email (recommended as primary identifier)
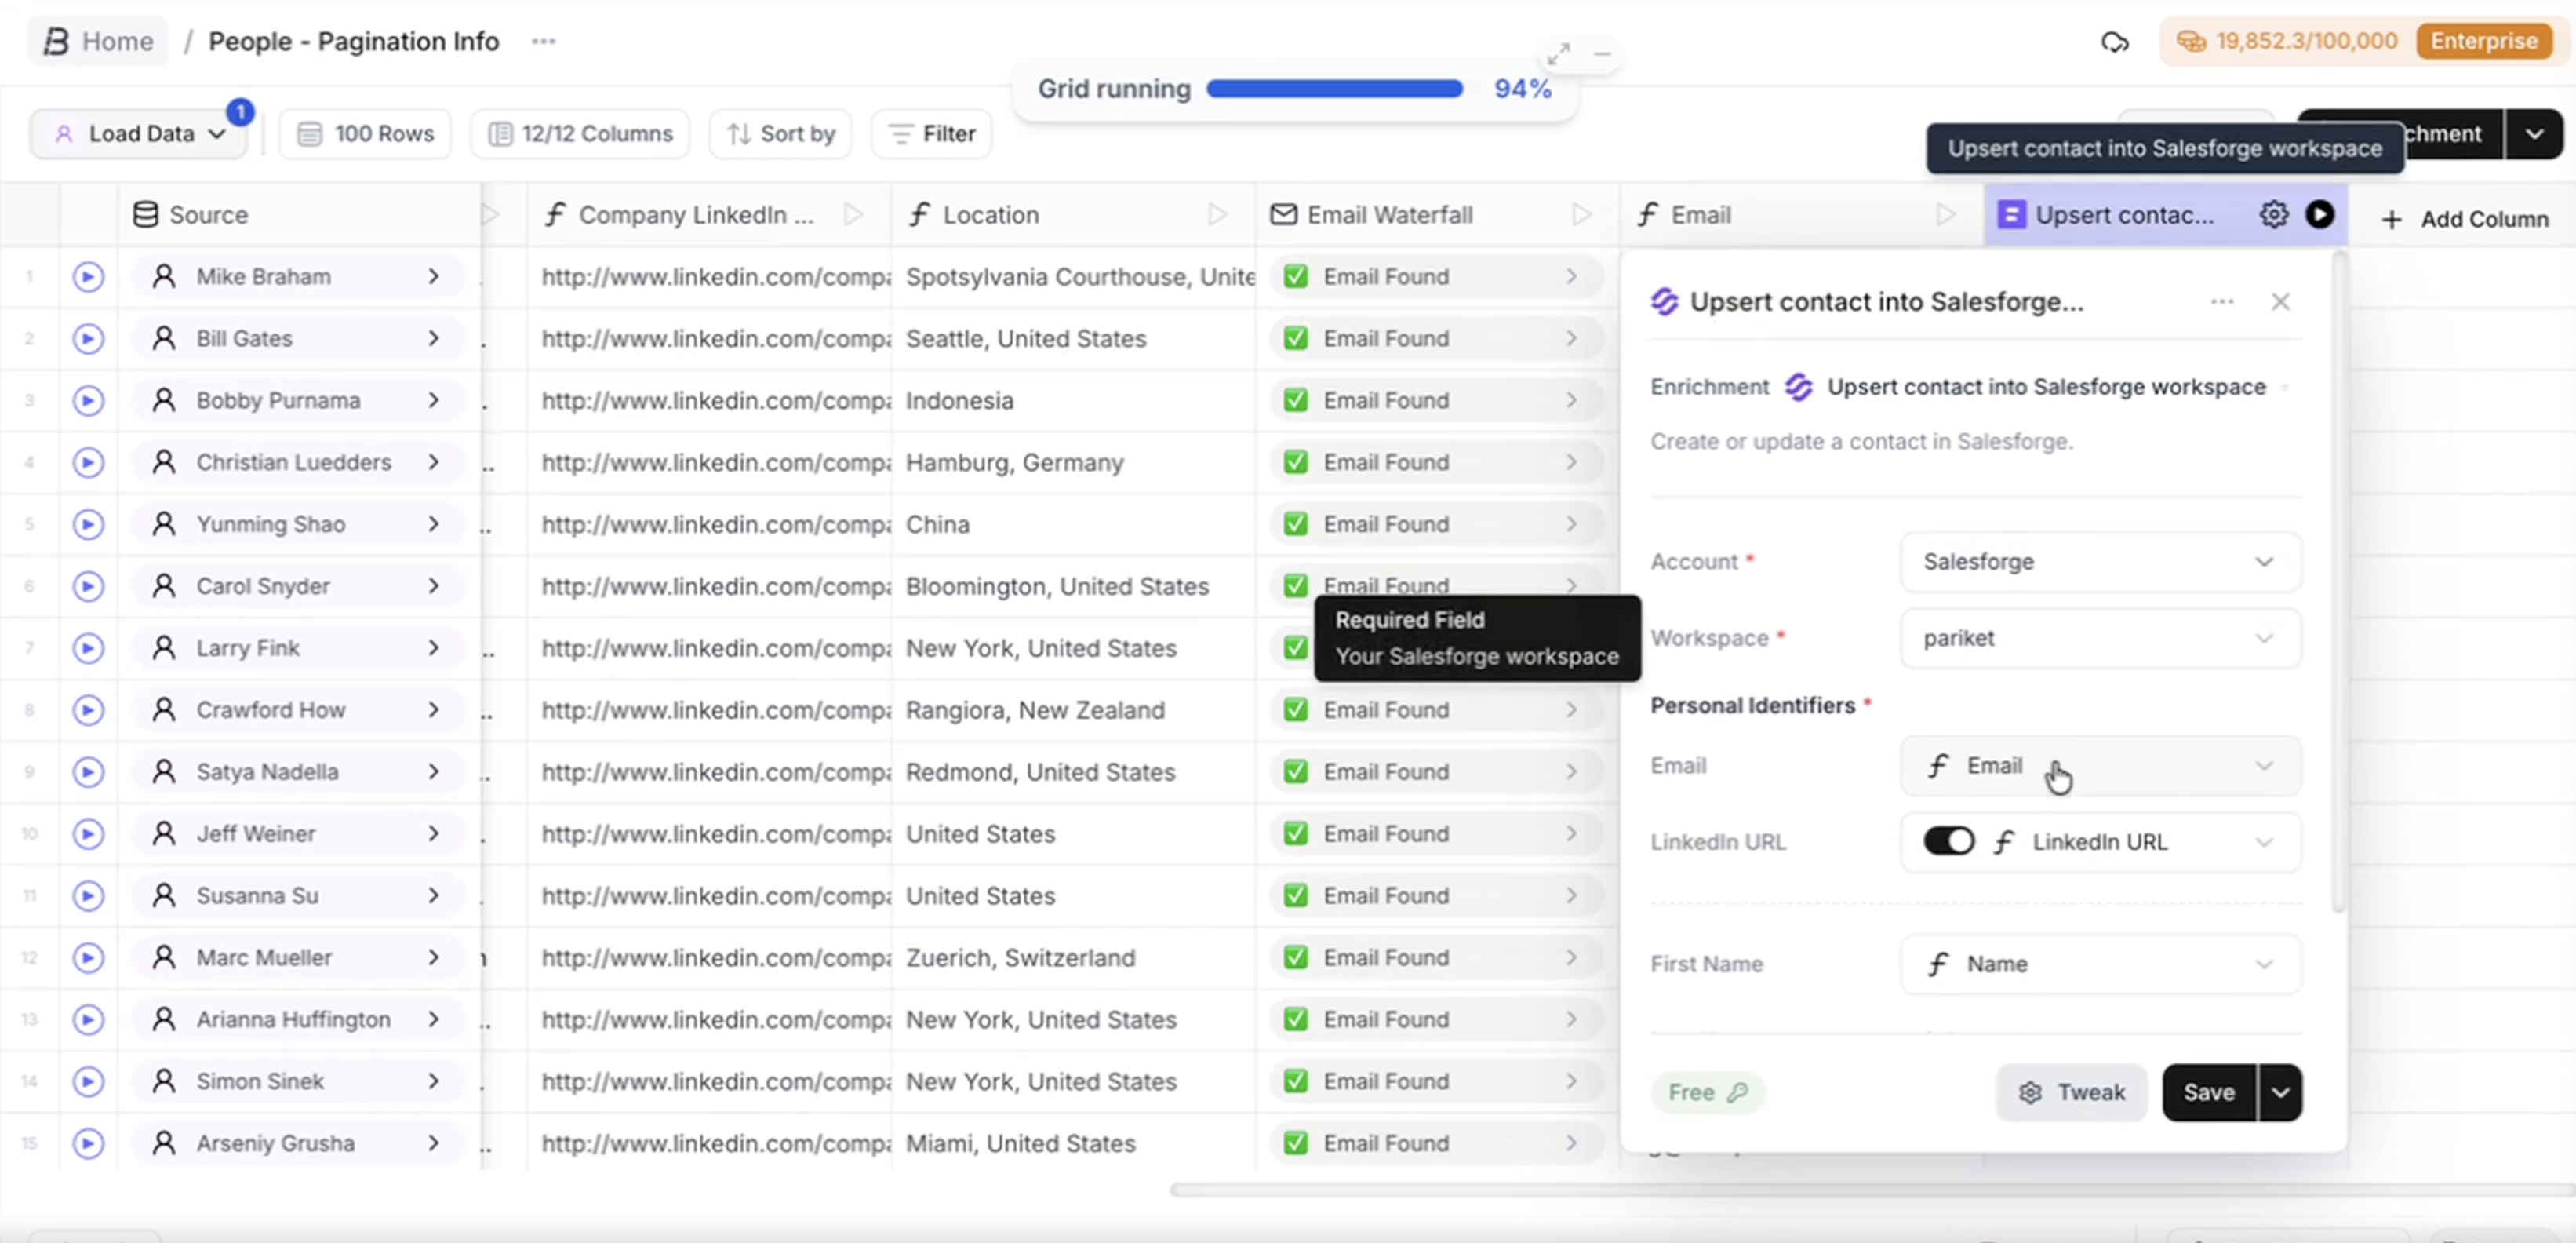
Recommended mappings:
First Name → Name
Company → Company
LinkedIn URL → LinkedIn column
Email → Email column
Optional:
Add custom variables
Once done, click Save.
After saving:
Bitscale will start sending contacts to Salesforge
Contacts will be created or updated (upsert logic)
You can immediately use them inside Salesforge sequences
Instead of just pushing contacts, you can:
Use the Add to existing Salesforge sequence action
Automatically enroll leads into outreach campaigns
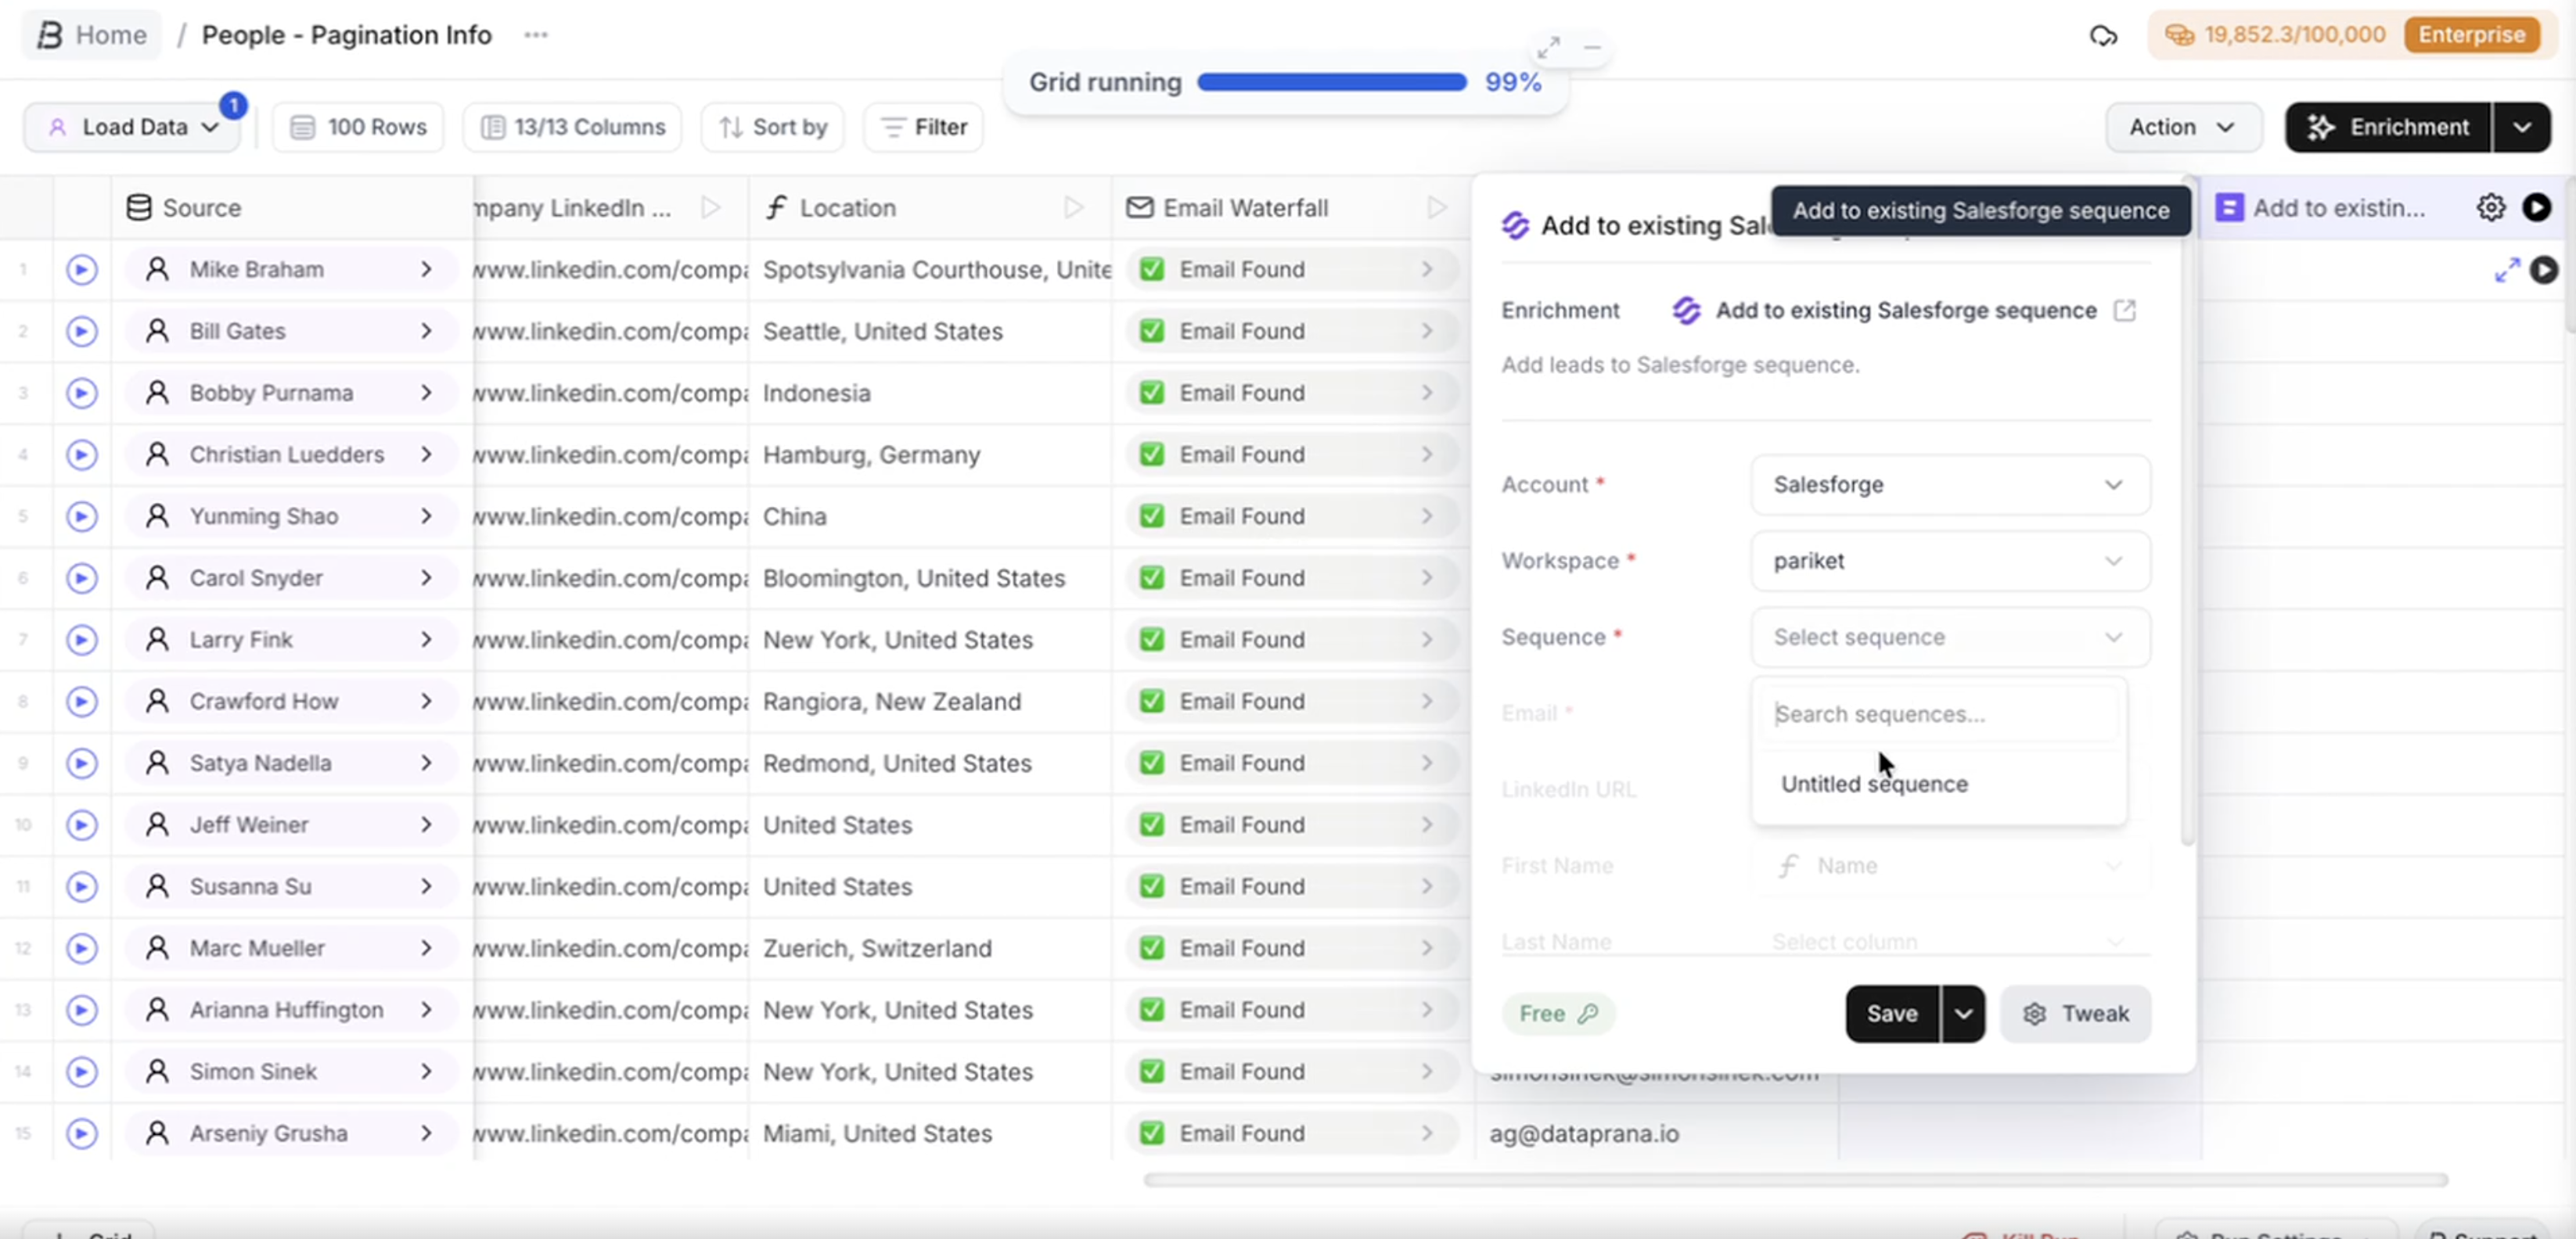
This removes the need for manual imports.
Always enrich emails before pushing to Salesforge
Use Email as the primary identifier to avoid duplicates
Test with a small batch before running large datasets
Use tags or custom variables for better personalization
Integration not verifying
Double check API key
Regenerate the key in Salesforge if needed
Contacts not appearing in Salesforge
Confirm workspace selection
Ensure required fields are mapped
Check if enrichment actually returned emails or LinkedIn URL
Missing data in Salesforge
Review field mappings in Bitscale
Ensure correct columns are selected
This integration turns Bitscale into a powerful lead sourcing layer and Salesforge into your execution engine.
You source, enrich, and qualify in Bitscale.
You engage and convert in Salesforge.
No CSVs. No manual work. Just a clean pipeline.