Keeping your contact data up-to-date is critical for high-performing outbound campaigns. Salesforge integrates deeply with HubSpot, allowing you to import, sync, and manage contacts across both platforms without manual CSV uploads or data discrepancies.
This guide walks you through:
How to import contacts from HubSpot
The different sync options available
Best practices for configuring your sync setup
You can import a list of contacts from your HubSpot CRM directly into Salesforge in just a few clicks.
Navigate to Contacts in Salesforge
From the main dashboard, go to the Contacts tab in the left-hand menu.
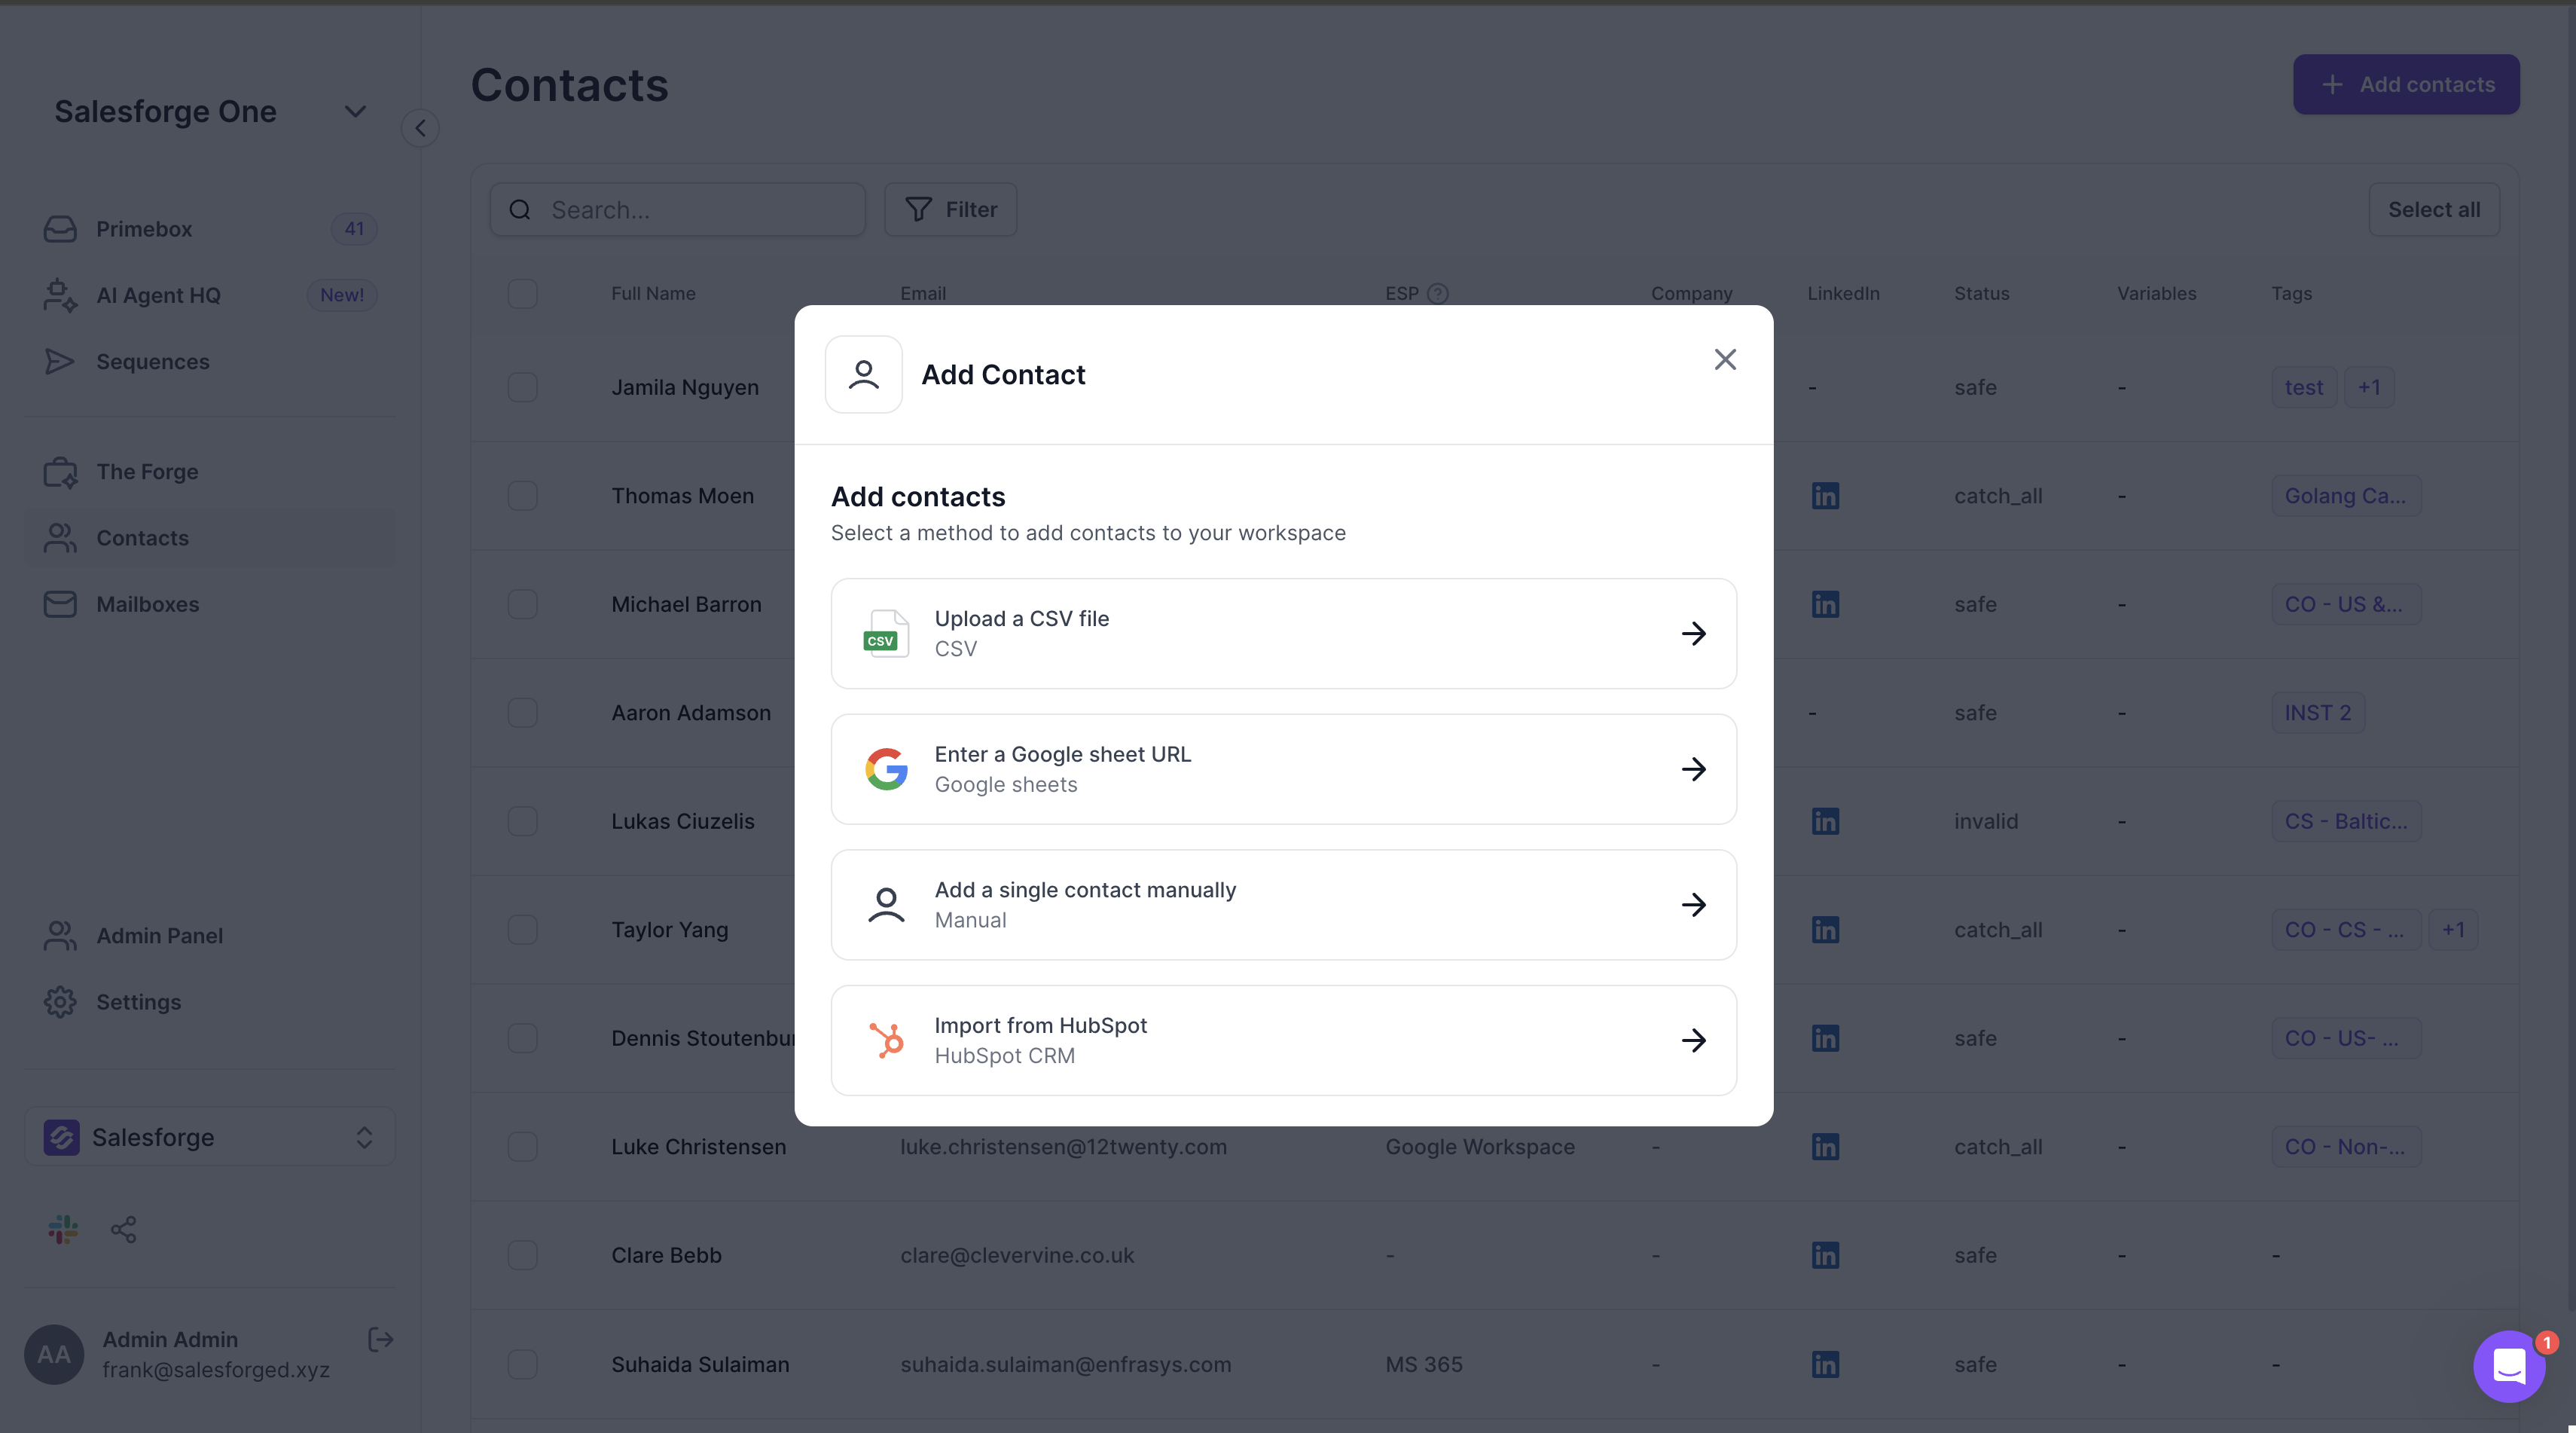
Click "Add Contact"
You’ll see options to import contacts via CSV, integrations, or manually.
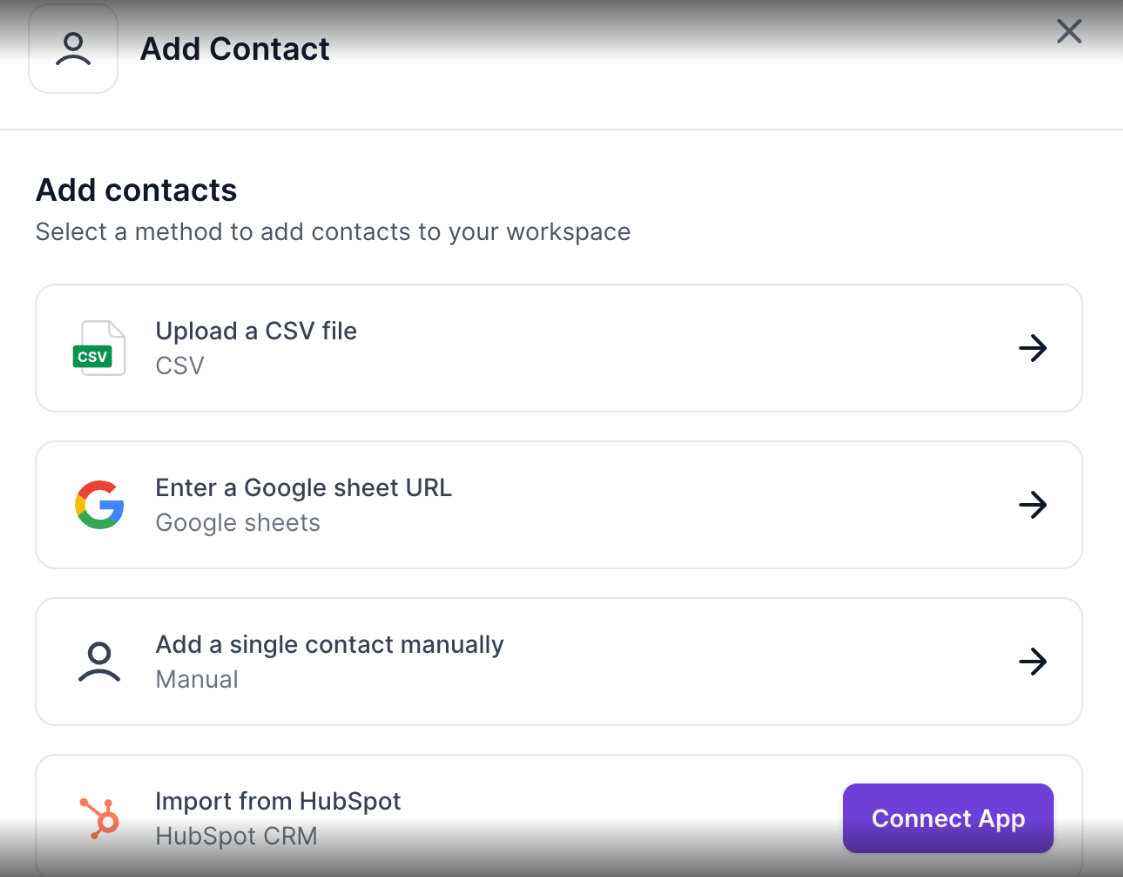
Choose HubSpot as the import method
Select HubSpot from the list of available integrations.
Connect Your HubSpot Account
If you haven’t already connected HubSpot, you’ll be prompted to:
Log into your HubSpot account
Authorize Salesforge to access your contact data
Choose the HubSpot workspace (if you have multiple)

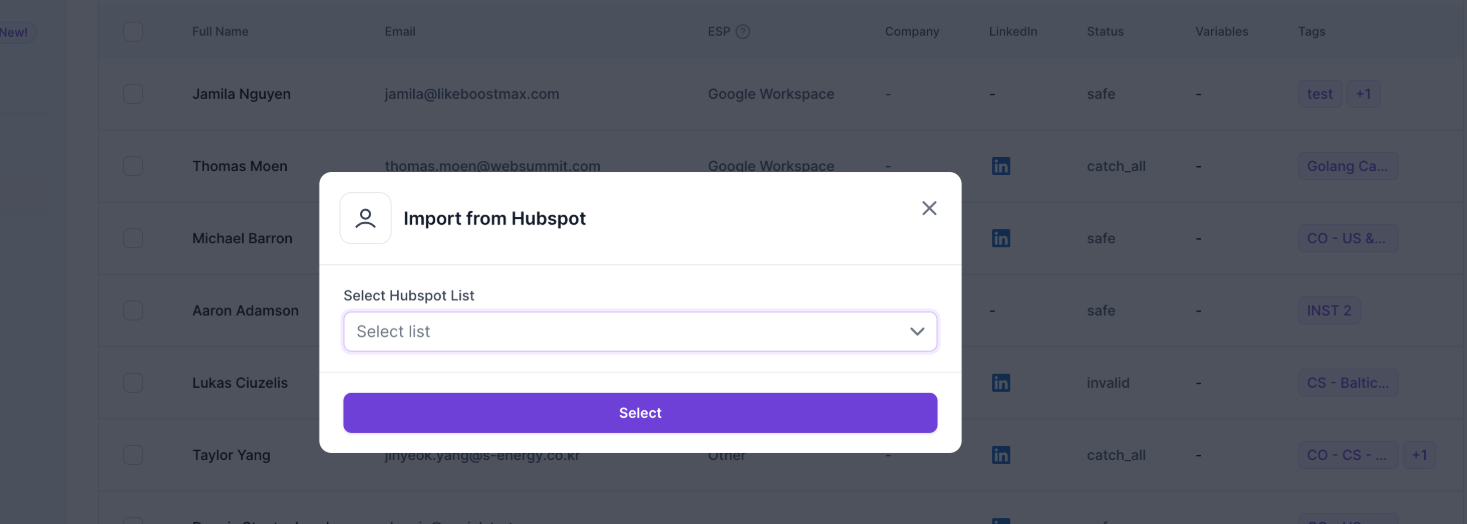
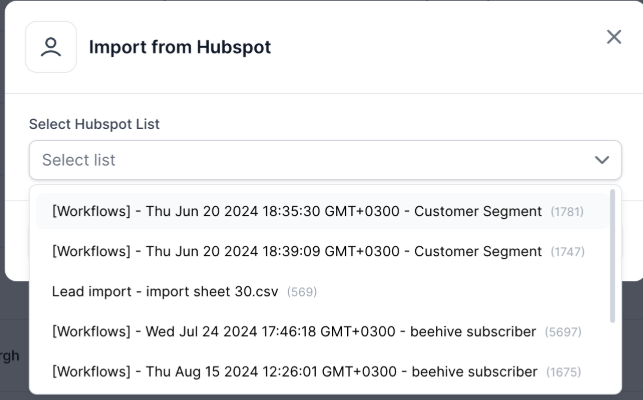
Select a Contact List
You’ll be shown a list of contact lists already created in HubSpot
Select the one you want to import into Salesforge
Click Import
Salesforge will begin importing contacts from the selected list
You'll see progress and confirmation once the import is complete
⏱ Note: Depending on list size, import time may vary slightly, but it's typically completed within minutes.
Once contacts are imported, Salesforge gives you the option to keep them synced with HubSpot through multiple levels of synchronization.
This ensures your data stays accurate, no matter where you’re working.
This is enabled automatically after you import contacts from HubSpot.
How it works:
Salesforge pulls in updates from HubSpot every 15 minutes
Only contacts that were manually imported from HubSpot are synced
HubSpot is considered the source of truth
Changes made in HubSpot (e.g., updated job titles, email addresses) will override those fields in Salesforge
Best for: Keeping Salesforge aligned with your CRM without pushing changes back.
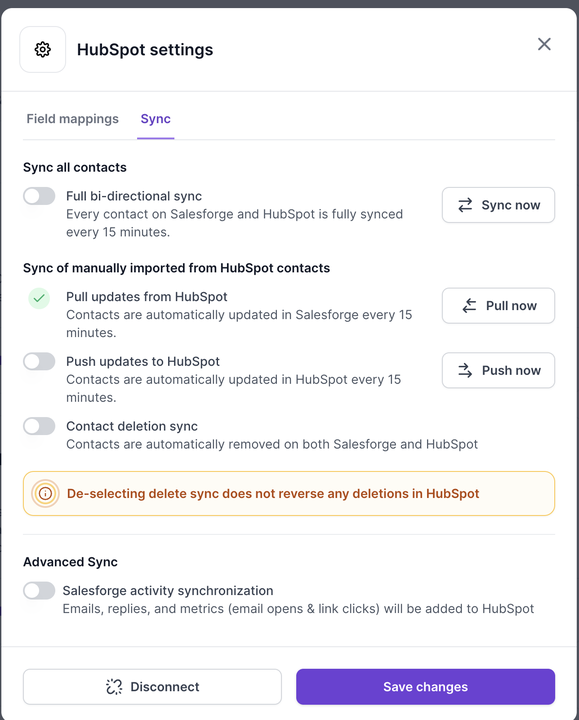
If your team is actively updating contact details inside Salesforge, you may want those changes to reflect in HubSpot too.
You can choose to enable:
Push Sync
→ When enabled, any updates made in Salesforge (e.g., name edits, label changes) will be pushed back to HubSpot.
Deletion Sync
→ When enabled, contacts deleted in one platform will be automatically deleted in the other.
→ This applies to contacts manually imported or part of full sync.
These are not enabled by default and can be configured per workspace in the Integrations > HubSpot settings panel.
⚠ Caution: If using Deletion Sync, ensure that Salesforge deletions are intentional. There is no undo.
This is the most advanced and comprehensive sync option.
When enabled, Salesforge will:
Sync all contacts in HubSpot (not just the ones you manually imported)
Automatically enable Push Sync
Automatically enable Deletion Sync
Keep all fields updated both ways
This is useful when you want to fully mirror HubSpot and Salesforge databases, especially in multi-user teams.
Note: Full sync will continuously update any field mismatches between the platforms and ensure consistency across the board.
To manage your sync preferences:
Go to Settings > Integrations > HubSpot
You’ll see toggles for:
Contact Sync (default: ON)
Push Sync (toggle ON/OFF)
Deletion Sync (toggle ON/OFF)
Full Sync (toggle ON/OFF)
Enable the settings that best fit your workflow
Changes take effect immediately and sync runs every 15 minutes
HubSpot is considered the source of truth by default. If you disable Push Sync, Salesforge will not send any updates back to HubSpot.
Contact Sync and Full Sync are separate options. If you only want to sync the contacts you manually imported, Full Sync is not necessary.
Deletions are permanent. Use Deletion Sync carefully, especially in collaborative teams.
Custom fields are preserved. If you use custom properties in HubSpot, they will sync into Salesforge as long as they’re mapped properly.
| ScenarioRecommended Sync Settings |
One-time import | Contact Sync only |
Regular updates from HubSpot only | Contact Sync (default) |
Editing contacts in Salesforge & syncing back | Enable Push Sync |
Need contacts deleted in both platforms | Enable Deletion Sync |
Want everything to sync both ways automatically | Enable Full Bi-Directional Sync |
If you’re unsure which sync setting is best for your use case or need help troubleshooting a HubSpot integration issue, reach out to us anytime at [email protected]